RV Stabilizer Removal | RV Mods
After a couple of years of travel in our View, we still had not used the rear stabilizers at all. Not even once. We decided that they were dead weight, and getting rustier by the minute. Digging around on the Winnebago Forum revealed that occasionally someone else out there wanted to remove theirs, too. I found a thread from a Minnie Winnie that dealt with the same MORryde stabilizers, and the info was very useful. If you are on this page because you are looking to remove your stabilizers on a View / Navion, here is what might work for you too:
1 - Extend the legs normally, if your electrical circuit is working. If not, they can be manually cranked down with a 3/4” socket or wrench.
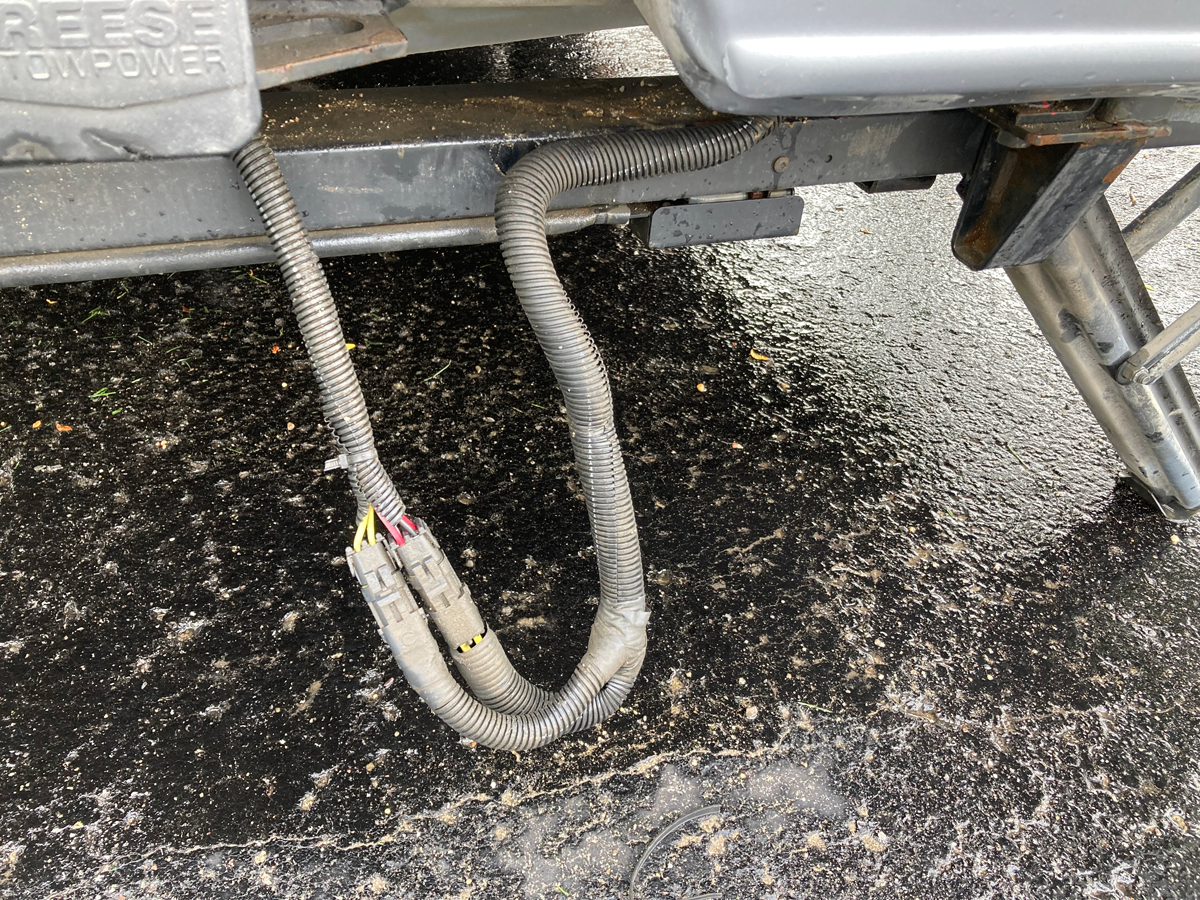
2 - You will find a zip tie near the trailer hitch holding the wire bundle for the power and control. When cut, the bundle drops and you’ll see two connectors. Disconnect the connectors. (This wire bundle is the only one relating to the stabilizers.)
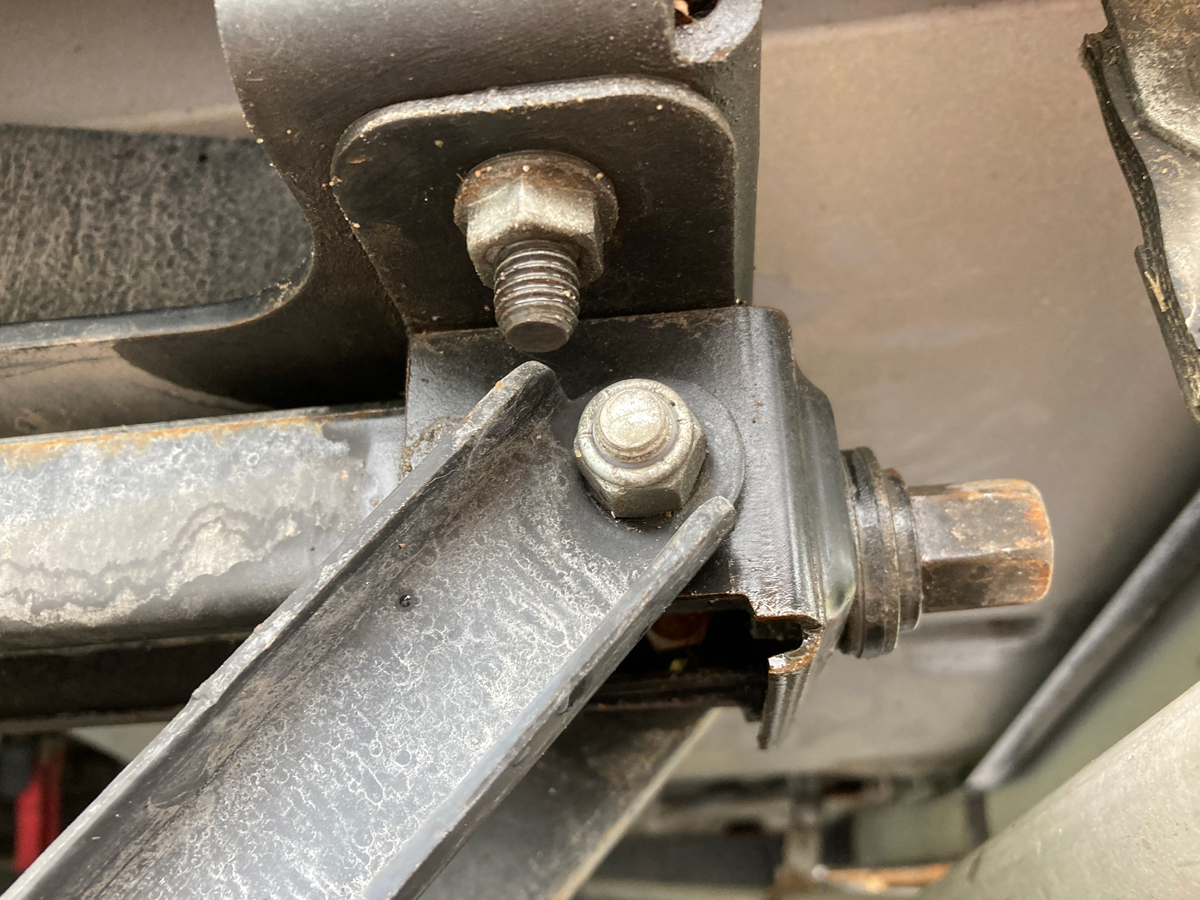
3 - You’ll find two vertical bolts on each end of the stabilizer assembly. You can remove these 4 bolts using a 9/16” socket and wrench and the assembly is now disconnected from the chassis.
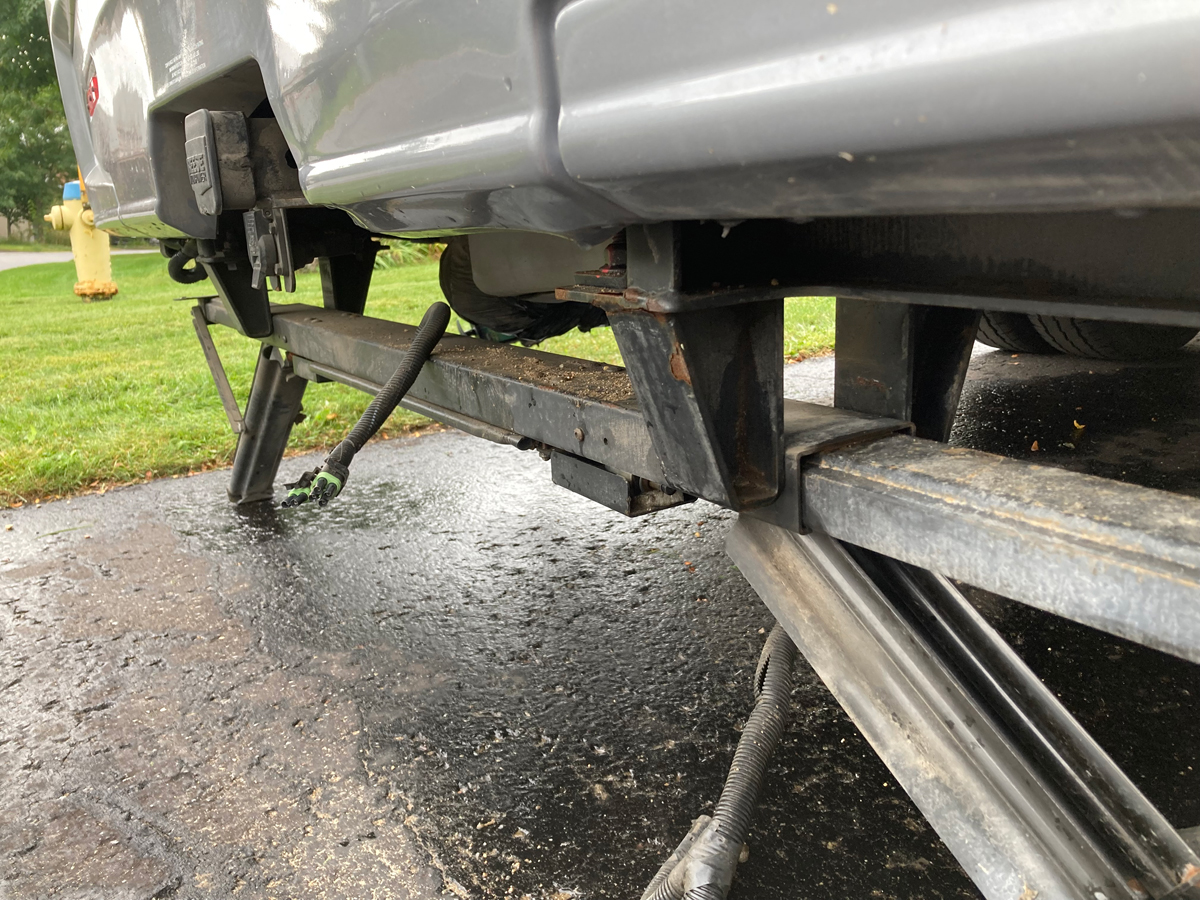
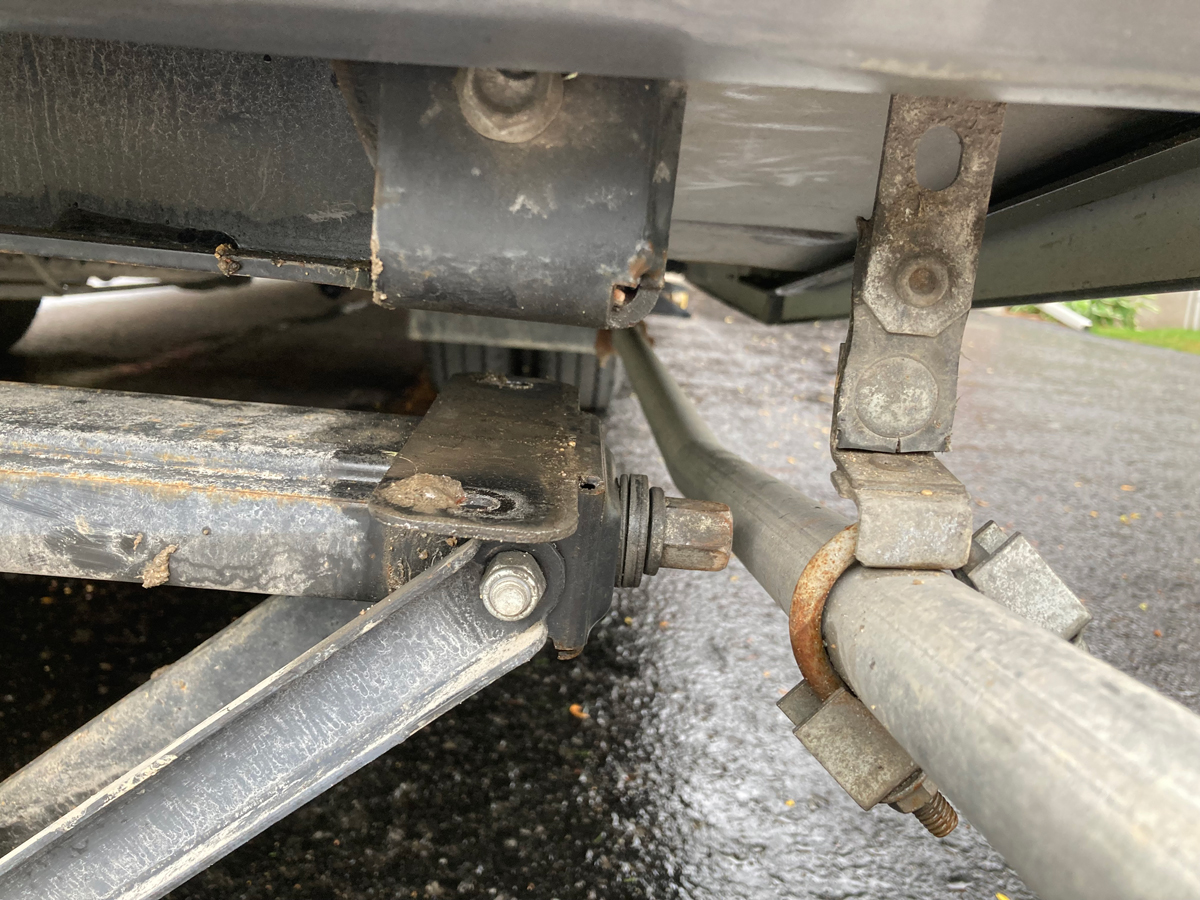
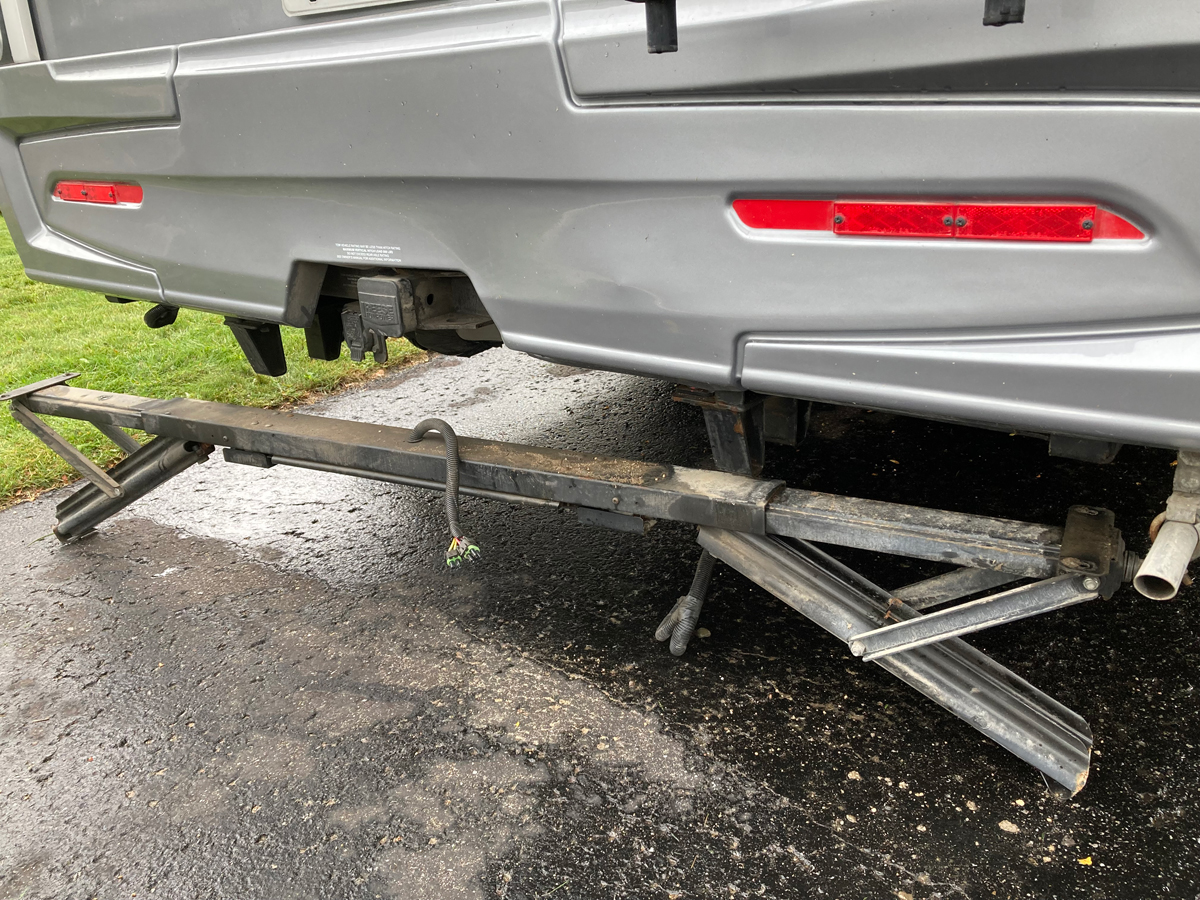
4 - Gently retract the legs using the manual cranks on the ends to separate the stabilizer assembly from the chassis, and note that it is initially being guided vertically by the structural tail bumpers attached to the chassis. (If you retract the legs using a socket and extender, watch out for the socket clearance on the exhaust pipe from the Onan as the weight comes off the leg. You might end up supporting that end of the assembly on the tailpipe of the Onan with your tool. How would I know that?) If you are on relatively flat ground, the assembly should remain standing as you clear the bumpers.
5 - Tape up the chassis connectors and re-stow the leftover chassis wiring bundle.
Here are a few photos to illustrate the above explanation:
When the zip tie is cut near the trailer hitch the wiring bundle will drop down:
The vertical bolt in this shot is one of the four that needs to be removed:
Once the four bolts are out, retracting the legs manually will drop the assembly to clear the chassis structure:
Keep an eye on your tool and the tailpipe of the Onan, as you might end up supporting that end with the tailpipe as you retract the leg:
Once the unit is clear of the chassis structure, it should support itself if you are on relatively level ground:
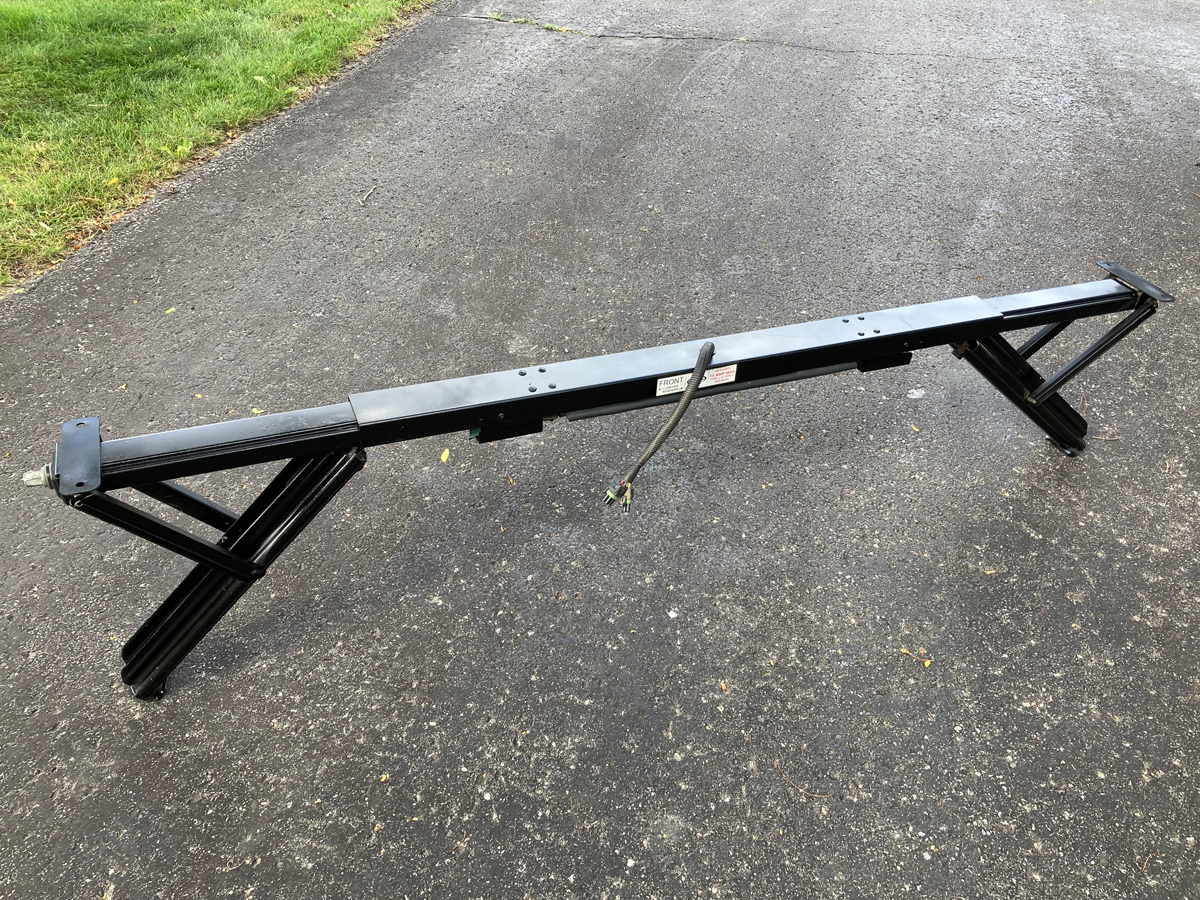
The stabilizer assembly cleaned up and painted nicely, for re-sale:
A few of points of interest: The power to the leg switches in the ceiling of the wet bay or electrical bay is still present. If you want to have a rear end, exterior, source of 12 volts, disconnecting the switches from the connectors will give you two sources of 12 volts. (I previously wired this power for a portable macerator pump we use.) The other interesting thing is this source of 12 volts is from the Sprinter battery. I’m guessing that Winnebago wanted the stabilizers to function electrically and provide the “legs down warning” regardless of the state of the coach batteries.
The removed stabilizer unit weighed in at 39.5 pounds. Based on other’s reports, I was hoping for more of a weight saving. There is some other structure under there that the stabilizers were attached to, but it looks to serve as a tail skid. For now I will leave it on, and be happy with the 40 pounds we managed to save.