SeeLevel II RV Tank Monitor | RV Mods
I don’t know about you, but we found trying to get a half decent idea of how much water was in the fresh tank a bit of a pain. Once the factory “OnePlace” monitoring panel went below 2/3rds on the fresh tank, all bets were off as to how much was in there that could reliably be used for trip planning. Was it just below 2/3rds? Or just above 1/3rd? The difference there is over 12 gallons – a significant amount when trying to figure out if you can make it to the next water supply, or have enough to take a shower before hitting the road. And, once it went below 1/3rd … just how low was it?
I used to resort to going under the bed, shuffling the stuff in storage out of the way of the access panel, getting a flashlight, and visually checking to see the status of the water level. Yes, on our 24J model, the water level can be checked visually, but as I said earlier – a bit of a pain.
The actual level of the fresh water supply became more important when we found ourselves winter camping, and there was no readily available source of water to replenish the tank. Once we were in “water conservation mode”, every bit of information on that water level became even more important.
I had been looking at Garnet Instrument’s SeeLevel II tank monitoring system for a while, and after a particularly intense bit of dry camping, decided to give the system a try. We don’t have the requirement to have the same granularity on the Grey and Black tank’s contents (we dump when those tanks hit 2/3rds), so I ordered the basic system that would be compatible with the tall 37 gallon tank we have in our View 24J model. The basic 709 system will work with 3 tanks if they are not tall, 2 tanks if one is tall and one is short, or one tall tank with a left-over sending unit you can keep as a spare.
Here is a link to Garnet’s webpage with the full selection of kits - the basic system we ordered was the 709 kit:
Garnet SeeLevel II Tank Monitoring System
This link will take you to the tank sender installation manual for the senders used in the 709 series - our senders are the 710 - AR:
Garnet 709 Sender Installation Manual
And, this one links to the display installation guide for the 709 series:
Garnet 709 Display Installation Guide
As you can see, the company makes many different displays with all kinds of functionality. But, all we were concerned with was getting one tank to give us good, useful information. Our factory “OnePlace” monitor was going to remain fully functional, so we did not need to replace any of its features.
The general idea for this installation was to make the SeeLevel II fully independent, with its own wiring harness and power supply. The display was to be mounted above the fridge, beside some other controls and displays.
Note - The company advertises that you can re-use your RV tank’s current wire runs, but we wanted to keep our factory “OnePlace” panel working as delivered. Looking back after the job was complete, that was, for sure, the right decision – tracing the wire runs all over the coach would have been a huge job and not worth the time. It was much simpler to run new wires and keep the “OnePlace” panel as a back-up source of water quantity.
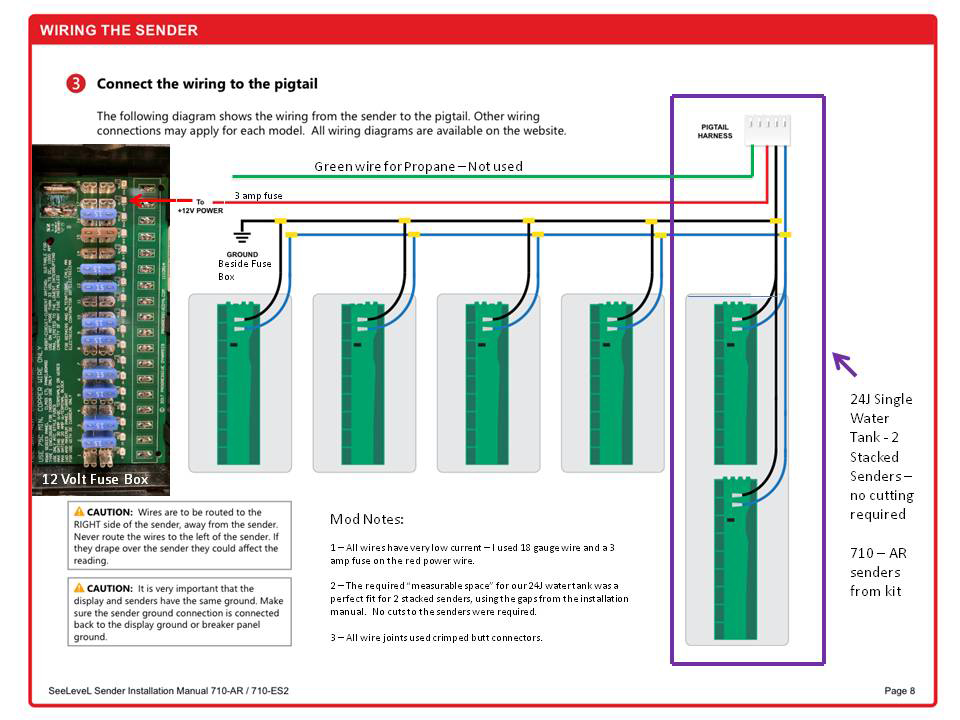
Here is a general view of the circuit from the installation manual, with a few notes of my own:
The Installation
1 – Knowing that getting at the water tank in our View 24J requires quite a bit of gymnastics, I elected to come up with a way to easily access the area. As you know, if you slide the mattress in the foot direction about two feet, you can get at the water pump area via an access panel built into the bed board. And, as you know, if you remove the mattress completely you can see that the top portion of the bed board is hinged to allow access to the water tank. Removing some screws in that top part of the bed board, and disconnecting the shock strut under the bed board, will allow the top of the bed board to be folded back.
But, neither of those access methods was suitable for this job, as I needed a more comfortable way to get at things for extended periods of time. So, here is what I came up with:
- Remove the headboard. (It is screwed on to the wall. A while back I added a French Cleat to the headboard to allow easy removal for projects like these.)
- Remove the mattress.
- Disconnect the shock strut under the bed board. (It is easiest to disconnect the attachment to the bed board itself, not the bottom of the strut where it attaches to structure.)
- Unscrew the top of the bed board so the entire bed board becomes free.
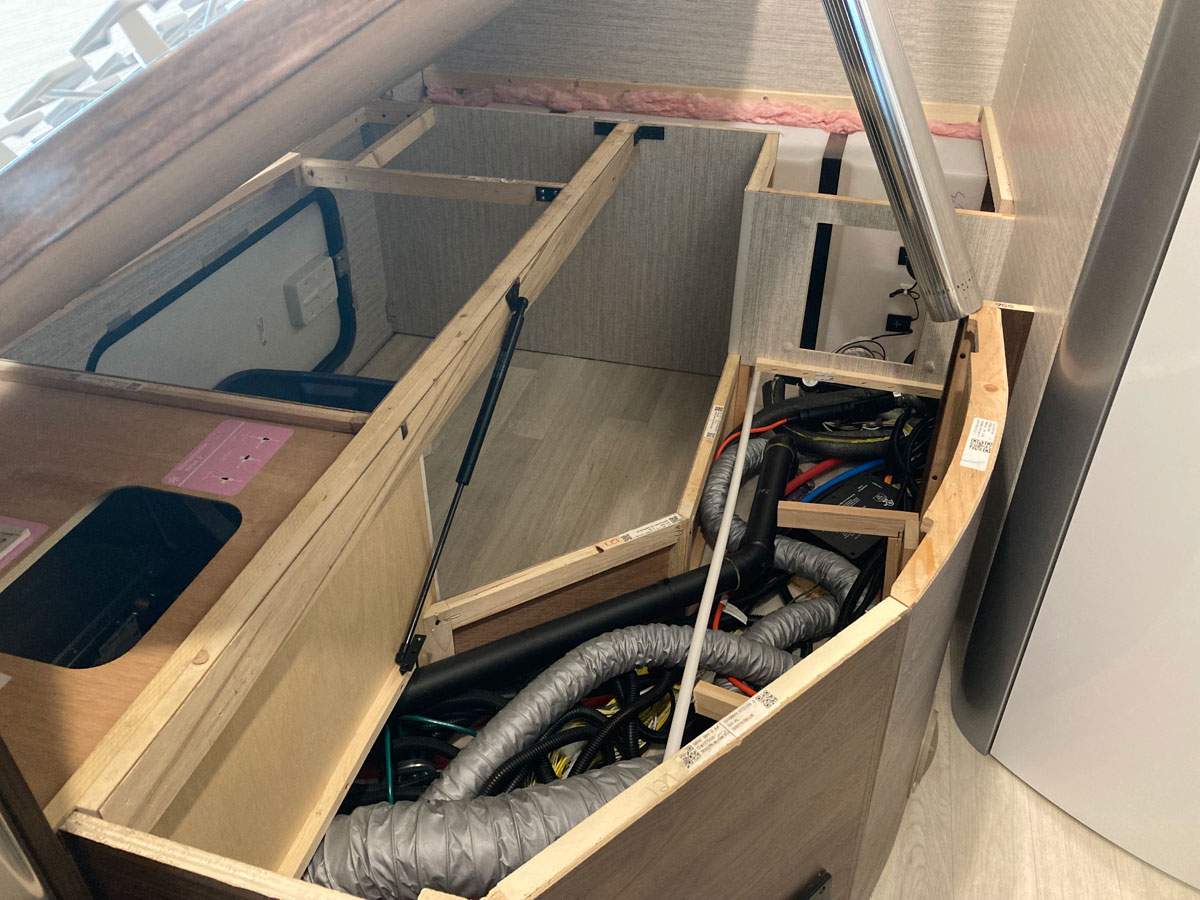
- Lift up the inside edge of the bed board and prop it up to allow quick, (and frequent), access. I used the table leg as a support.
Here is how all of that preparation ended up:
2 – I turned the battery master off for all wiring operations.
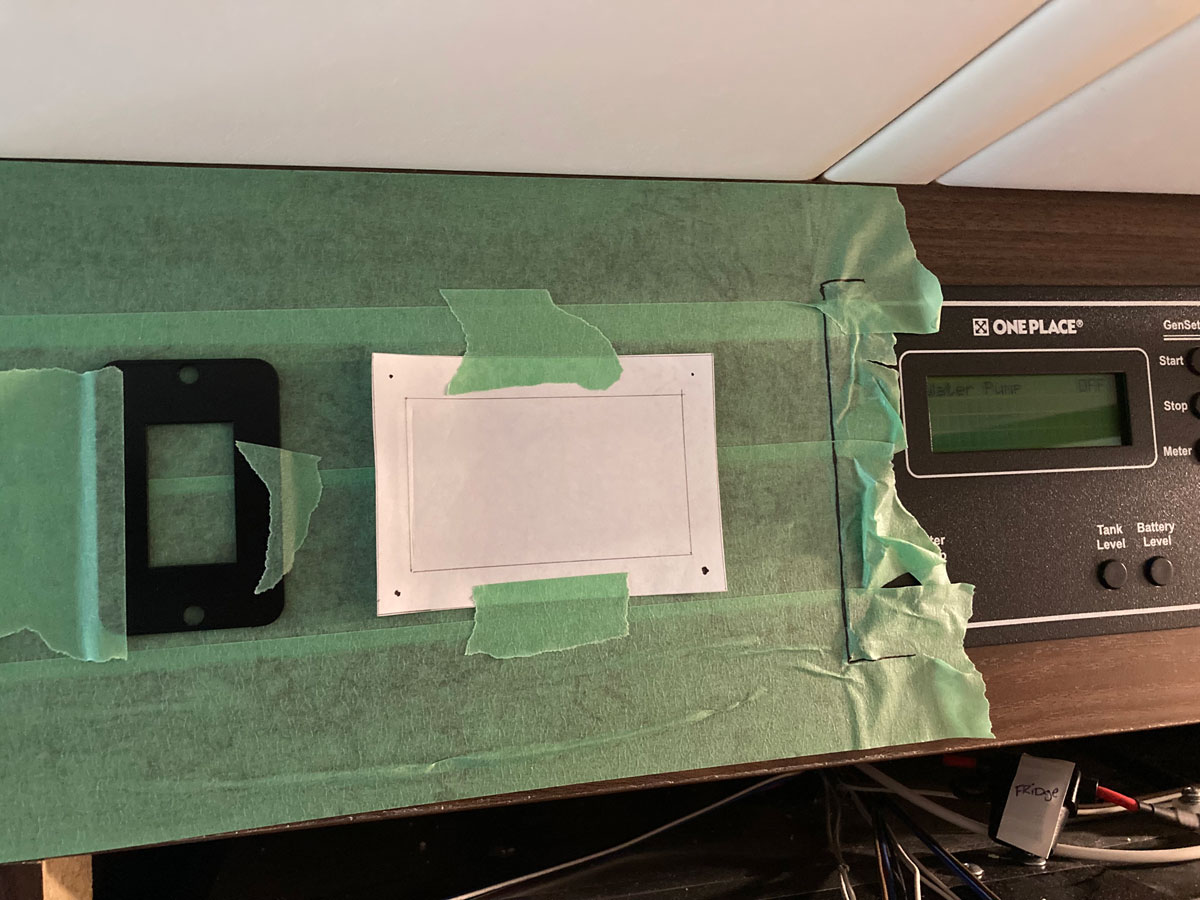
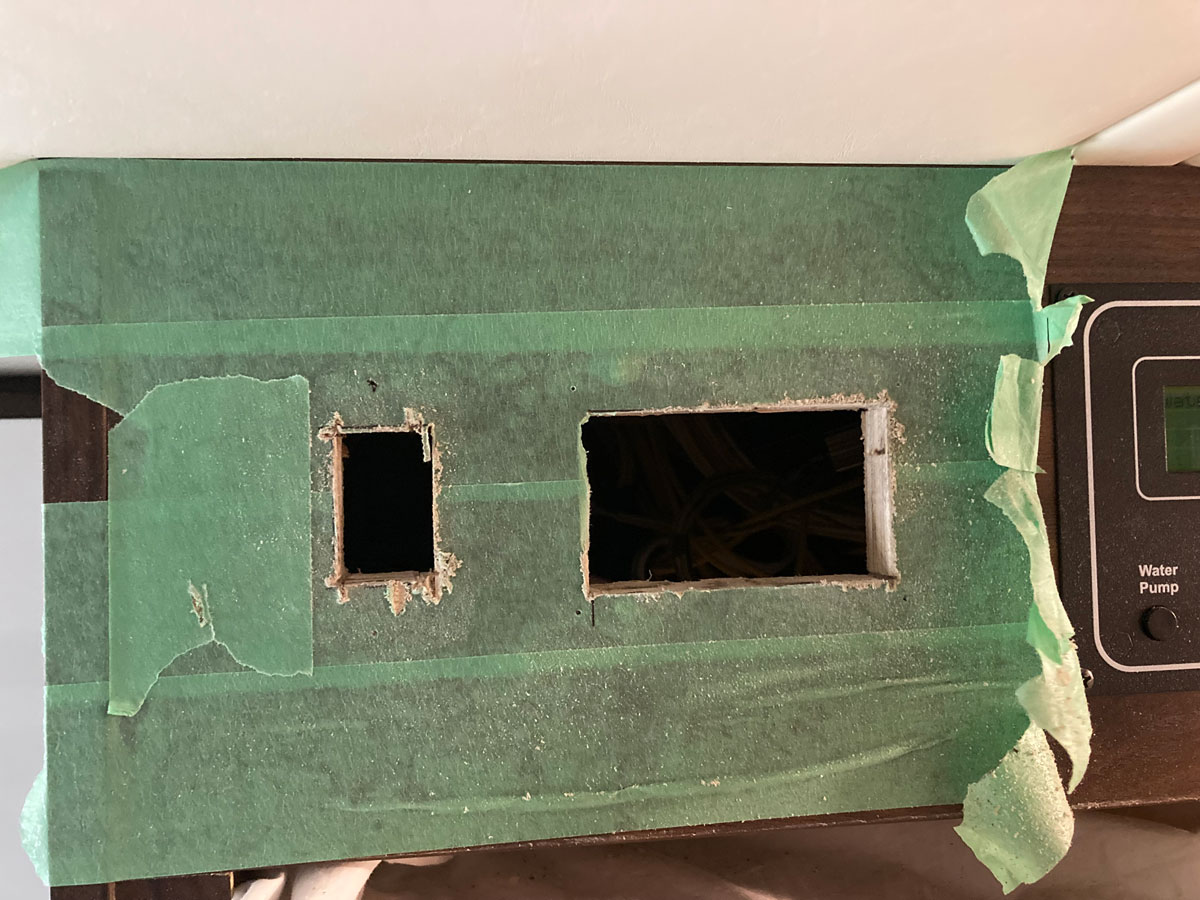
3 – I thought the easiest place to start the installation would be up at the panel, so I could work to the rear and figure out wire lengths as I went along. I wanted to mount the new monitor display up beside the “OnePlace” panel, but in our 24J model the slide-out switch got in the way. Luckily, the slack on the slide-out switch wiring in our particular View was just long enough to re-locate it to the left, and allow the new panel to fit in-between it and the “OnePlace” monitor comfortably.
After determining where I wanted the slide-out switch and new panel to go, I used a reciprocating saw to make the quick cuts – in our View, there was nothing behind there that was of concern while cutting:
4 – As I had done before on other mods that required wiring in this area, I removed the control panel on the fridge and fished all the new wires from the back of the fridge box. (When the freezer door is open, you can see the three screws that hold the fridge control panel to the fridge structure.) As before, I found that using the back right corner was the best route to bring wires up from under the bed / Truma area to the top of the fridge. Here is an old picture from one of those other mods that required wire fishing from under the bed - you can see that there was not enough room to install the SeeLevel II display inbetween the slide-out switch and the “OnePlace” monitor panel:
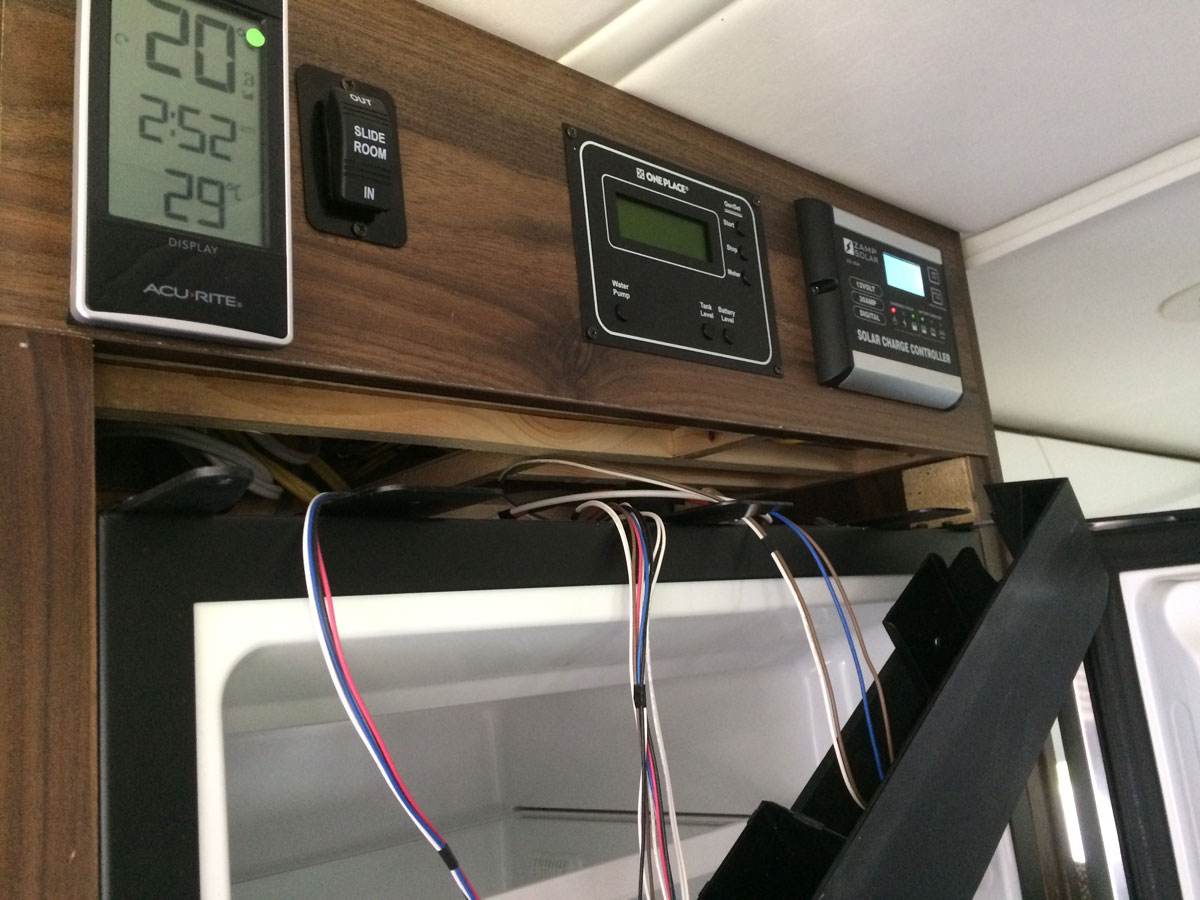
(Also, I found that removing the “OnePlace” monitor panel allowed me to get my hand in behind the face trim board to work more freely in the area on top of the fridge while I worked with the slide-out switch and the new display.)
5 – For the circuit wiring, here is what I did:
- I fished up a wire from the Truma / bed area, and used a butt connector to attach it to the red power lead on the display pigtail. On the other end, I crimped on a female spade connector to connect with an empty fuse slot in the fuse box. I closed the circuit with a 3 amp fuse, and labeled the index on the panel door.
- A second wire was fished up and connected the same way to the blue lead on the display pigtail. The other end was run to the back of the coach, to gang with the blue leads on the tank senders.
- A third wire was again fished up and connected to the black lead on the display pigtail. It too was run to the tank area, but this time ganged with the black leads on the senders.
- A fourth wire was run from the ground post beside the fuse box back to the tank area, and ganged with the other ground wires down at the tank. I chose this ground wiring configuration after reading the note on the wiring diagram regarding the importance of a common ground for the senders and the display. I guess with the low currents involved in this circuit they were worried about a resistance imbalance somewhere, so for a few extra feet of wire I ensured that there was no doubt about a shared ground.
- The green propane wire on the pigtail was left loose. Someday I might look into hooking up the propane tank to the display.
6 – As per the sender installation instructions, I only temporarily attached the sender strips to the tank using painters tape. (I had really wanted to install the strips to the left of that black tank retention strap, but chose not too because the side of the tank in that area, behind the top of the bed, was not flat – it had a pretty good bulge that would have prevented the sender strip from lying flat.)
Here is where I chose to temporarily install our sender strips to do a test:
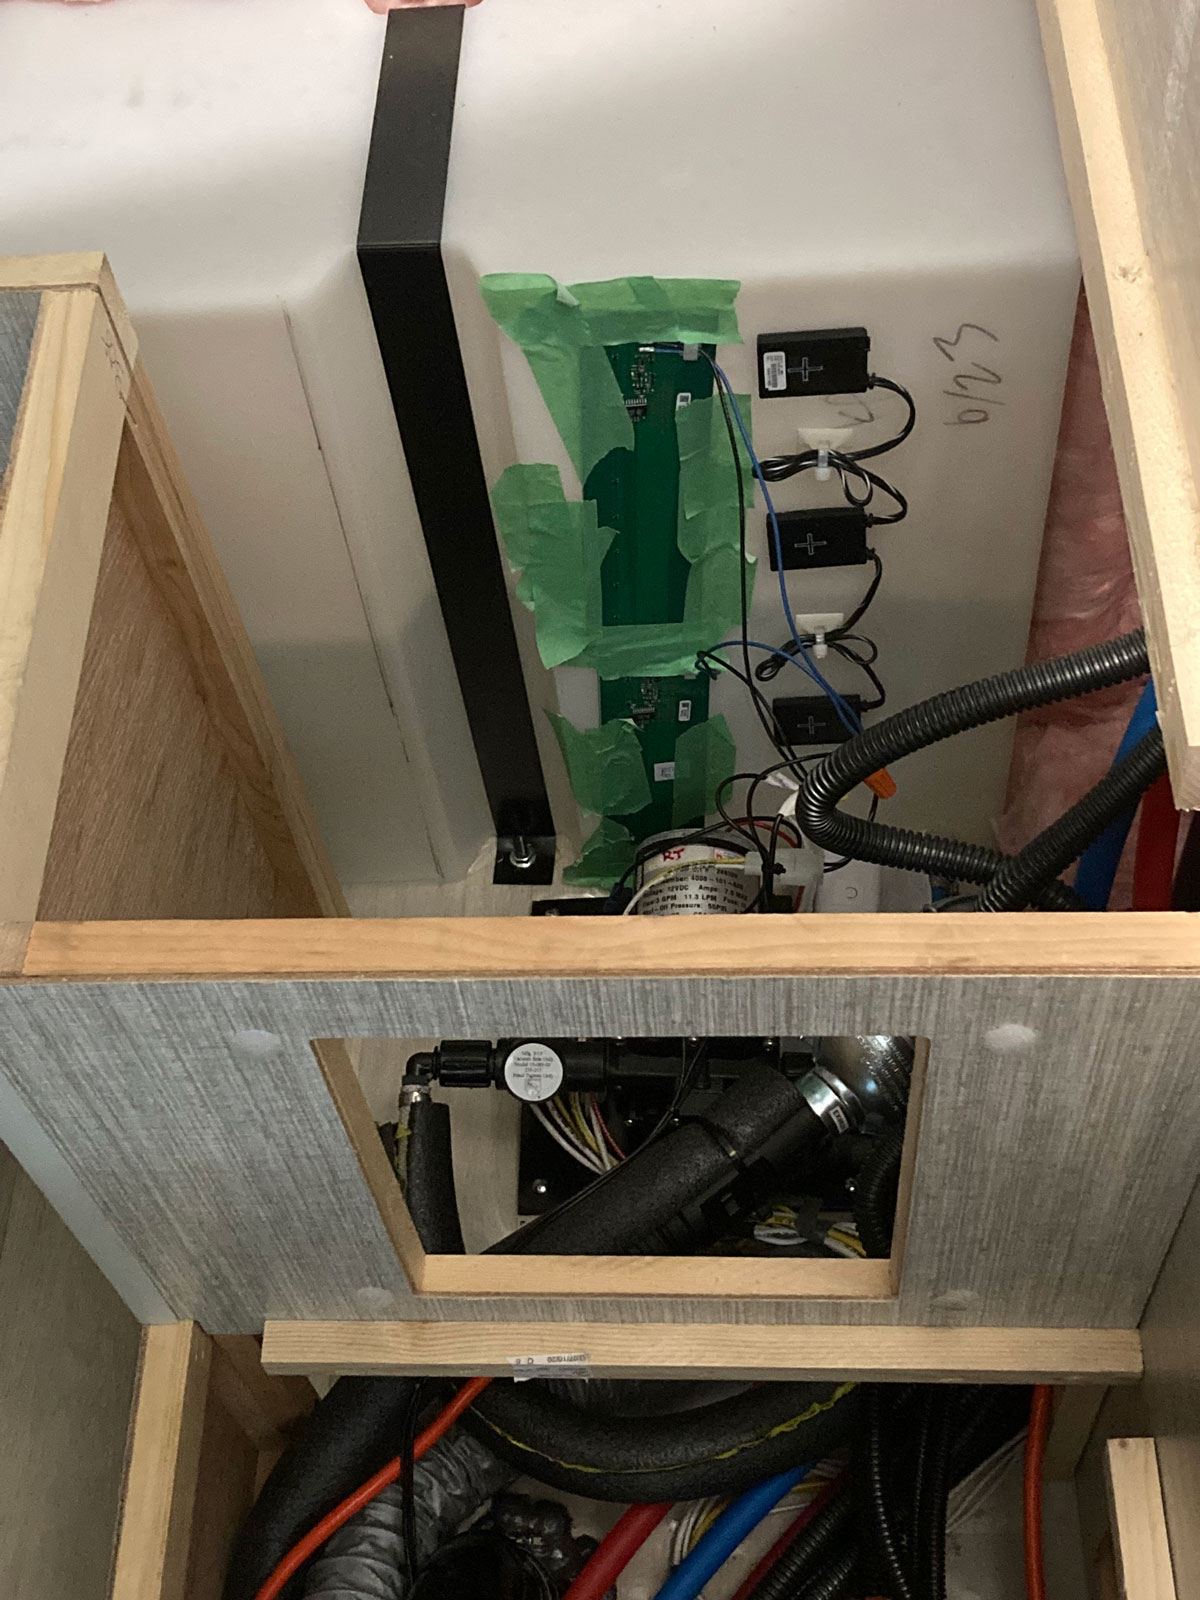
7 – I bundled the two blue sender wires to the new sender wire coming from the display using a wire nut, and the two black sender ground wires to the new ground wire also coming from up above the fridge AND the new wire coming from the fuse box ground - also using a wire nut. Since these connections were only for test purposes, the ease of wire nuts made for a quick install.
8 - With all of the wiring hooked up suitably for a test, I put water in the fresh tank to a level that would test the top sender strip as well, and turned on the battery master switch. The SeeLevel II display correctly indicated the amount of water that was in the tank. I drained the tank and watched the quantity change correctly as the tank emptied.
9 – With a good test completed, I again turned off the battery master and disconnected all of the rear wiring. After careful consideration of how I was going to get the “gaps” correct during the sender strip installation, I cleaned the tank area using a 50/50 water alcohol mix, peeled the backing off of the adhesive, took a deep breath, and stuck the sender strips to the tank using the technique described in the sender installation manual.
10 – I organized the wiring to keep things tidy, used butt connectors to make the final connections, added some wire loom to the protect the wire runs, and then added a piece of polyethylene sheet to protect the strips from any of my future visits to the area.
Here is how the sender strips ended up looking:
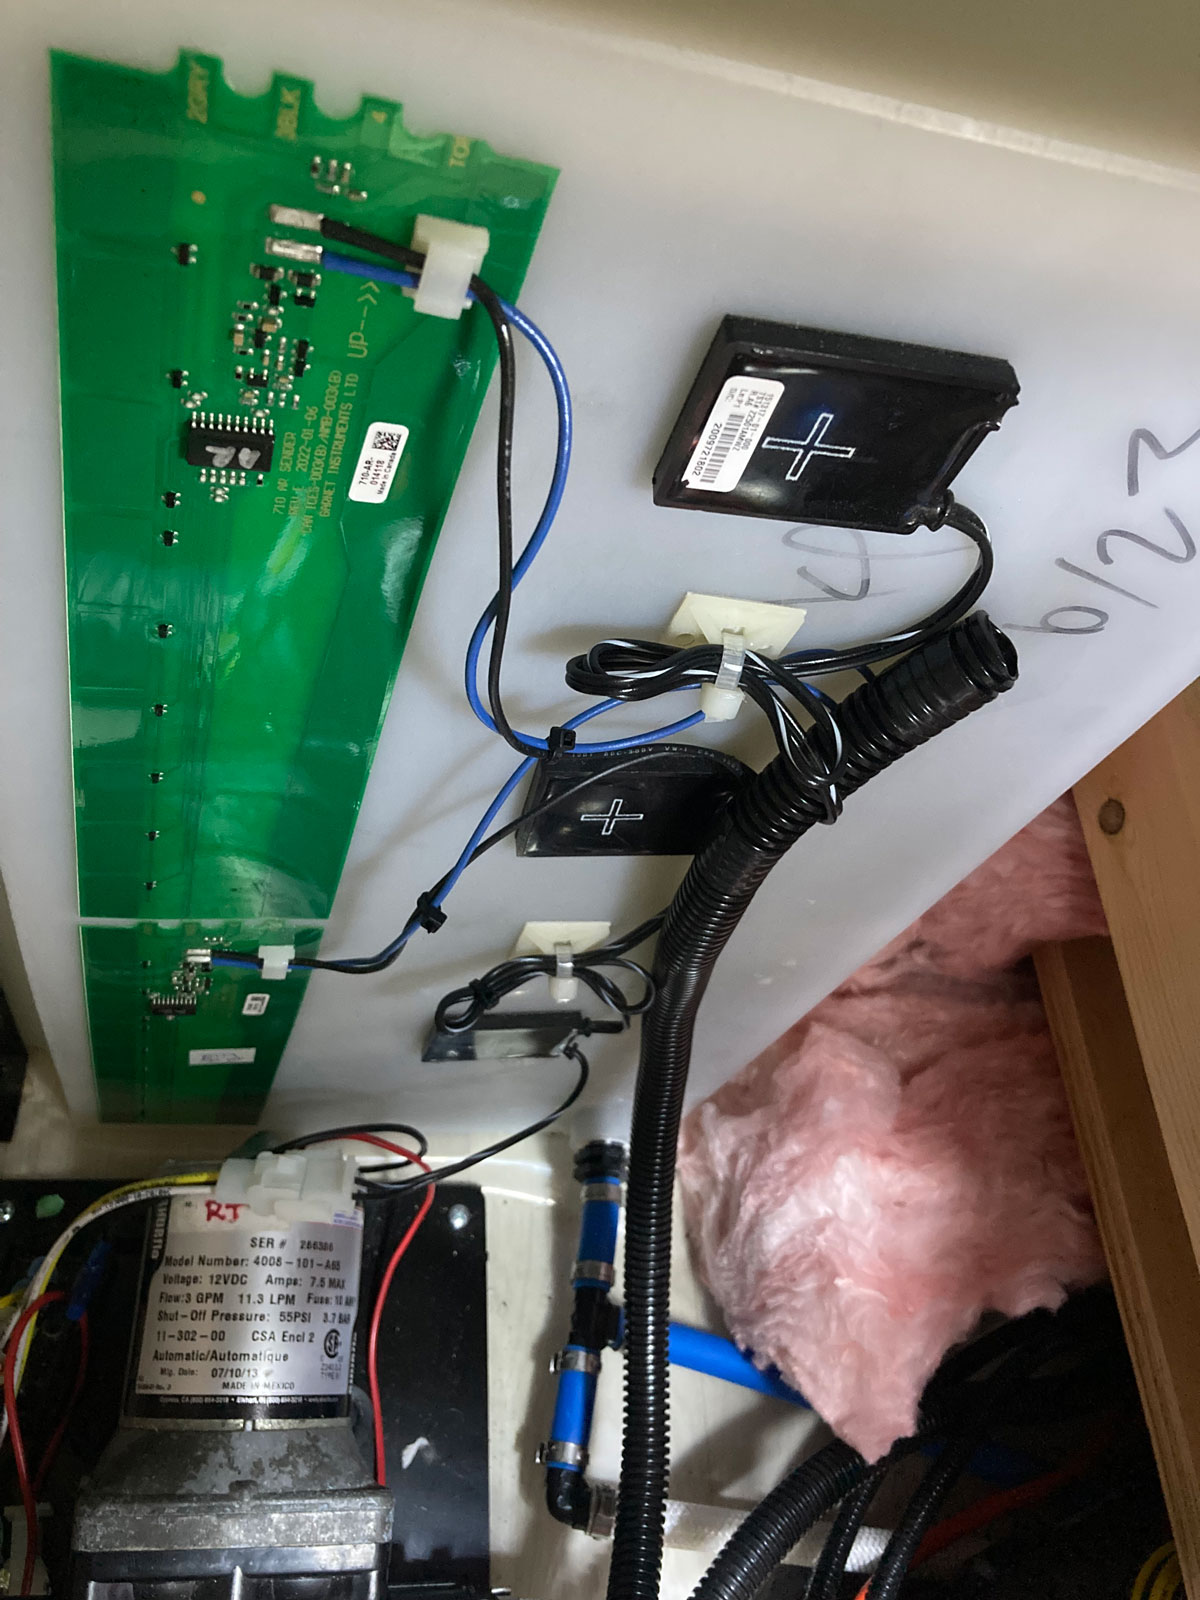
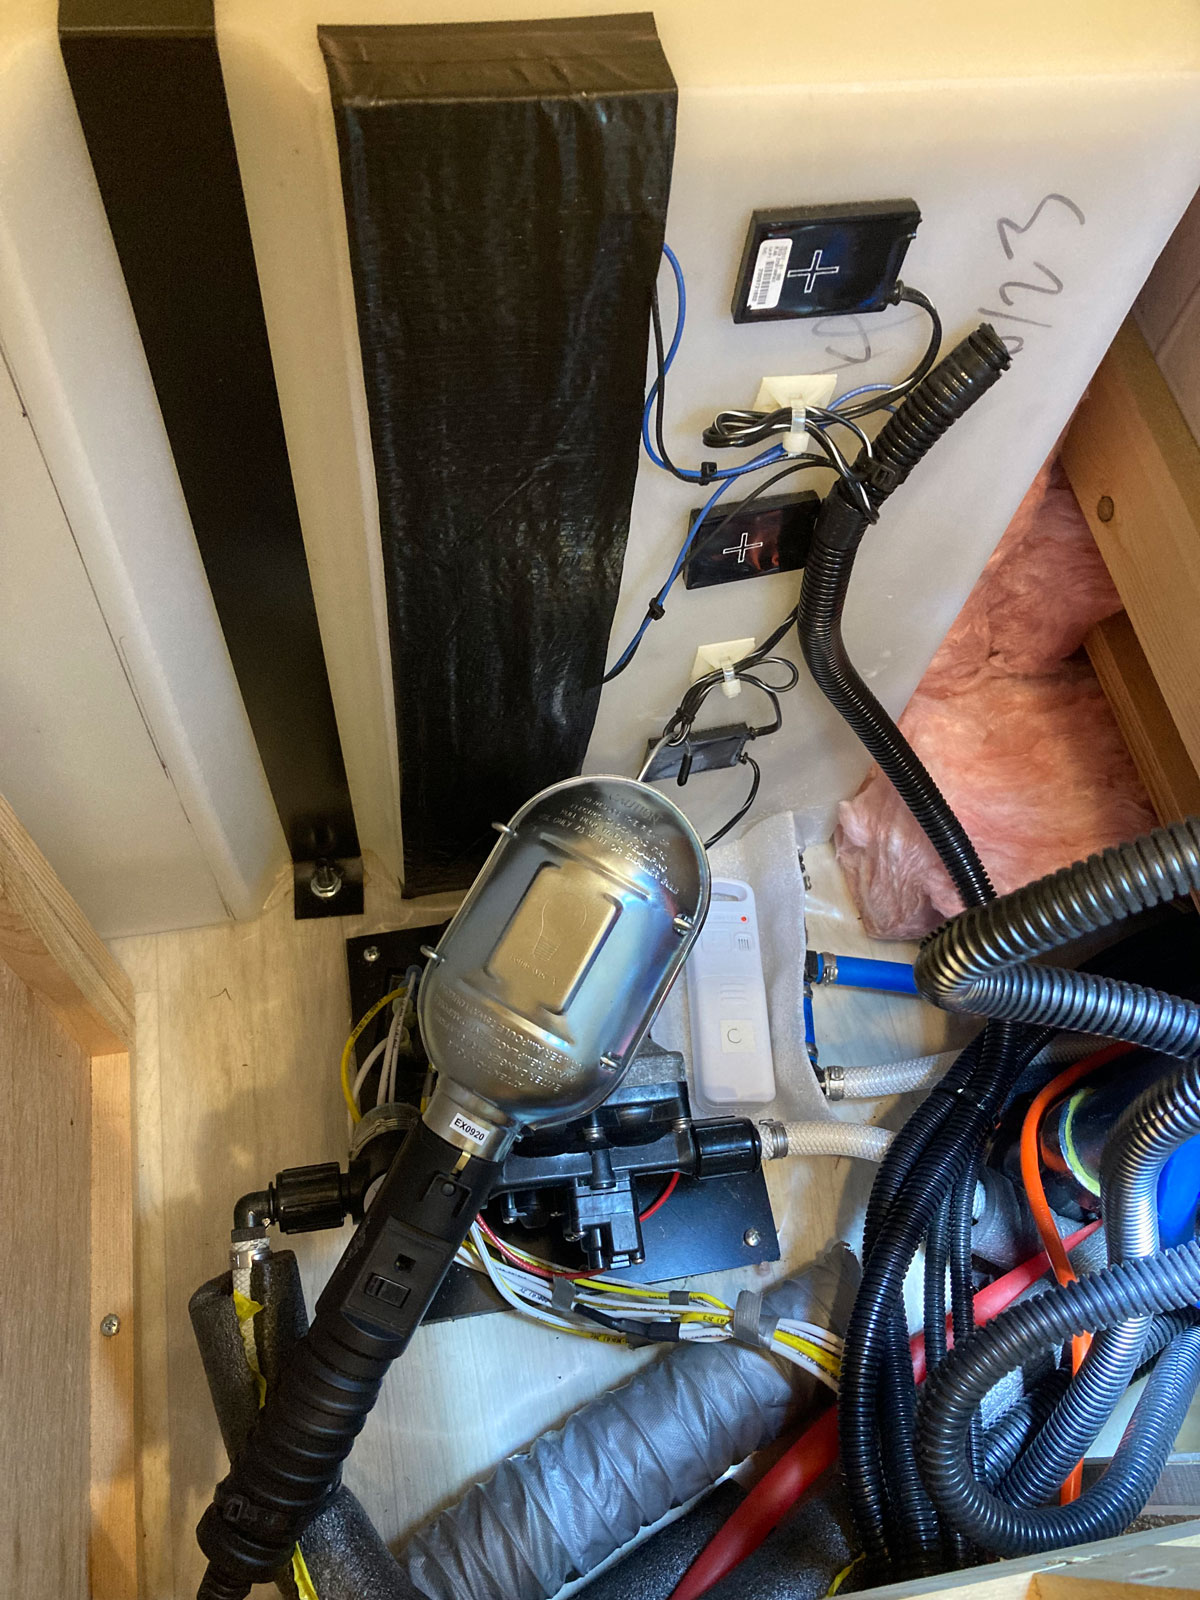
Note - The incandescent light in the above picture is how we heat the water pump area during the winter when we are not using propane heat. Also, you can see one of the temperature sensors we have in the coach to monitor various critical areas during winter operations.
11 – With the circuit working as designed, I finished up by re-installing the slide-out switch and securing the SeeLevel display - both to the trim panel above the fridge.
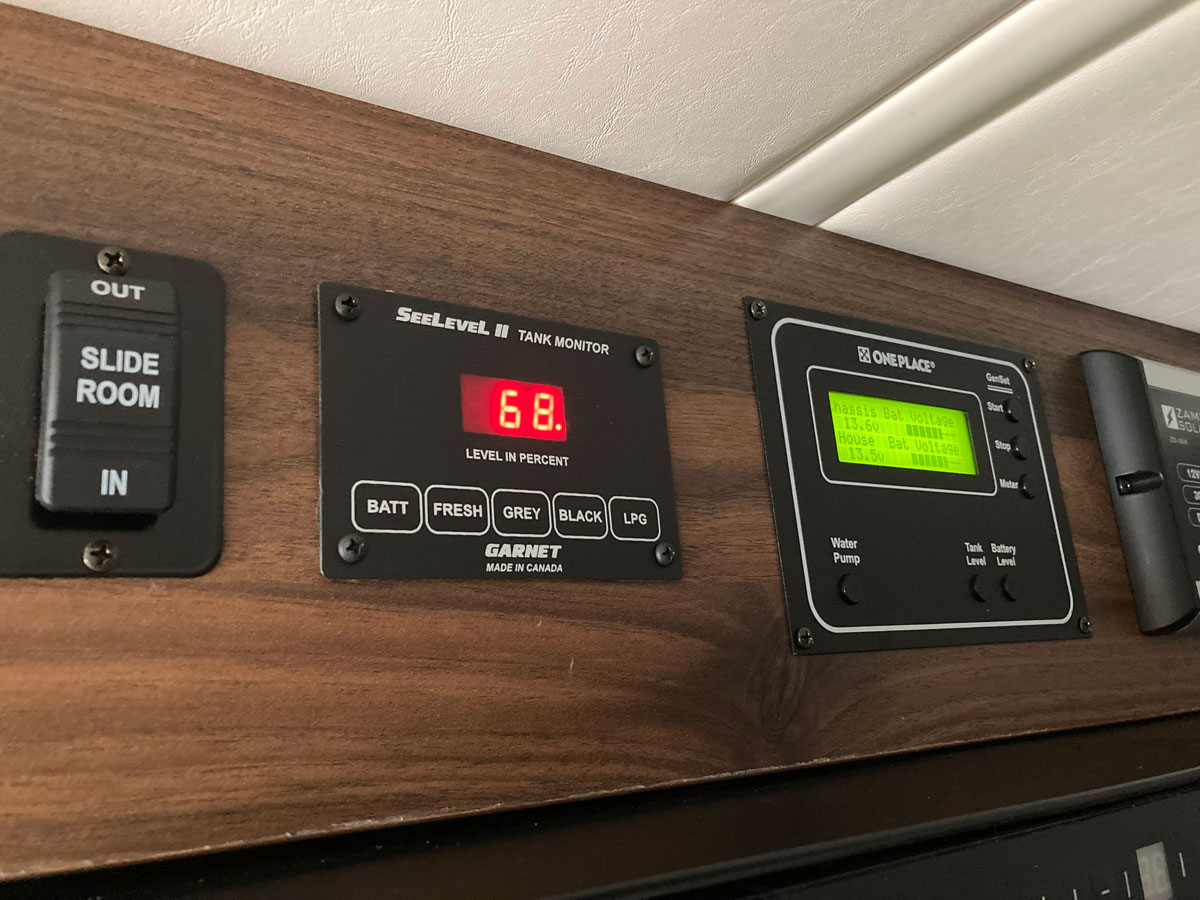
Working as advertised.
“Anybody need a shower before we head out? It looks like we’ve got enough water!”