RV Full-Time Rear View Monitor | RV Mods
A Rear View Monitor? Yes, not a backup camera – we’ve been there and done that – this is a full-time electronic monitor replacement for a rear view mirror…
Our View came with an actual rear view mirror, but all it really did was let us check to see what was going on in the coach – it was not a rear view mirror capable of showing what the traffic was doing behind the RV as we were driving. And, we really have missed that capability - from a situational awareness perspective and basic driving safety. Our Sprinter coach does have a dedicated control for activating the factory back-up camera, but it does not function above 30 km/hr, or about 18 mph. Using that for awareness would have been great – it has a super big and crisp picture – but Mercedes has decided against providing that functionality.
James and Stef at the FitRV evidently had the same problem; they too wanted to see what was behind them as they were driving, and came up with the idea to explore a back-up camera that you could leave on full-time to give you the same usefulness as a rear view mirror. Have a look at this FitRV video to give you the background to the product we too ended up installing:
The FitRV Auto-Vox Solar 4 Wireless Rear View Camera Review
We liked the fact that this product works without having to run cables from the rear to the front cab, and any wiring that needed to be done was pretty minimal. The camera looked more robust than most and was solar charged, the monitor had a good size display, it could be configured for full time use, the back-up guide lines could be removed from the display, the wireless range for the kit was advertised to be more than adequate, and James had found a way to install it in the same place as a rear view mirror. That last feature was actually pretty important, as having a display take up dash board room and potentially get in the way, was not attractive – and we wanted to be able to look in an intuitive place for rear traffic.
So, we decided to order the Auto-Vox Solar 4 kit from Amazon:
Auto-Vox Solar 4 Wireless Rear View Camera
The goal of somehow getting it attached to the rear view mirror post was the next challenge, as we don’t have a 3D printer like James does (wouldn’t that be nice). James was able to manufacture an adaptor that looked extremely professional, but I was left to scour Amazon to see if I could come up with a decent looking alternative. And, much to my surprise – I did find something that would work – it was a universal holder that would attach to the ball of the mirror post and also to the monitor:
Rear View Mirror Universal Mount
The Installation
1 – I started with the camera mount on the rear of the View, and chose the rear roof trim cap to make the attachment. From previous experience removing this trim cap, I knew there was nothing in there that would be affected by a drill bit. I added a bit of foam sheeting in-between the mounting bracket and the trim panel, but other than that – just drilled and installed it, centered above the middle running light:
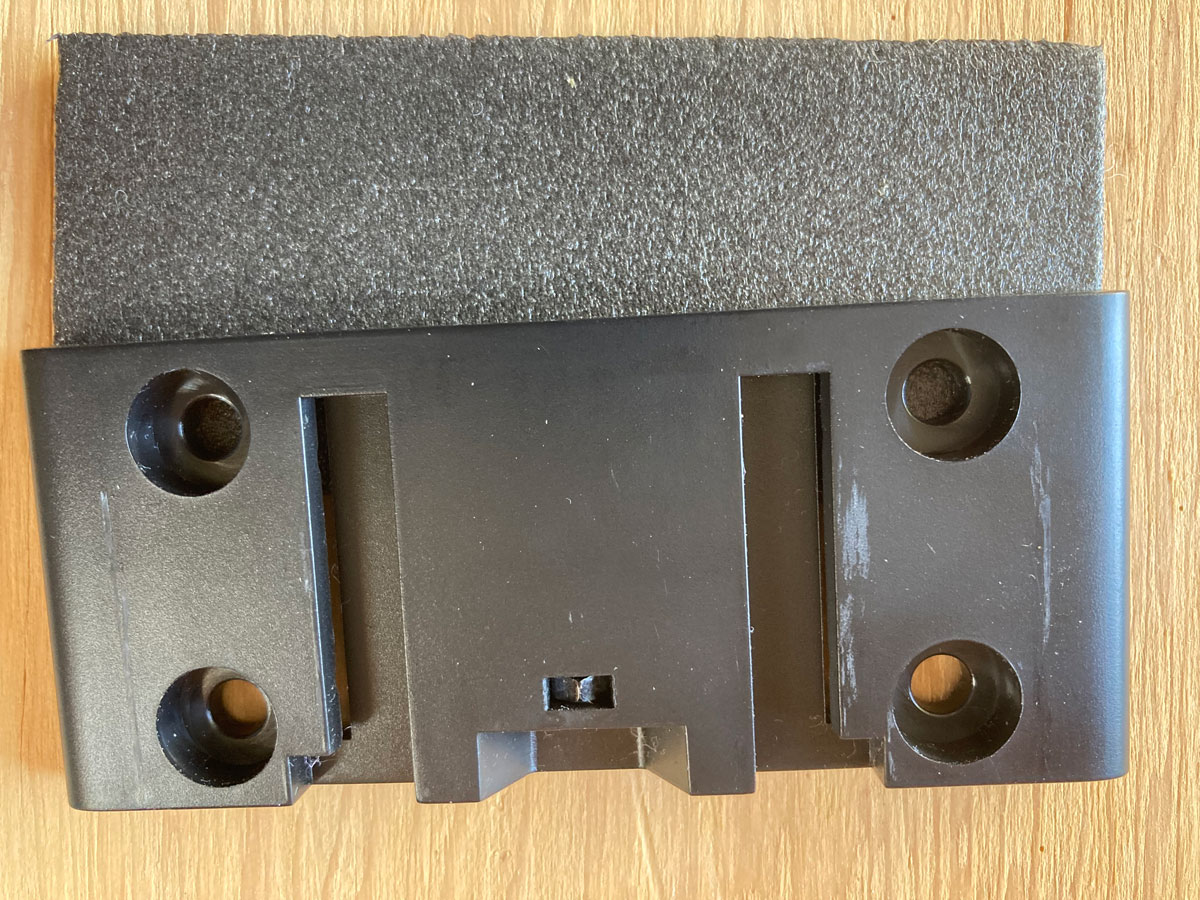
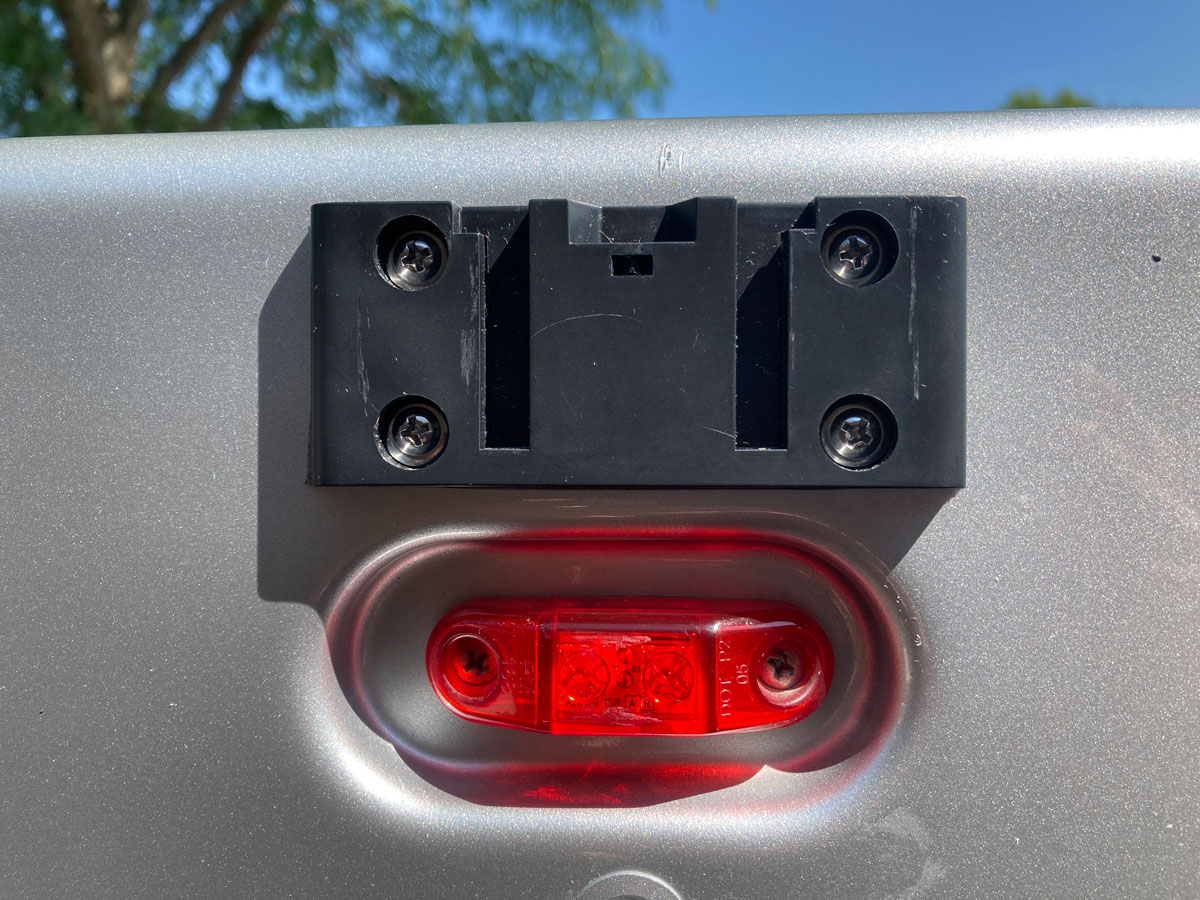
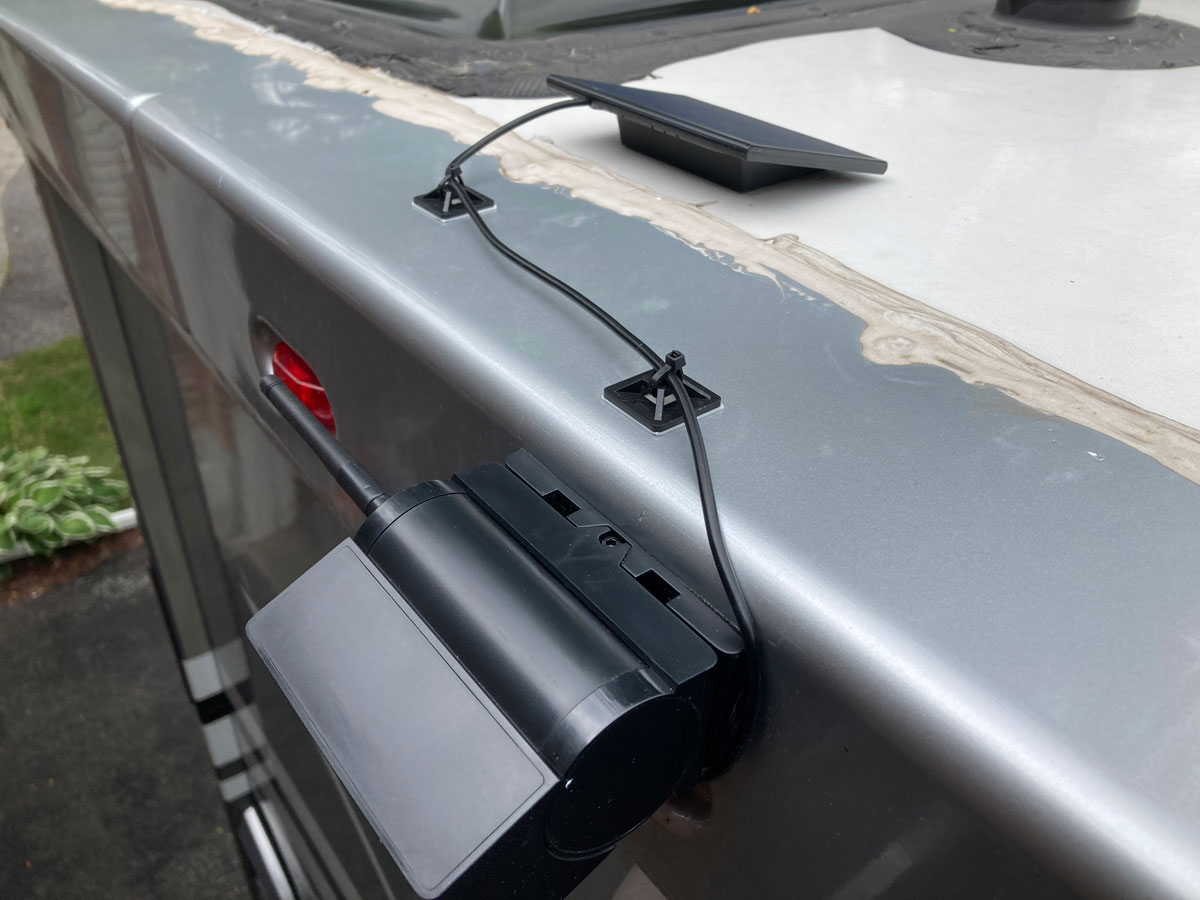
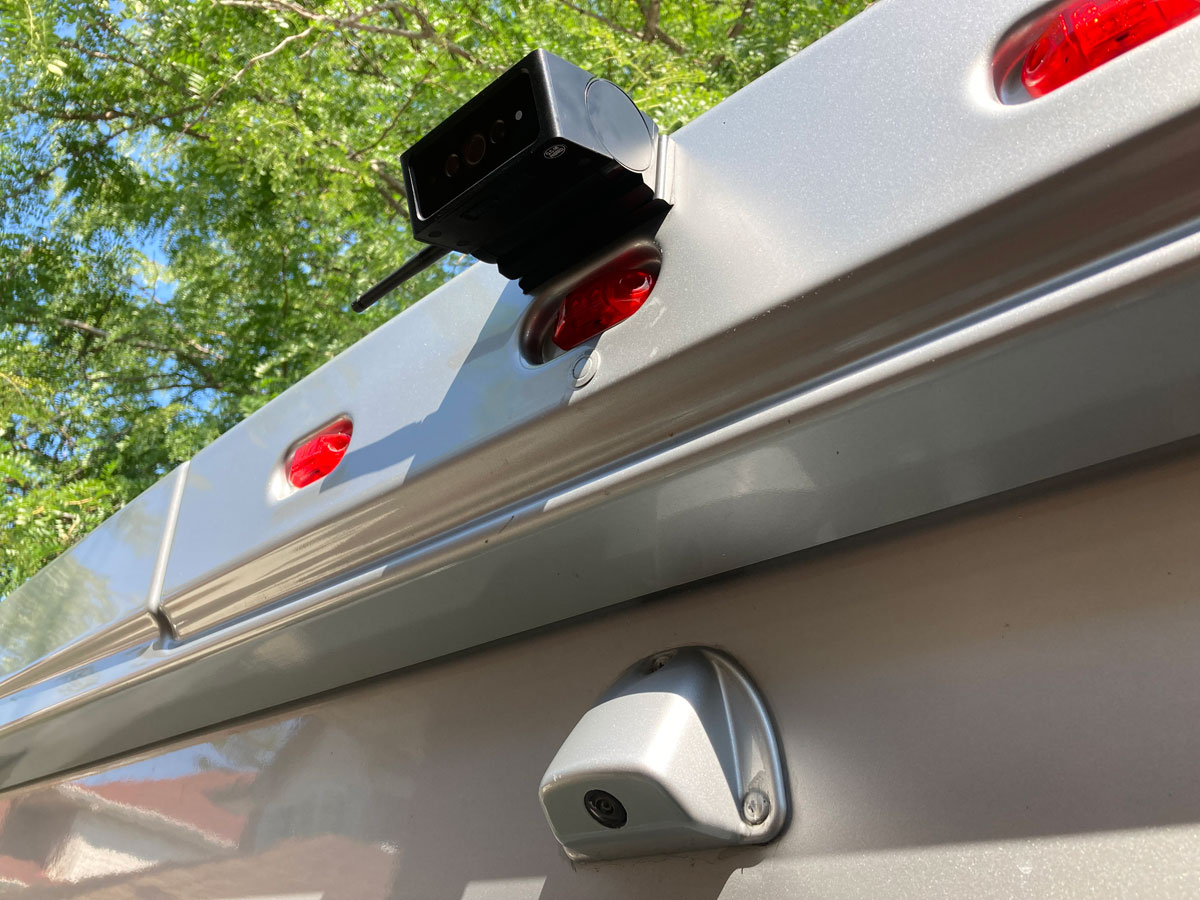
Sliding on the camera, locking it in place, attaching the solar charge panel to the roof, and running the charging wire was all very straightforward. (The FitRV had elected to run a dedicated USB charging cable to the camera, but we thought we would give the solar charging panel a try …)
Here is how the camera installation ended up looking:
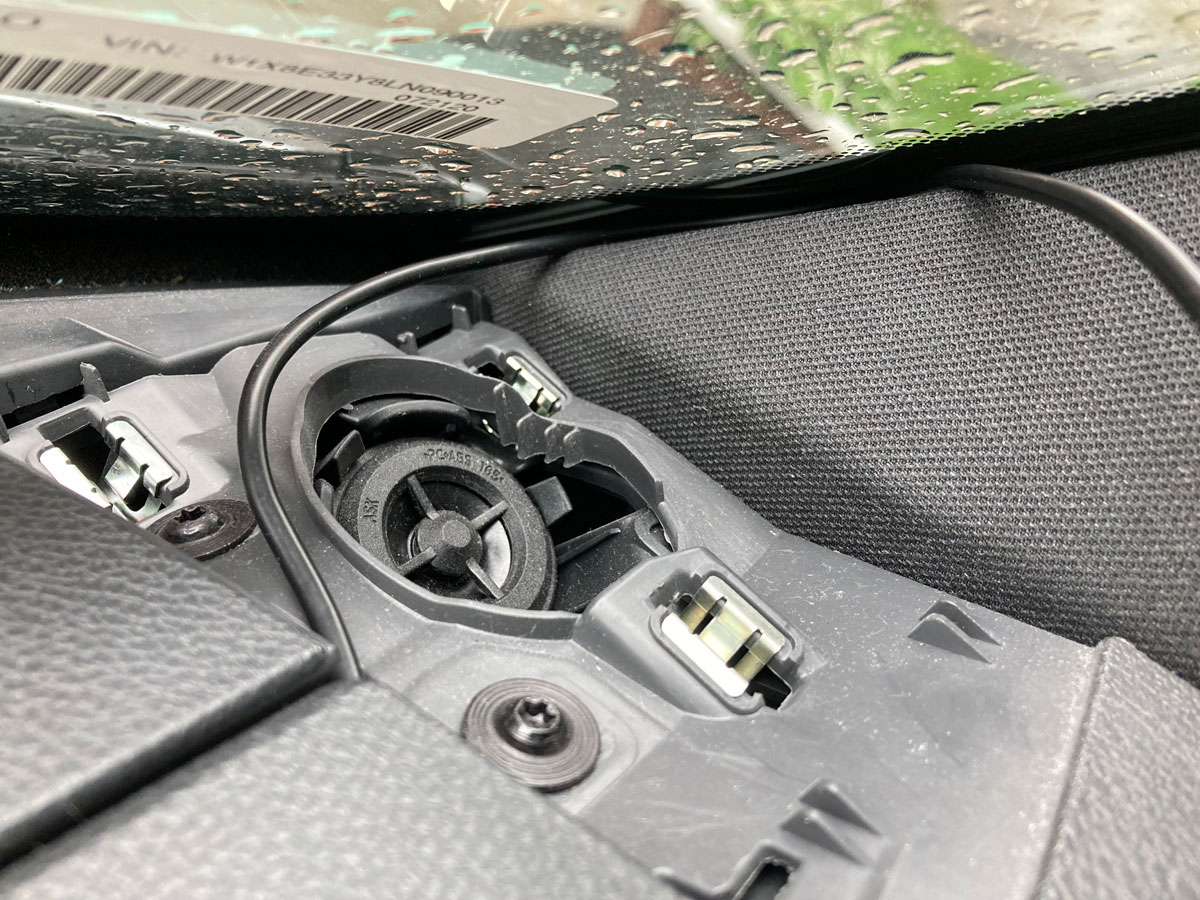
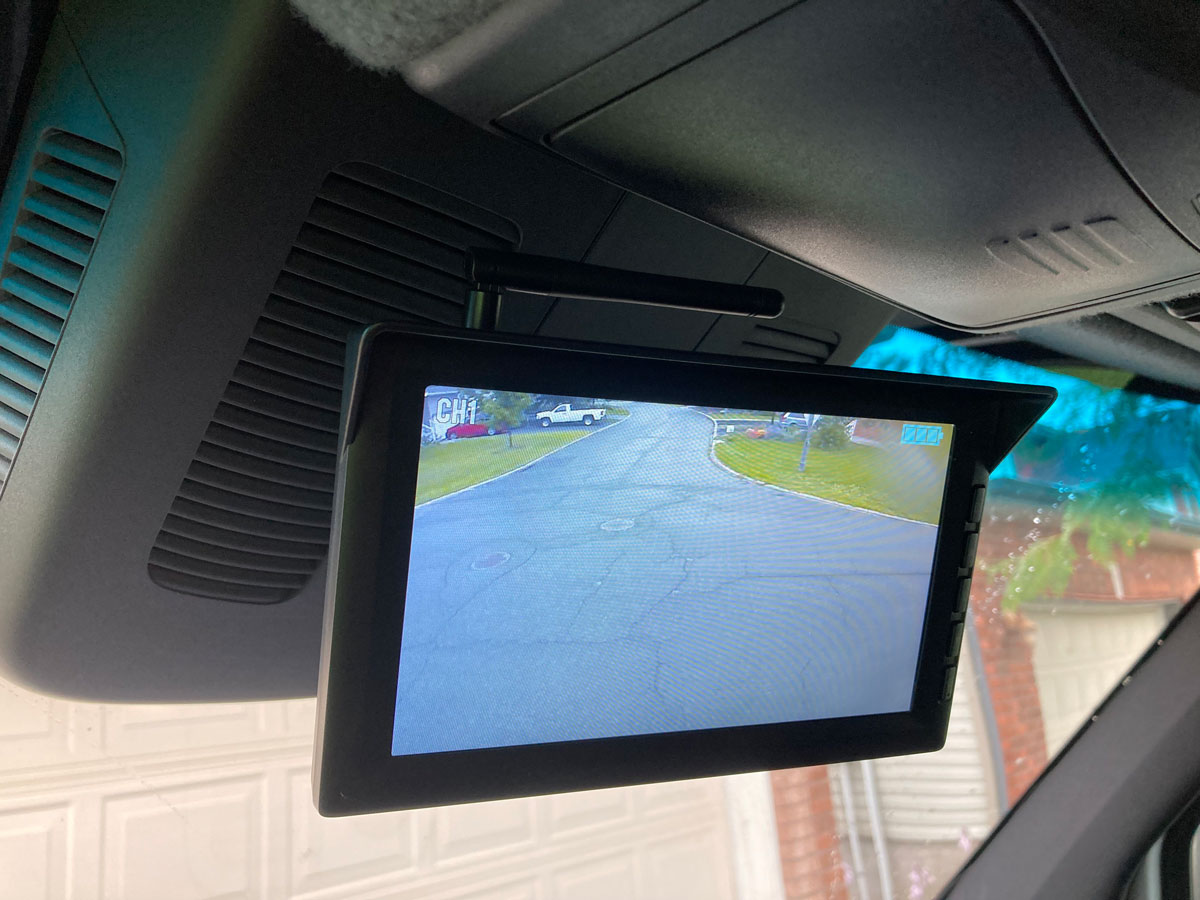
2 – The monitor installation up in the cab was equally straightforward, after some research into how to get under the radar housing on the upper windscreen. I started by twisting off the rear view mirror to leave the mirror post and ball:
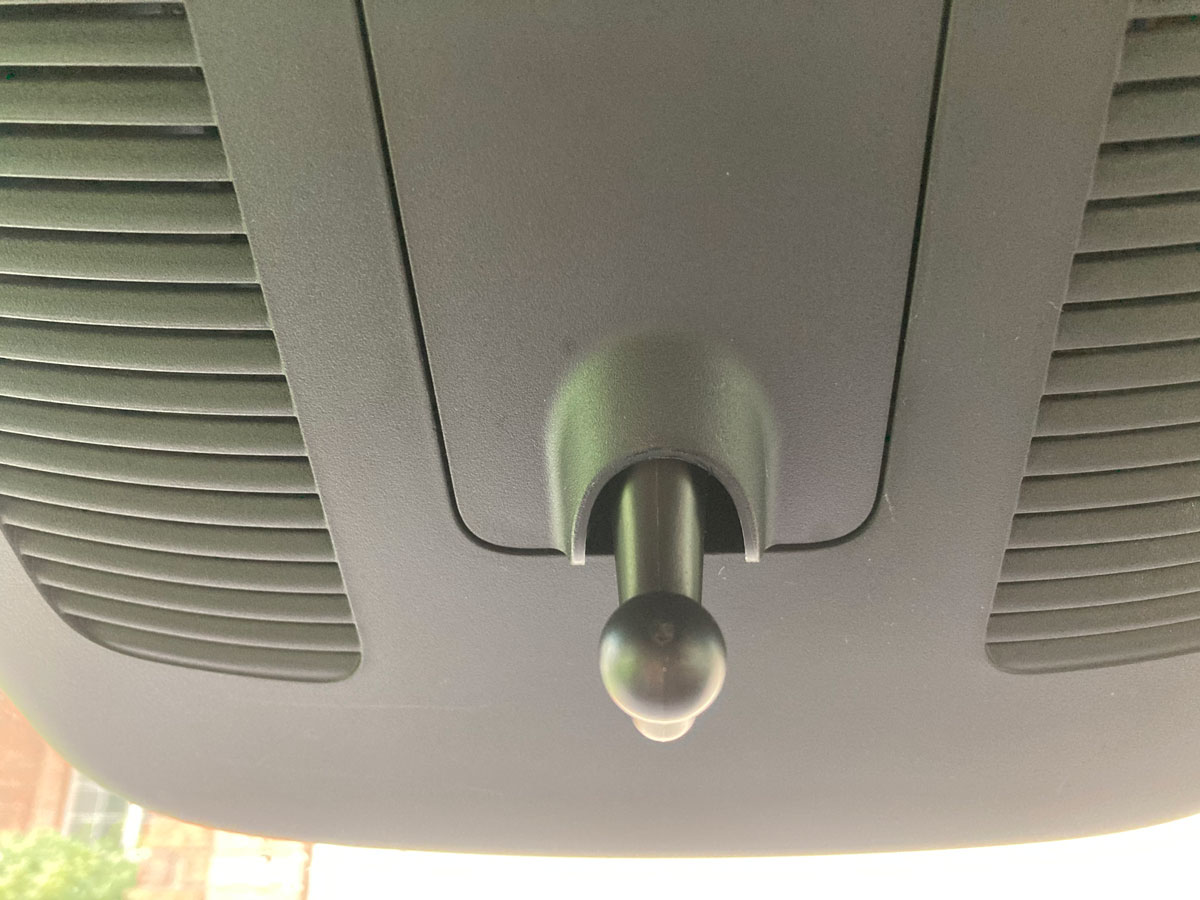
And then with my fingers placed at the bottom of the housing, where it contacts the windscreen, gently pulled to snap it off. The housing uses four push-in tabs and is removed very easily. You can work the housing around the post and ball, if required.

I used most of the Amazon mount - discarding the lower small ball adaptor that was intended to interface with a camera – using the clamp that was intended to attach to a mirror post and the ball and socket adaptor as the attachment to the actual Mercedes mirror post. During my search for this type of attachment method, I removed the Mercedes mirror post so I could do some experimenting in the basement. The Amazon adaptor’s sockets were designed to fit a 16 mm ball – but the Mercedes post ball is only 15 mm. This resulted in not quite enough compression on the Mercedes post ball, so I added some material to take up the slack and create a tight enough fit to ensure the monitor would stay in place while driving on rough roads.
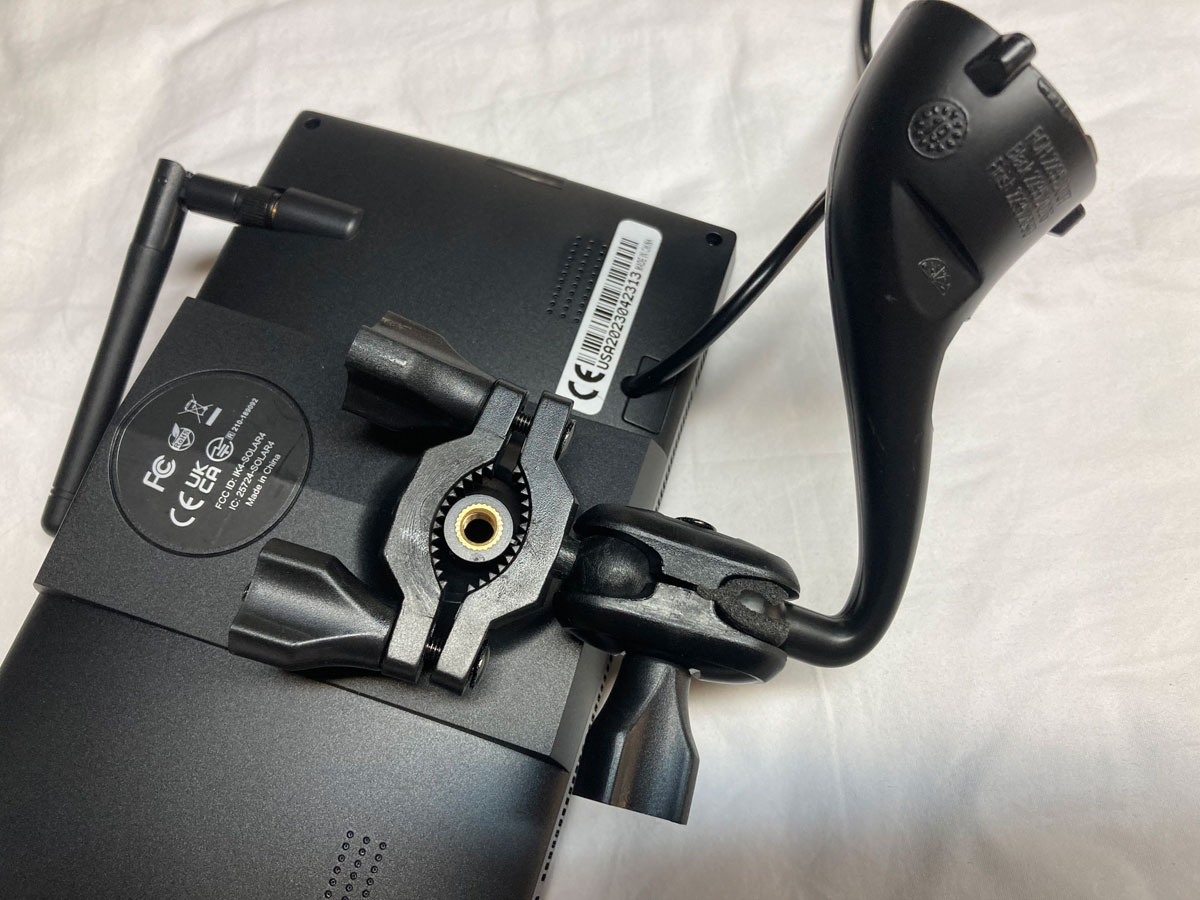
I used the retention knob / bolt that came with the Solar 4 to ensure the monitor did not slip out of the clamps:
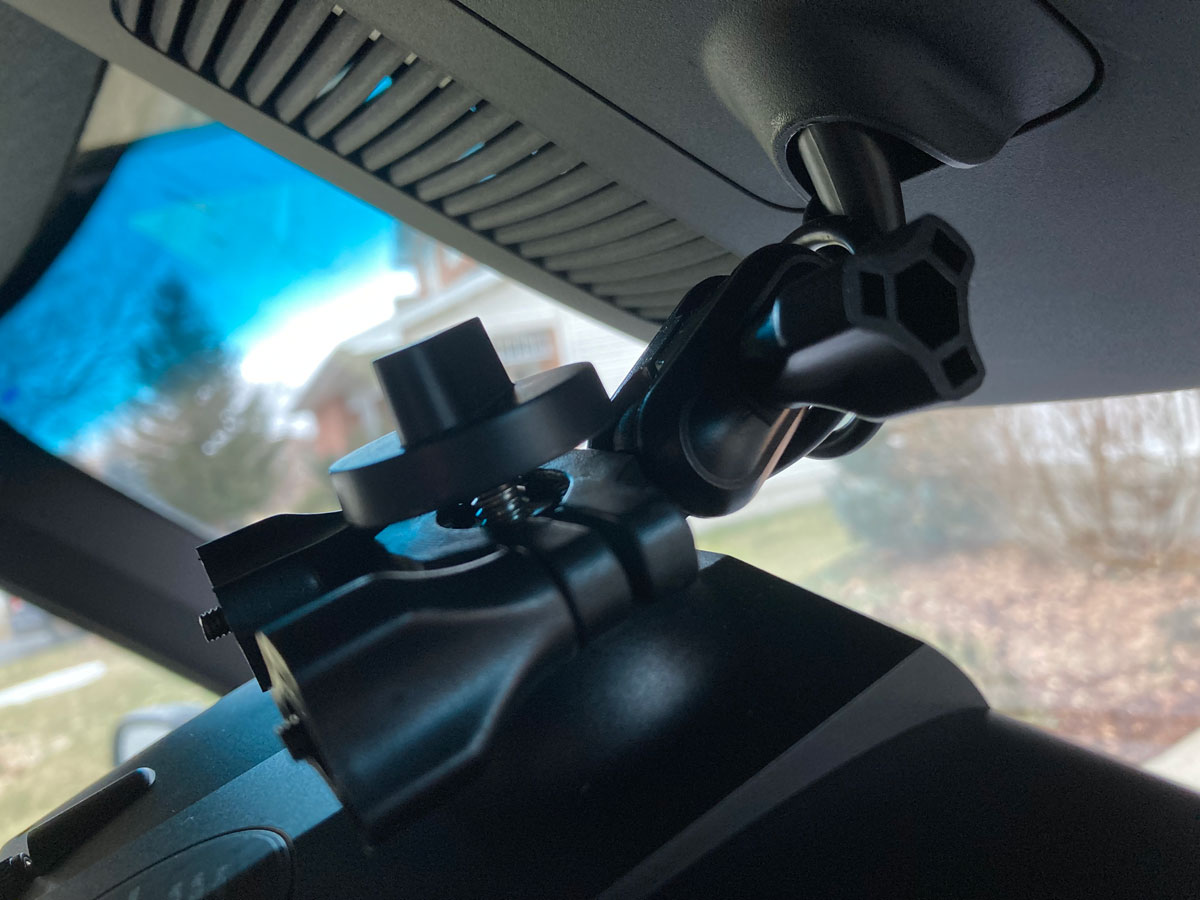
With the jaw clamp on the monitor, the monitor secured with the Solar 4 knob / bolt, and the socket on the Mercedes mirror post, all connections could be tightened as desired to position the monitor securely.
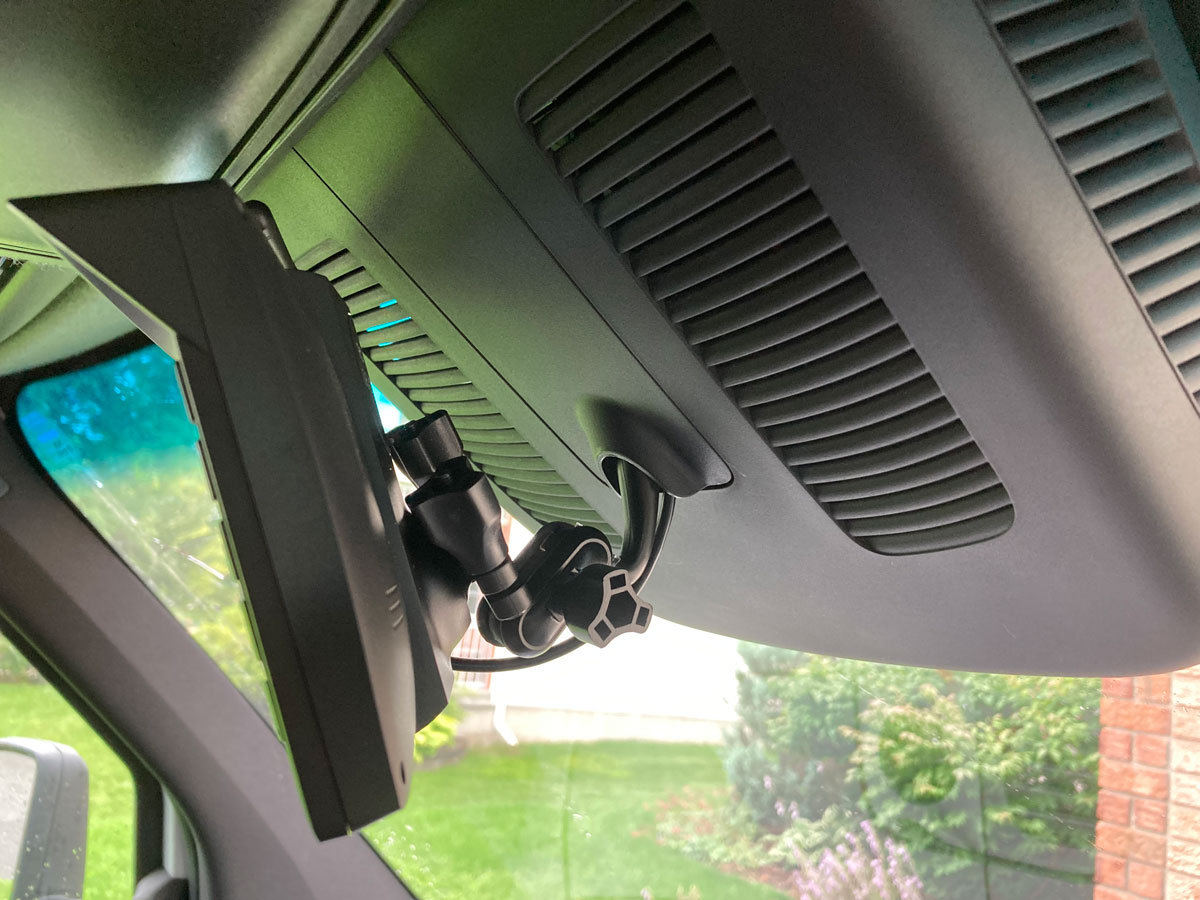
3 – The last piece of the puzzle was running a power supply up to the monitor. I had seriously considered tapping into a power wire up in the radar housing, or in the reading light fairing, but in the end decided to keep it simple and use a similar method to what the FitRV had used. On our ’20 Sprinter we have a cigarette lighter socket in the middle cubby, so opted to use that as the power supply. The monitor power wire was of a generous length, so I ran it along the back of the middle and right hand side cubby, out of the speaker enclosure, up the side post, along the ceiling, and into the radar housing. I coiled up the slack in the radar housing area, and snapped the coil into some unused wire holders.
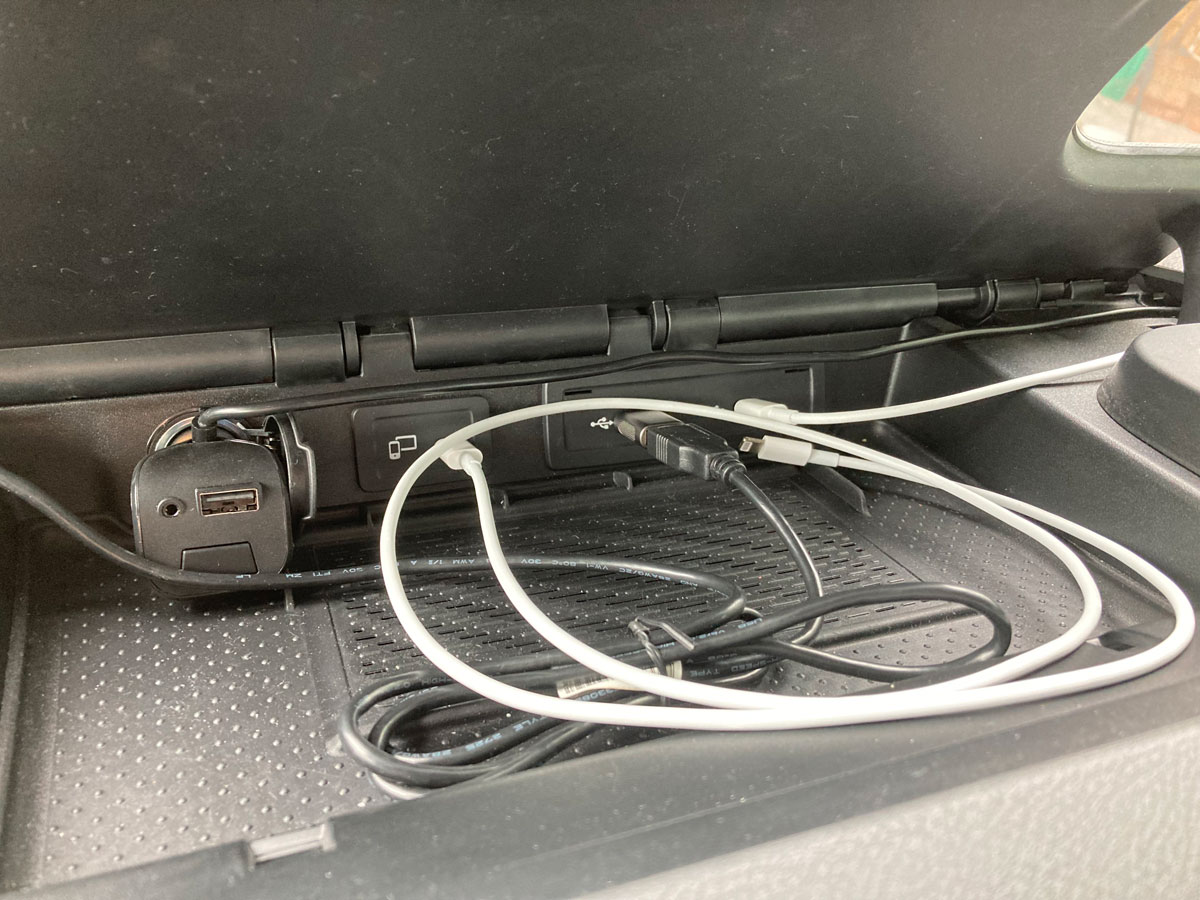
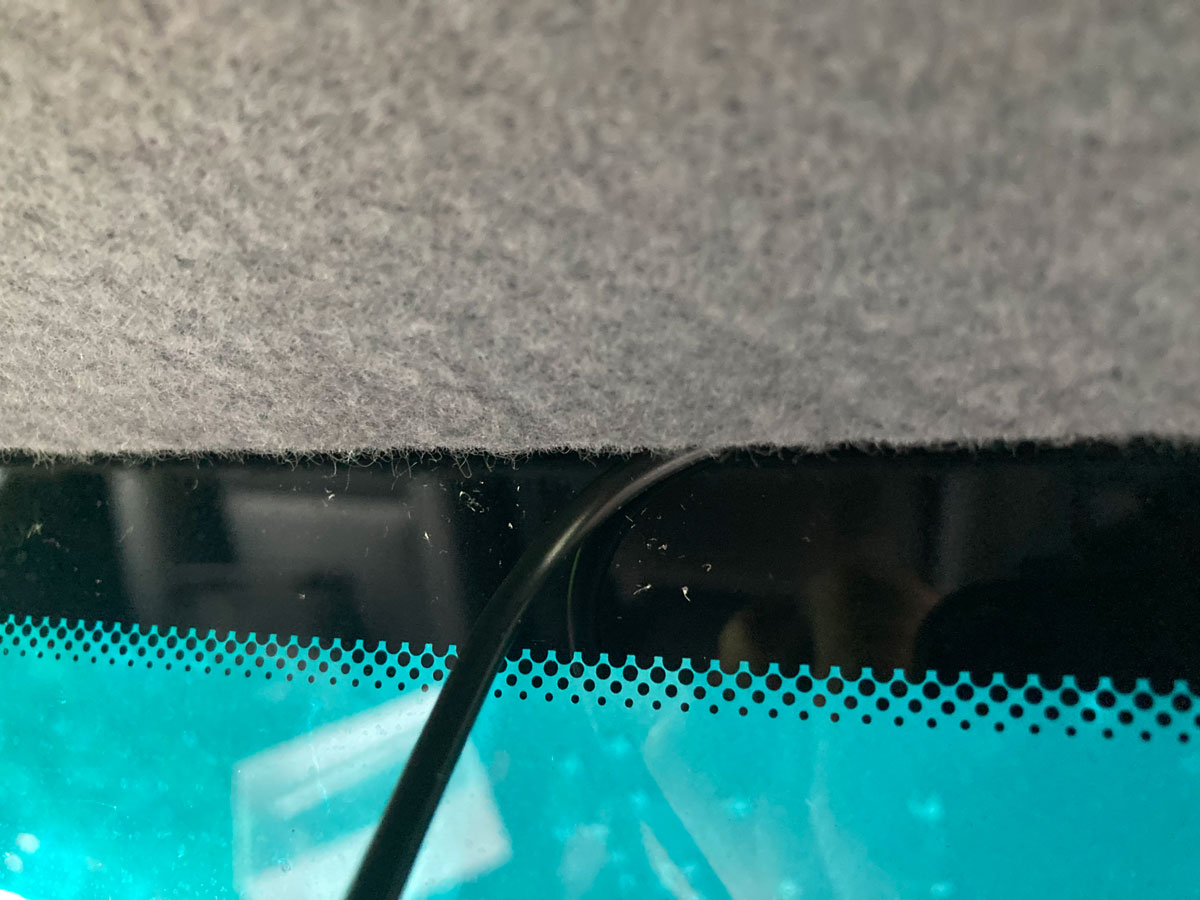
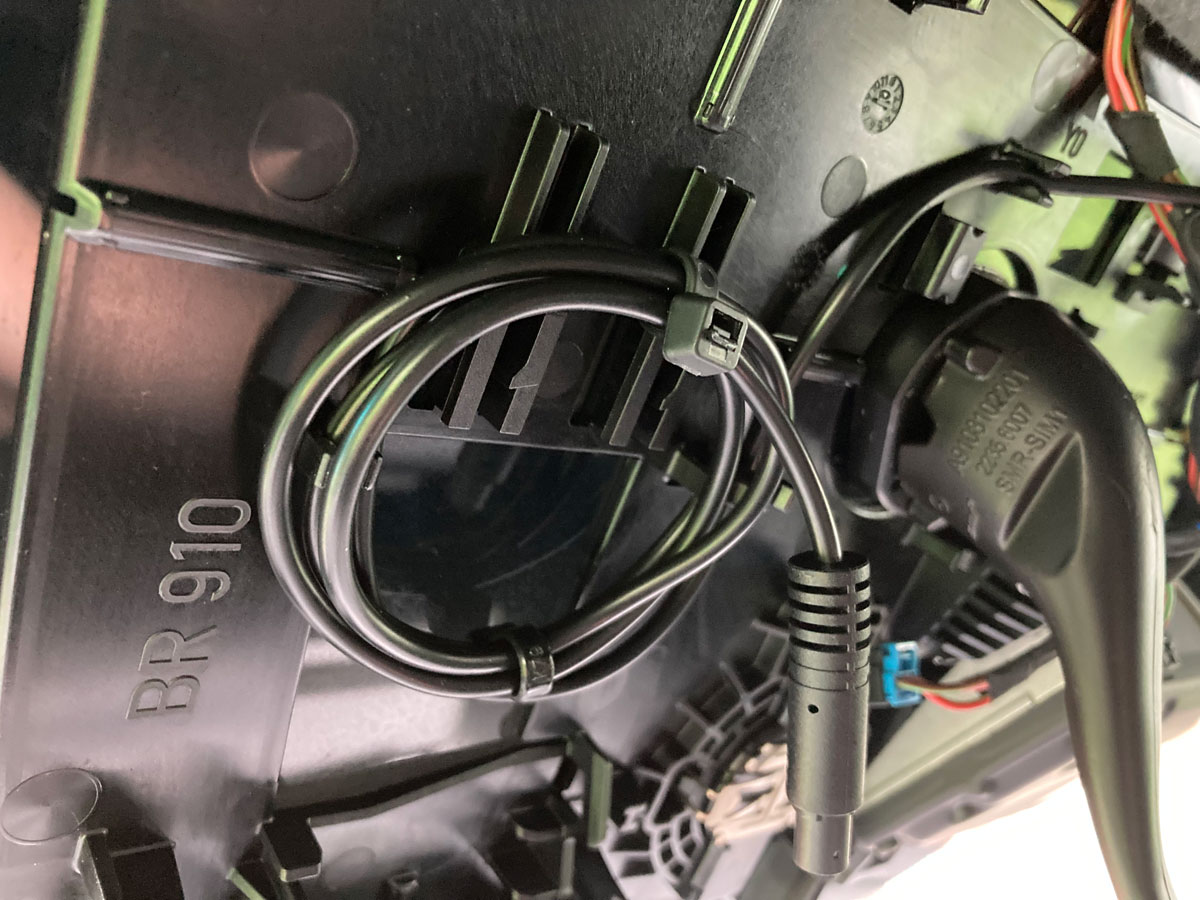
With the radar housing ready to snap back on, I finished up by threading the monitor wire into the housing, connecting it to the power wire from the dash. Snapping the housing back on competed the job.
4 – I had tested the camera and monitor in the basement before the installation, so the power-up went ahead with no surprises of any kind. Here are a couple of notes I made myself when testing things earlier:
- For a single camera – CH 1 is the default
- A short press of the OK button to turn off the monitor appears to leave the camera powered
- A long 4 second press of the OK button appears to de-power the camera – when the Ok button is pressed again, you can hear the camera “waking up”. Knowing this, we have got into the habit of turning off the monitor - before shutting off the ignition and Sprinter power - using the long 4 second press. Our thinking is that this might prolong the battery life of the camera and require less solar charging.
UPDATE: So far, so great. It is really nice to be able to see directly behind us again with an instinctive glance up to the rear view mirror. The solar charging is working well. We went for many months with the camera battery indicator showing fully charged, but one trip we had about 3 days of overcast / rain and solar charging was affected. The camera battery indicator dropped to 1/3rd, but eventually got topped up again when the sun came back out. I had wondered if the solar panel would be able to keep up with using the camera for 7 or 8 hours a day - now we know. Yes - if the sun is out, it keeps up fine. And, if you shut off the monitor with a long push of the Ok button, the camera does indeed become depowered.
But… on a couple of occasions we have been running for many days without sun, and the battery powered rear camera has run out of power. The monitor displays a red battery icon, and things shut down. You can remove the camera and re-charge the battery with an alternate USB power source, but that is obviously not ideal. For that reason, we came up with a new way to continously re-charge the camera battery - similar to what the FitRV did during their initial installation. I “borrowed” 12 volts from a nearby running light, and stepped it down to 5 volts for USB charging. It was a pretty straightforward job. Because the concept could be used for any rear view camera, battery powered or not, I’ve elected to describe that mod on a page of its own. Here is the link to our mod for the full time charging of our rear view camera:
Full Time Rear Camera Charging
NEW INFO on an alternative solution to a dedicated rear view camera - It looks like an engineering company in the US has developed a software dongle that uses the Sprinter’s OBD II port to hack into the MBUX system of the new Sprinters, to allow full time use of the factory rear view camera. With a one time installation for a unique VIN number, this dongle allows you to bypass the speed limit restricting the use of the rear view camera. If you are not going to miss navigation or radio info, maybe this would work for you?
MBUX Full Time Rear View Picture
And, here is the link to the product from Mid City Engineering:
Sprinter Dongle for Rear View Camera
A dedicated monitor, or an MBUX picture, which ever you choose - you will not regret the decision to make driving your RV safer.