RV Macerator System | RV Mods
What is a Macerator System, and why is it in the Electrical section of this website? A macerator pump is a marine sewage pump hooked up downstream of your black and grey water discharge system, and is responsible for delivering liquid black tank stuff and grey tank contents to the dump station inlet. The manufacturer of our previous Class B motor homes used to advertise “No mess, No fuss”. It turns out this advertising was actually very true, and we have considered a macerator pump to be a necessity for any motor home we drive.
Winnebago does not have a true macerator pump setup on any of its View / Navion lineup. The closest Winnebago comes to a true setup is a macerator pump installed in the grey water dump line of the 24V model. On this model, its purpose is to pump grey water from the tank, as they have some geometry challenges with relying on gravity to get the job done. (I seem to recall they have to get the line over the rear axle.) But, c’mon… grey water? Isn’t that a waste of a macerator pump?
So, full disclosure. I don’t have a lot of experience using the traditional 3” hose gear during dump duties. For the entire time we have been RVing in a motor home (approaching 20 years now), we have been spoiled by the macerator dump functionality we have come to expect as normal operations. In the past, we have rounded the corner into the dump station, and took note of the rig pulling up beside us in the other lane. I jumped out, donned my work gloves, openened up the lid on the dump station inlet, flipped open the dump service panel door, yanked out the dump hose, pulled the black valve T handle, and then looked up to see my wife smiling back at me. With a nod of my head, she hit the in-coach button on the remote panel to turn on the macerator pump to start delivering that liquid black tank stuff I was telling you about. This used to take about 30 seconds to accomplish. When I glanced over at my neighbour, I used to note that they have not started, anything, yet. What my neighbours did next could vary from staring over at me wondering what the Dickens I was doing, to rummaging around in a bin looking for their dumping equipment. After the black tank had emptied, I glanced back at my wife as she shut off the macerator pump via the in-coach remote button. Then, black handle in, grey handle out, and we repeated the process. All done, hose was pushed back in to its stowage port, grey handle in, service door closed, dump station lid closed, gloves away, and I said “so long” to the neighbours who had just then started to wrestle with their three inch slinky hose. No mess, No fuss. Really.
Spoiled? Yes, we think so. But this is the operation we wanted for our View as well…
But for those that are reading who don’t mind the traditional dump process, and can’t understand what the big deal is, I applaud you. You have way more patience than we do, and likely go through life, in general, with less stress than my wife and I. You can stop reading now, and move on to another mod, if you like.
For those that think they might see where I am coming from, read on!
So, this macerator pump requirement… the View does not come with one… what did we do? We decided early on that we could add an aftermarket, portable, macerator pump to our dump routine that would meet our needs. Sure, it would not be as convenient as a built in one like our previous Class Bs, but we felt the extra setup would still be better than having to get used to a traditional dump system. I guess sometimes the “old dog new tricks” thing is just the way it is.
We built a system by which we can take a bin out of a locker, pull out the macerator pump and twist it onto the black and grey dump flange, plug its 12V power chord into an outlet in the service bay, and have it all activated by my wife remotely sitting in the coach watching from the window. I know, I know. That extra time it takes to pull the bin out of the locker and twist the pump onto the dump flange is going to kill me…
So, here is what we purchased to build our macerator setup:
• Remco 9911-02-12 Portable RV Waste Pump (Amazon)
There are many different RV macerator pumps out there. Any of them that twist on to a dump valve and require a 12 volt power supply will work. If the power cord has a plug in adaptor, all the better. That will save you having to wire one on…
• Valterra Products T1020-2VP Carded Bayonet Fit Drain Hose Drip Cap (Amazon)
• Ten foot Thetford 70425 RV macerator hose (Amazon)
• 1 inch threaded coupler and cap for the end of the hose
• 12V cigarette lighter socket (Amazon)
• 12V latching 30A Heavy Duty low voltage wireless remote control kit (12Vmonster Lighting)
• 14 gauge wire and connectors
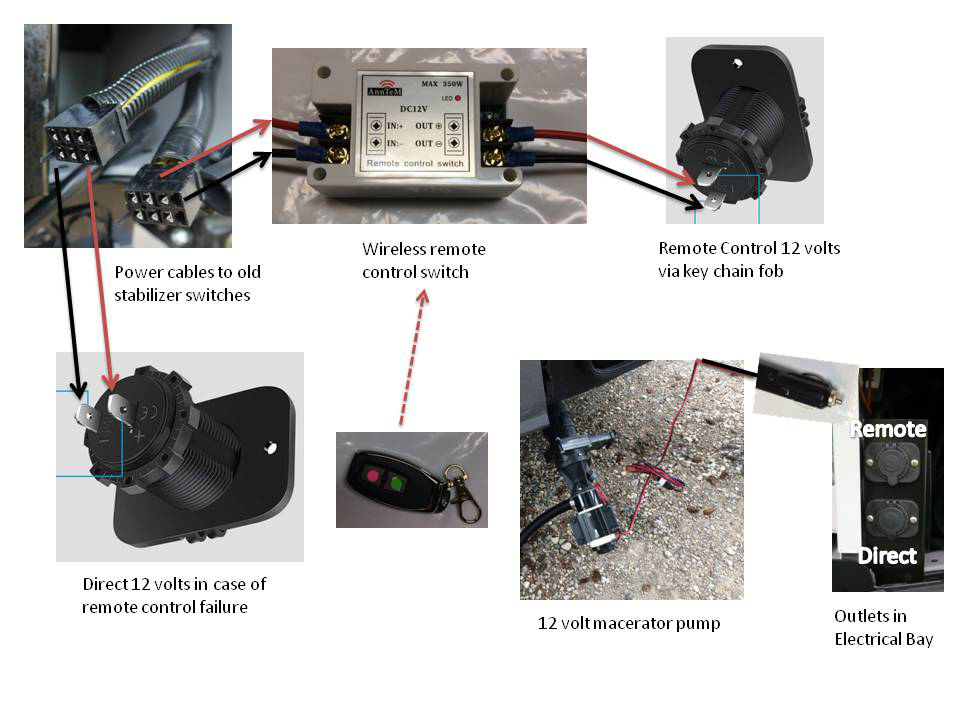
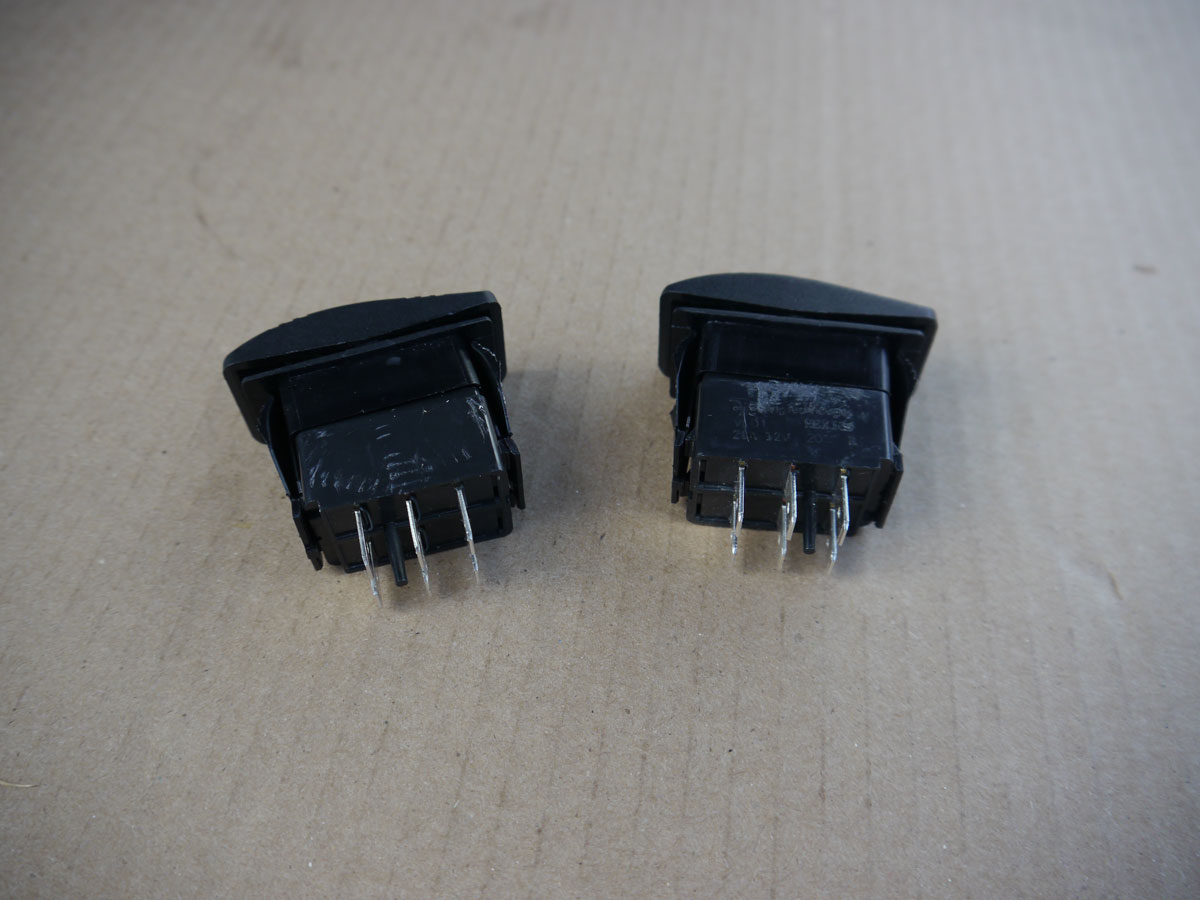
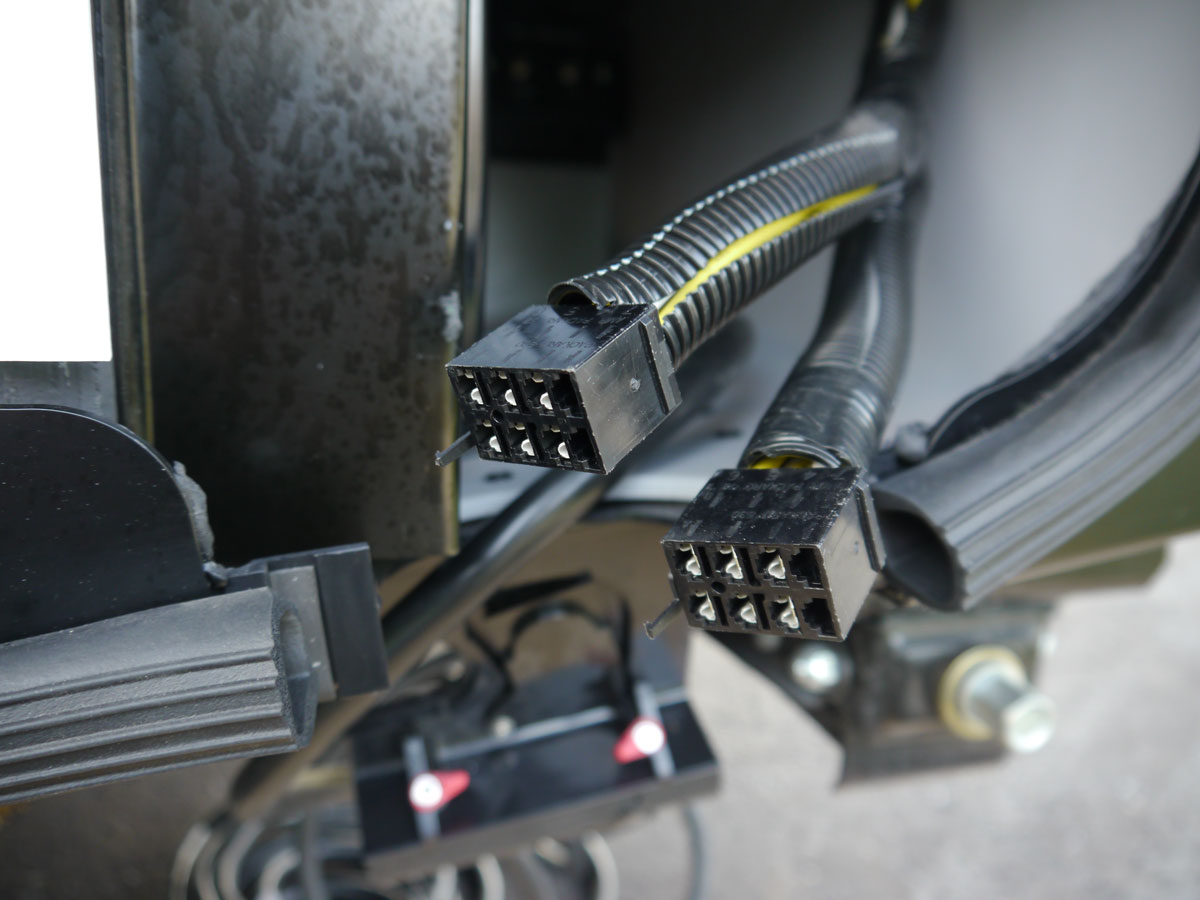
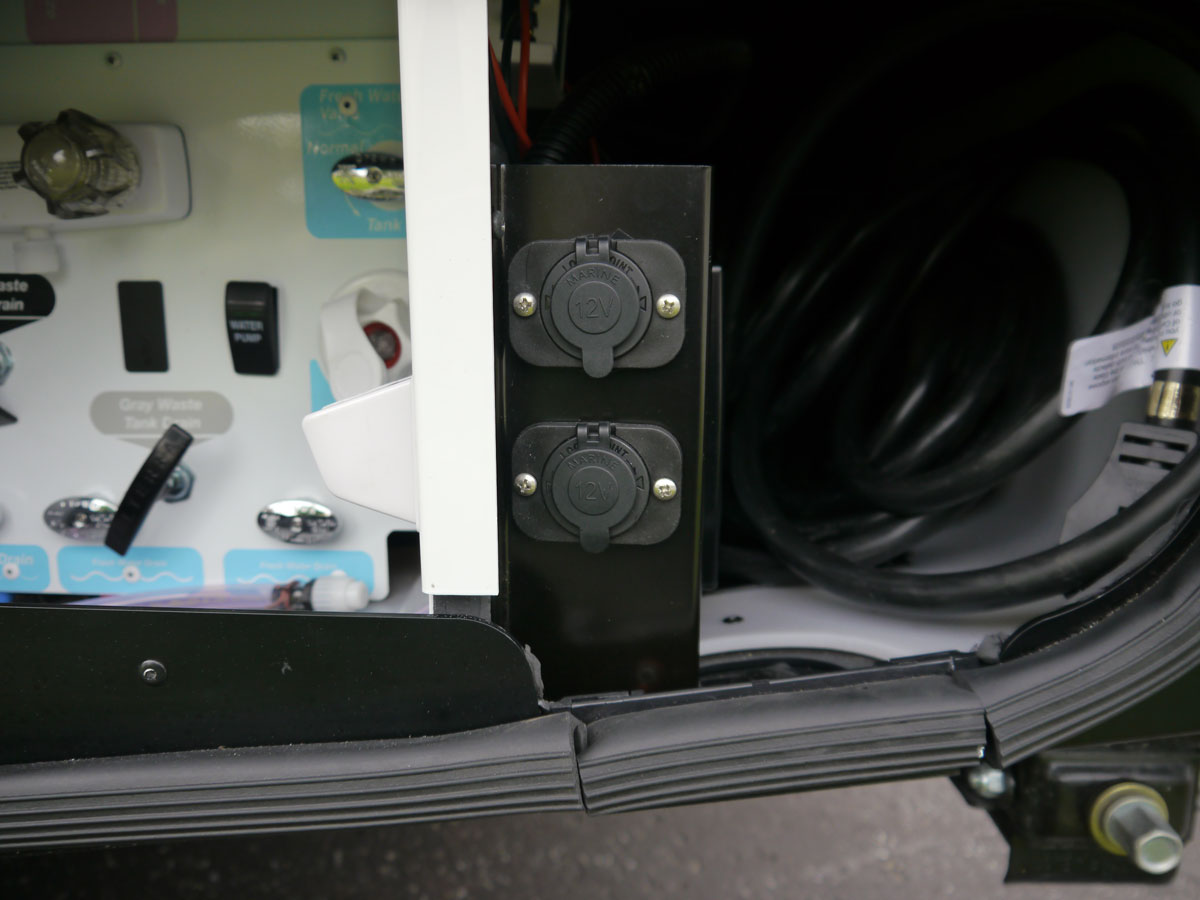
The electrical part of the setup was the only challenge, but not difficult. As part of the weight reduction program we removed the rear stabilizers, and saved some weight. This decision gave us access to 12 volts that was hooked up to the power switches for the legs. We removed the two leg actuator switches located in the top righthand corner of the wet bay, and added two 12V sockets to the bracket that guards the electrical side of that same locker area. After connecting them to the old wiring for the leg switches, I wired in the 30A wireless remote control switch in between the 12V feed and one of the new sockets. To cater for the possibility that the remote control switch might inconveniently fail someday out at the dump station, the second 12V connector is hooked up directly to the other old leg switch wiring bundles, thereby getting 12V directly to the macerator pump to get the dump done in the event that the remote switch ever does fail.
Here is a diagram of the above explanation:
Advantages to our macerator setup?
• Speed of operation during the dump process
• The traditional 3” dump hose option is still fully available should we have a macerator pump system failure. (Not unheard of… 2010 in St. Johns Newfoundland – we had a pump failure on our Class B dump system and had to limp home while getting very creative to rig up a hose system using its emergency cleanout port. Lots of mess, lots of fuss. That failure was a corroded wiring connector at the pump; the pump itself was fine.)
• The sewage drain outlet can still be used as per normal during tank and valve cleaning, and the likes.
• I get to talk to my dump lane neighbours a bit longer
• Did I mention No mess, No fuss?
Disadvantages to our macerator setup?
• Takes a bit longer to setup and use than a built-in one would
Details of our mod are below:
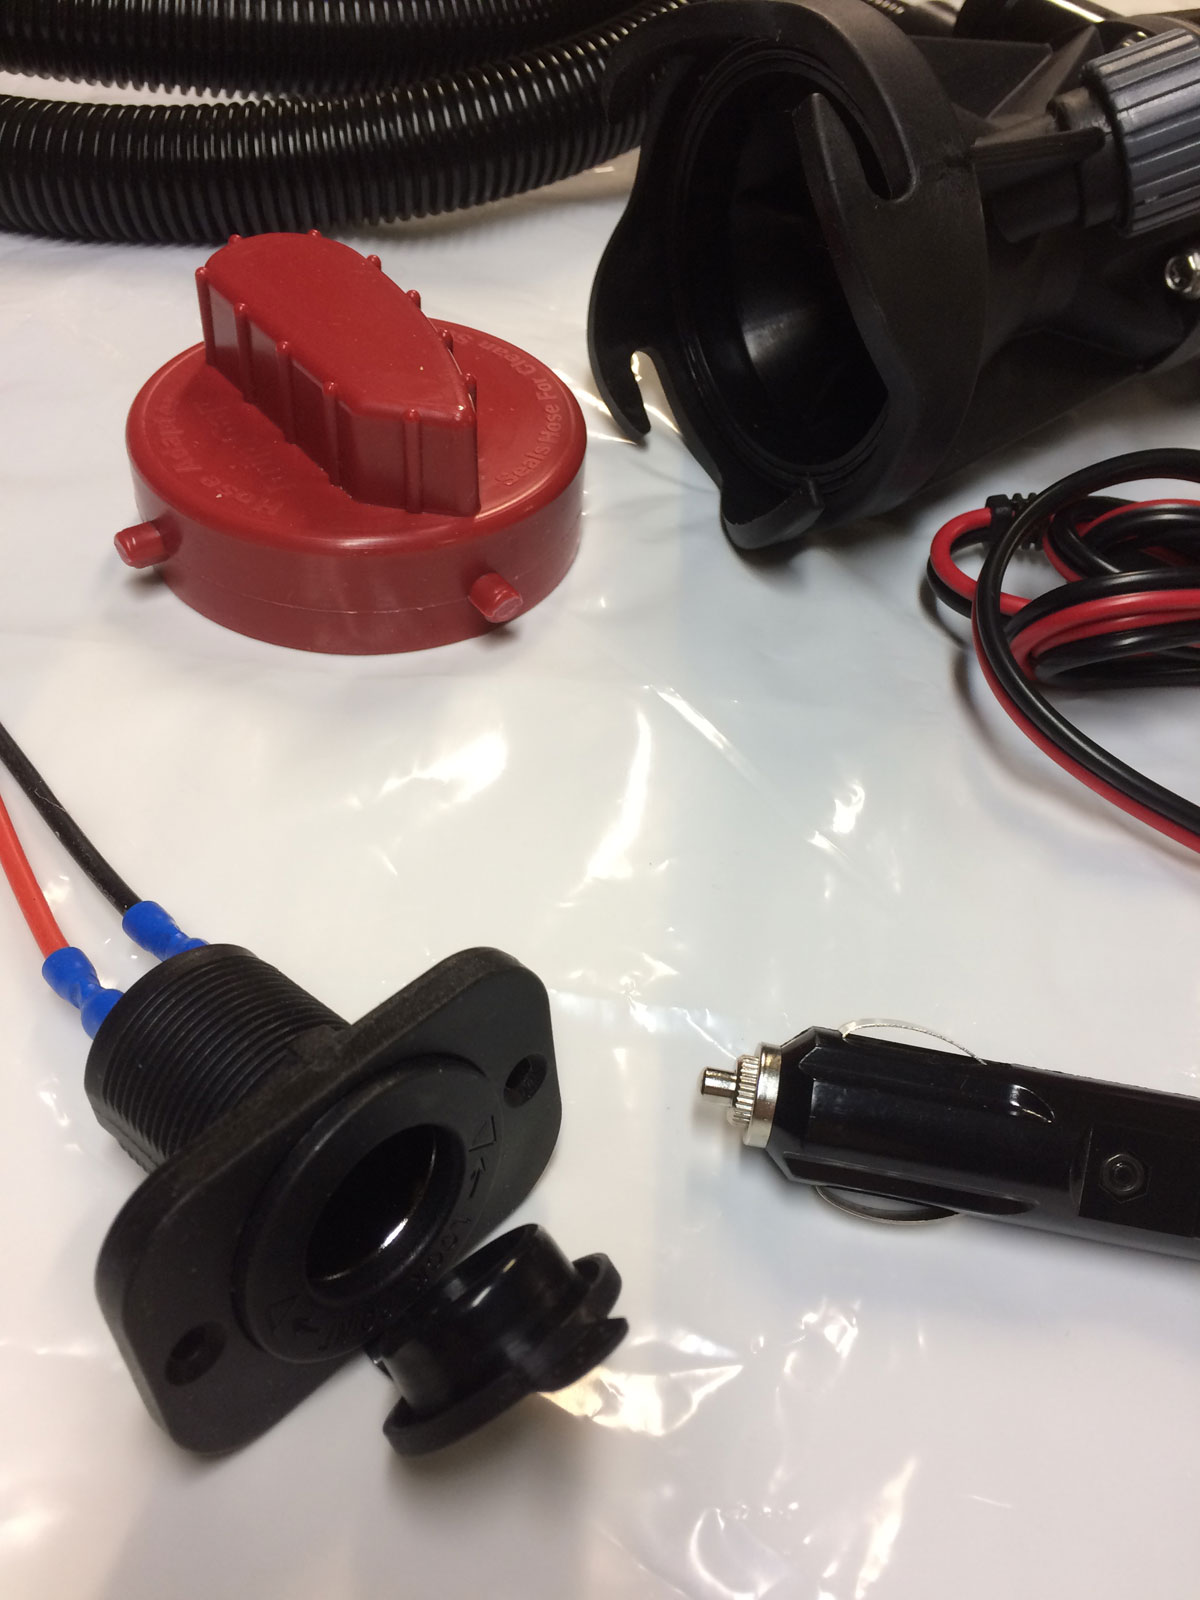
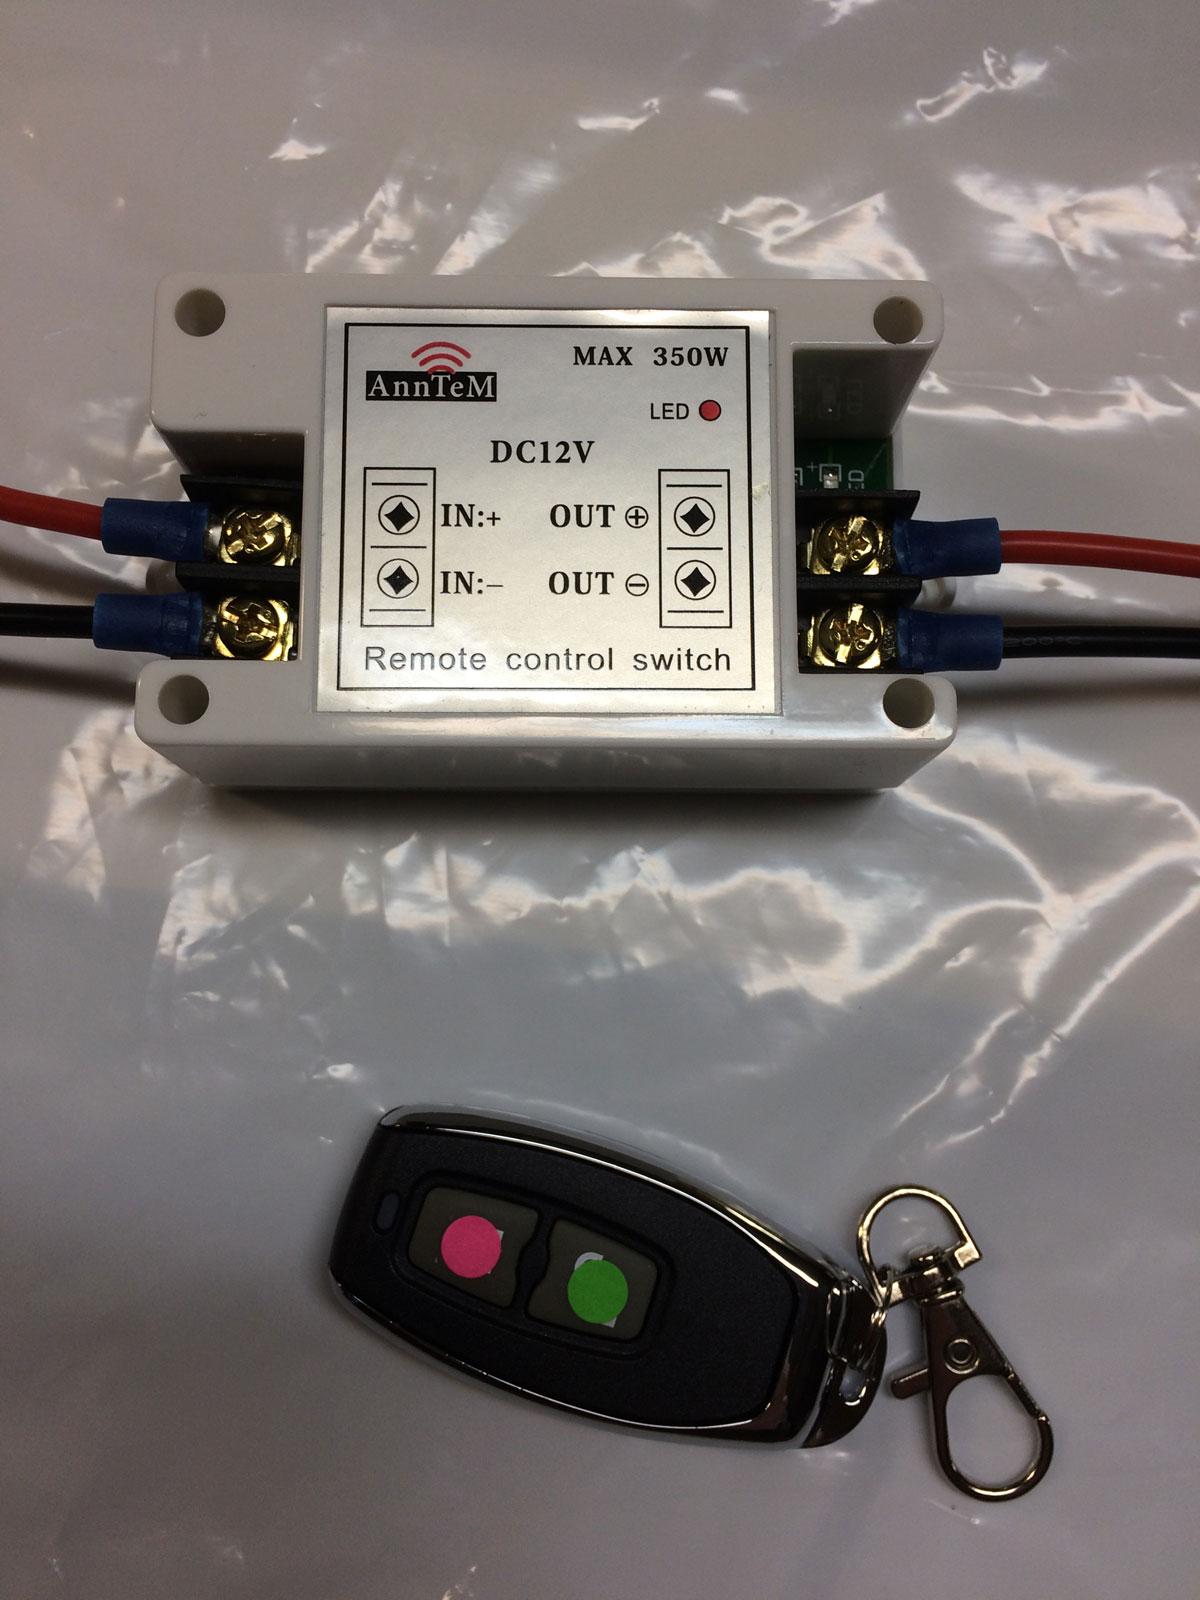
Here is a quick view of the layout of the components - starting at top right: the 10’ hose, the macerator pump with the end cap to keep things dry when not in use, the 12V plug that fits into a 12V connector, and the wireless remote switch that hooks up to a power and ground wire from the old 12V leads from a stabilizer leg.

Here are a few closeups:
These are the two dual action leg switches I removed from the top righthand corner of the wetbay. In order to get access to the power wires, these had to be pulled out.
Here is what the power wire bundles for the leg switches look like:
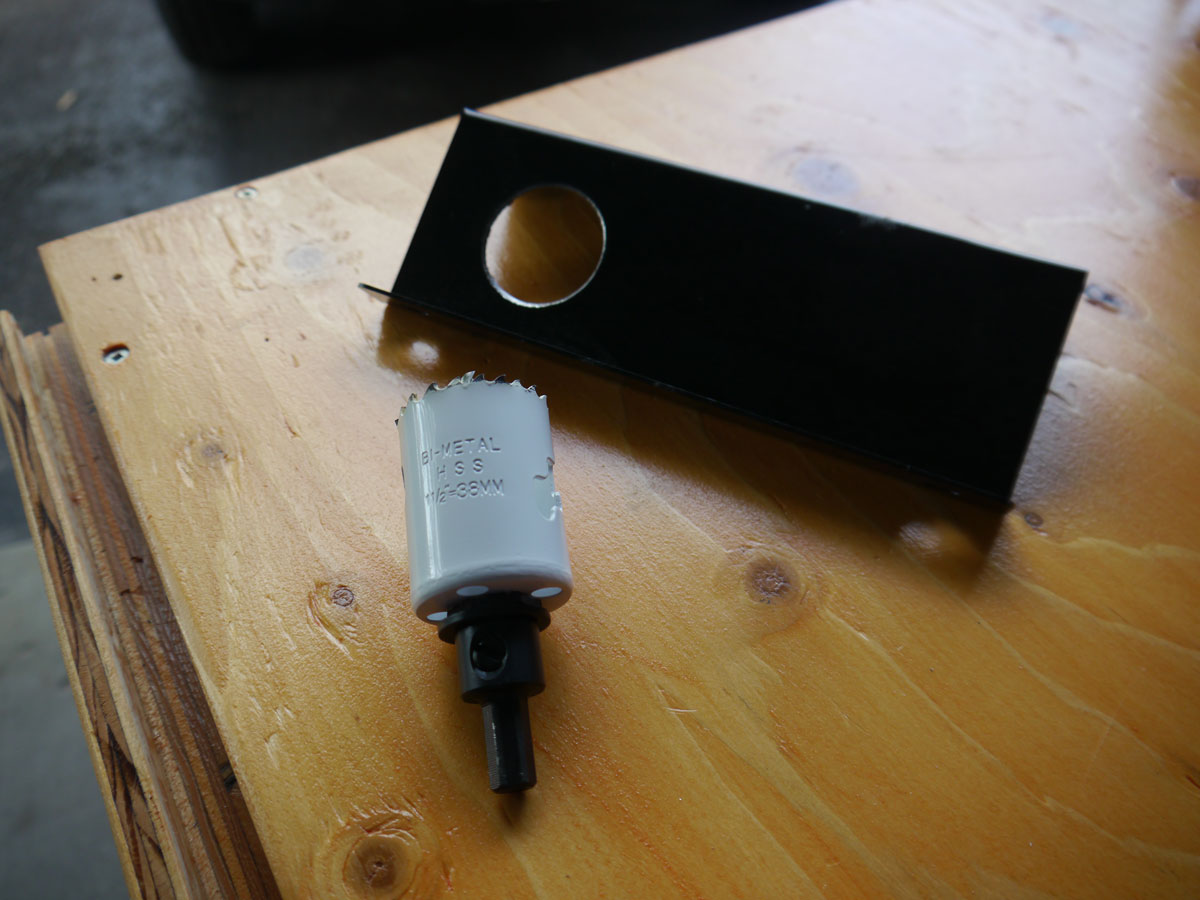
I removed the steel guard bracket protecting the auto-transfer switch on the electrical side of that locker bay, and drilled a couple of holes. A 1 and 1/4” hole saw provided the perfect clearance. This first one was 1 1/2”, which was not ideal, but Ok.
The finished location for the 12V outlets makes them very accessible.
I hooked up all of the wiring for this mod using AWG number 14 male bullet connectors and female bullet connectors between components, and number 12 quick connect spade terminals for the connection to the coach wiring. These spade connectors worked out great because the coach wiring bundle block accepted this type of insert. I used AWG 14 guage wire for all circuits.
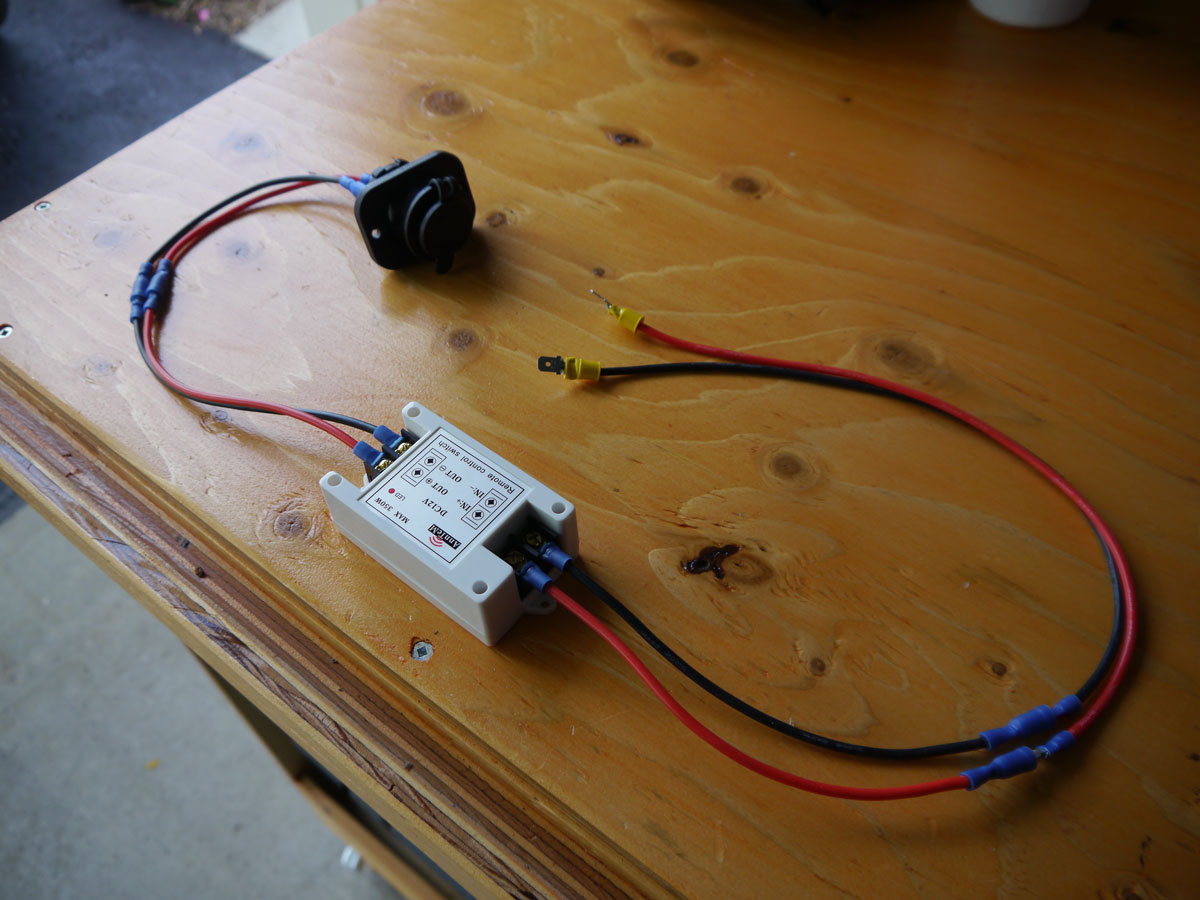
For the wireless side of the circuit, after finding a positive and negative terminal in one of the wire bundle blocks, all I had to do was insert the leads from the wireless switch into their respective terminals. For the “hot wired” 12V receptacle outlet, I just inserted the leads from the outlet directly into the other wire bundle block. This makes the top 12V outlet powered by the wireless switch, and the bottom 12V outlet powered full time. (Intersting note - the power for the stabilizer legs actually comes from the Sprinter’s 12V system. So, for this mod, the macerator is powered by the chassis battery)
I mounted the wireless switch box on the divider wall between the wet bay and electrical bay with some adhesive backed Velcro, and essentially the macerator setup was complete.
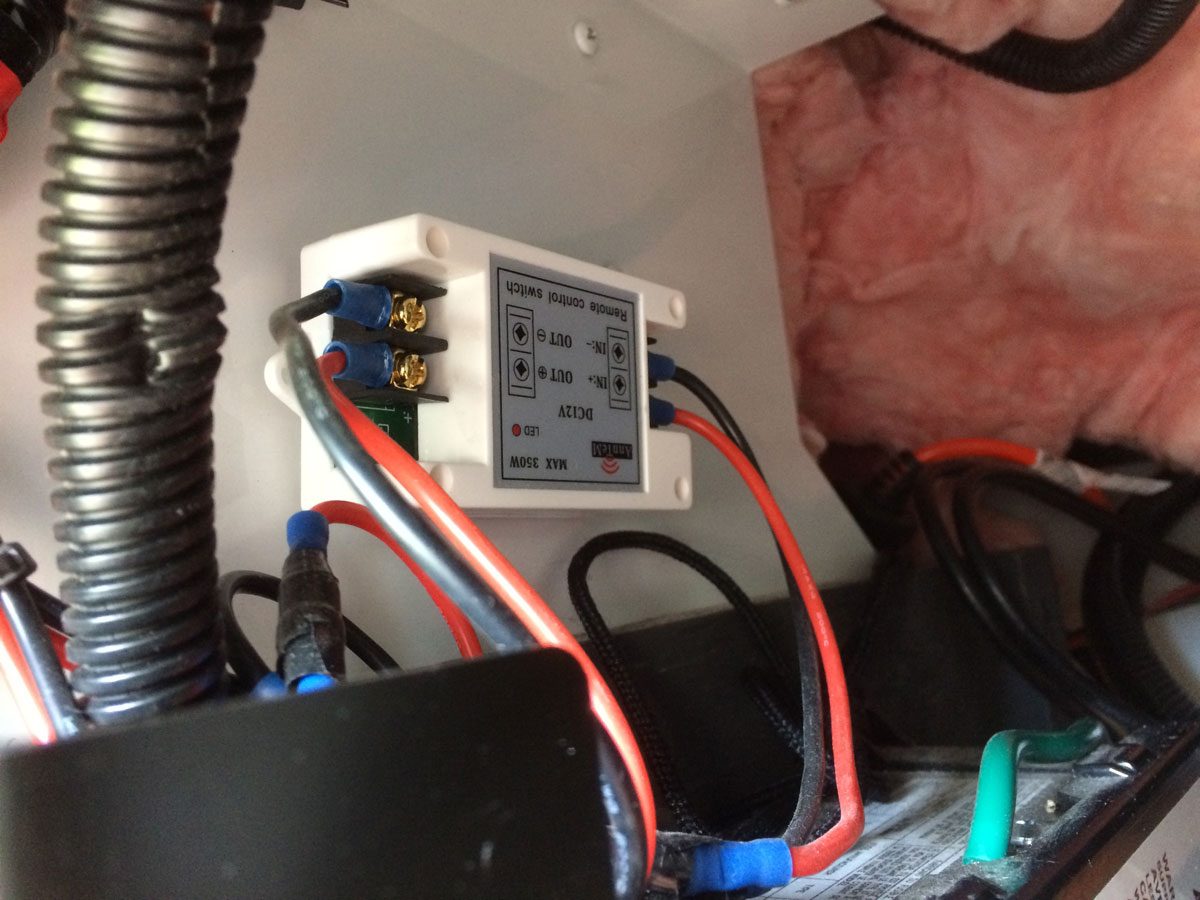
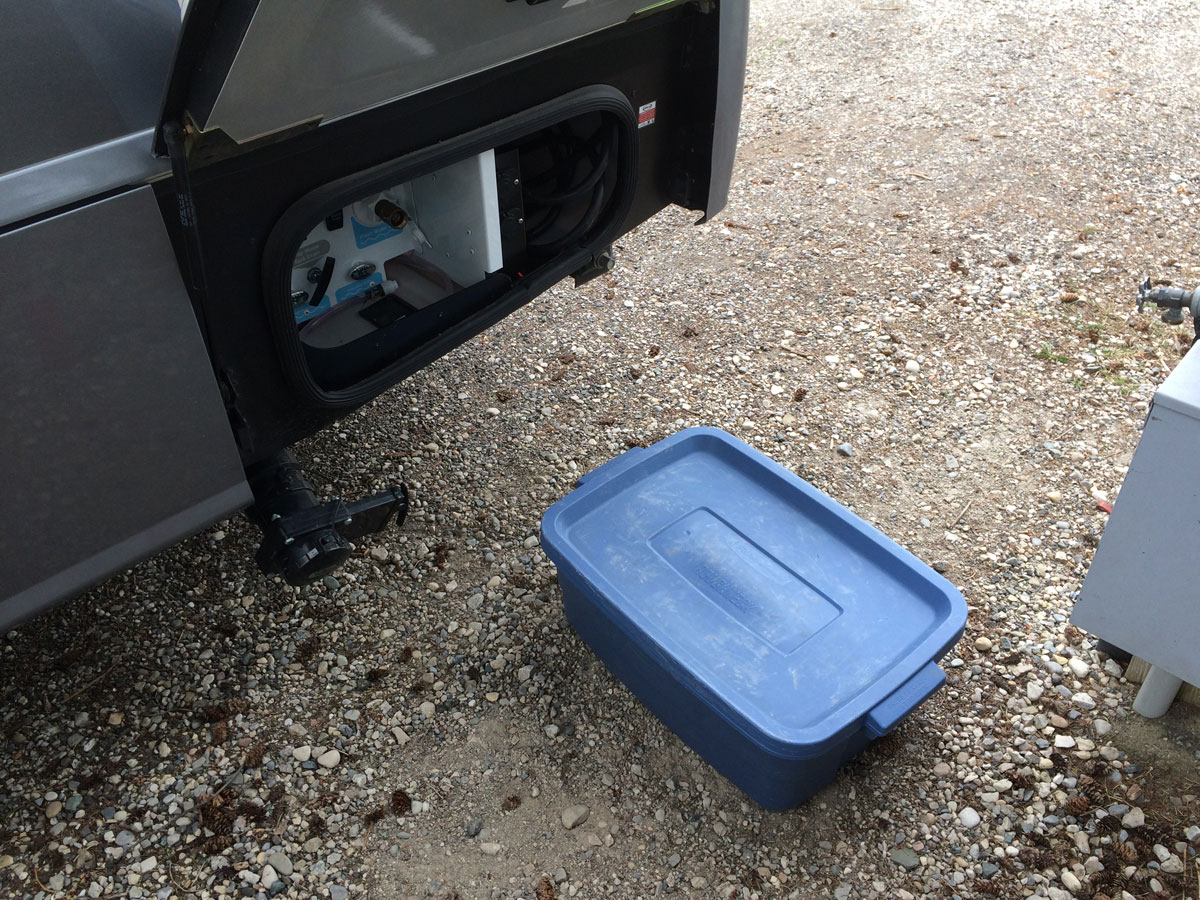
The setup works as well as expected. Currently I have the macerator and hose in a Roughtote bin that I pull from the locker beside the propane tank, hook up the macerator to the coach dump port, plug in the power plug, open the desired valve, my wife hits the switch on key remote for the pump power and I start dumping. It is not quite as seamless as a built in system, but I really like the ability to be able to service the valves and use the system as intended in the event of a macerator failure. It takes a few extra seconds to get hooked up, but I imagine it takes less time than using a conventional 3” hose hookup.
Here are a few photos of how it all turned out:
I keep all the components of the system in a bin I pull out of a locker:
I store the black tank flush hose in that same bin:
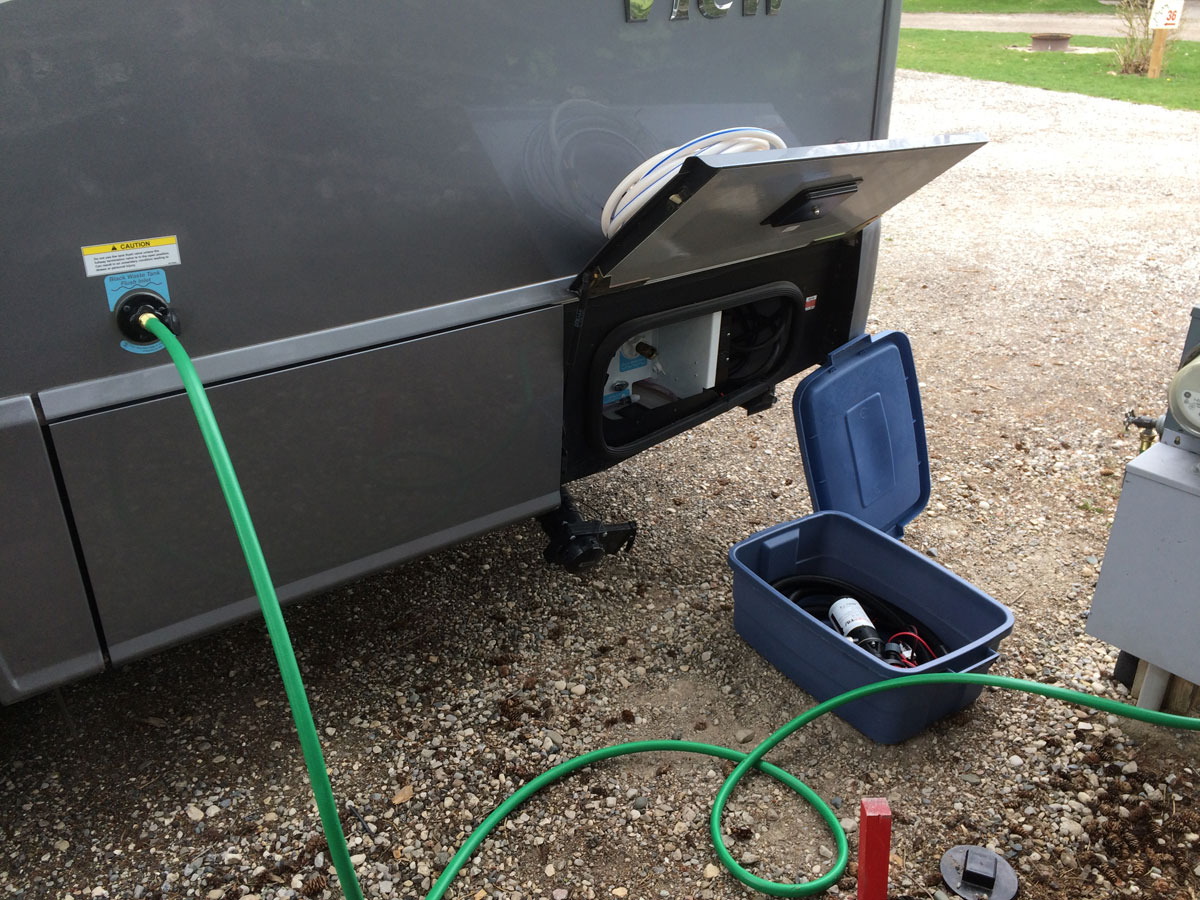
Here is the macerator and wiring to the remote controlled power switch:
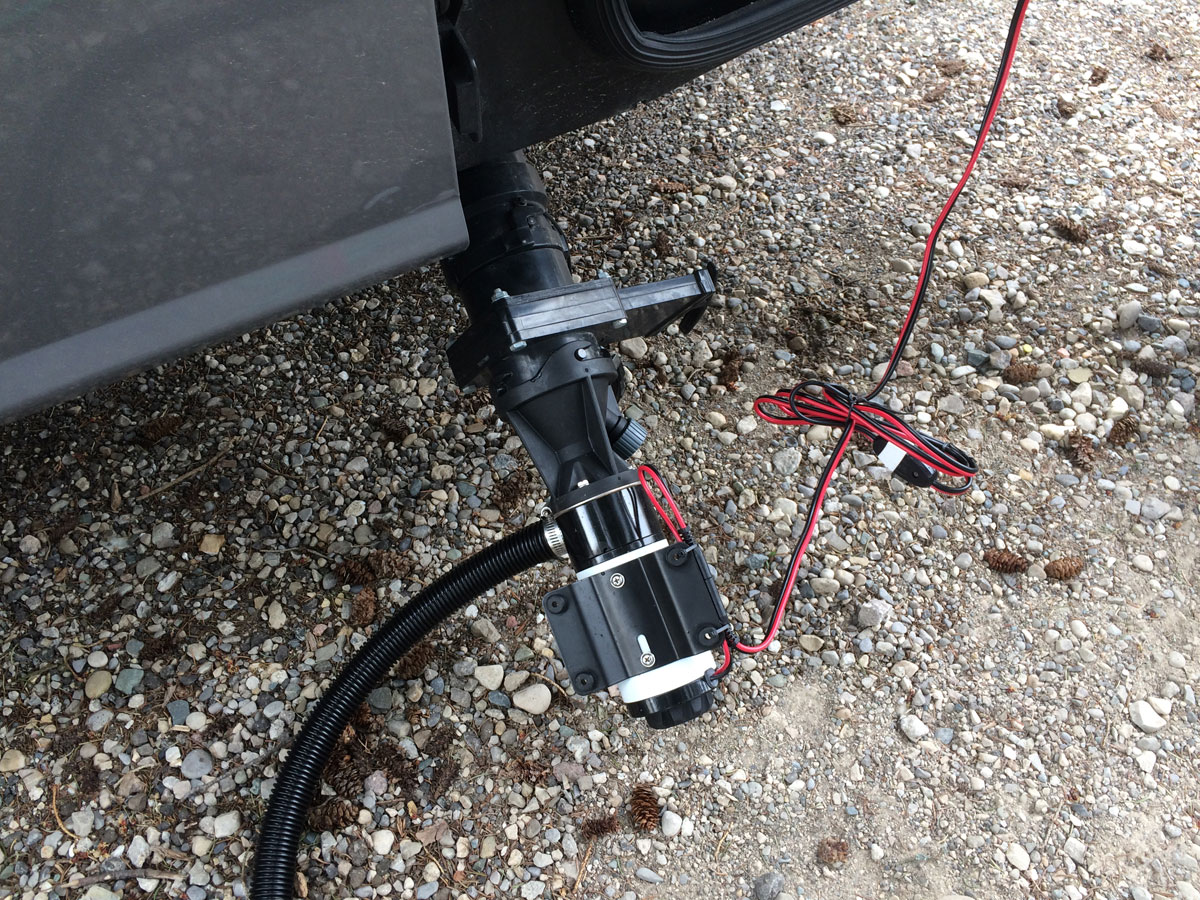
And, this is the whole setup ready to go:
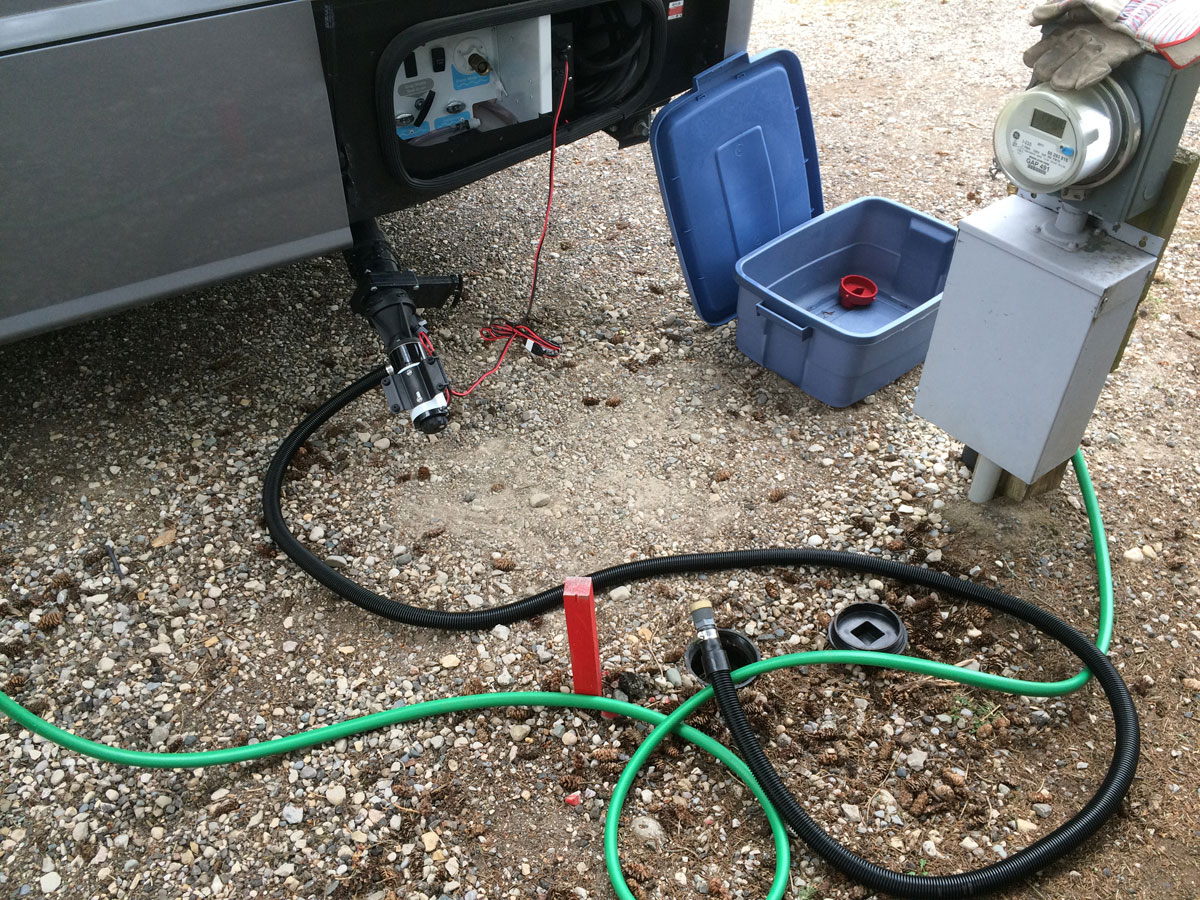
Working as planned. No mess. No fuss.