RV Lithium Battery Upgrade | RV Mods

Dry Camping at Silent Lake Provincial Park, Bancroft, Ontario
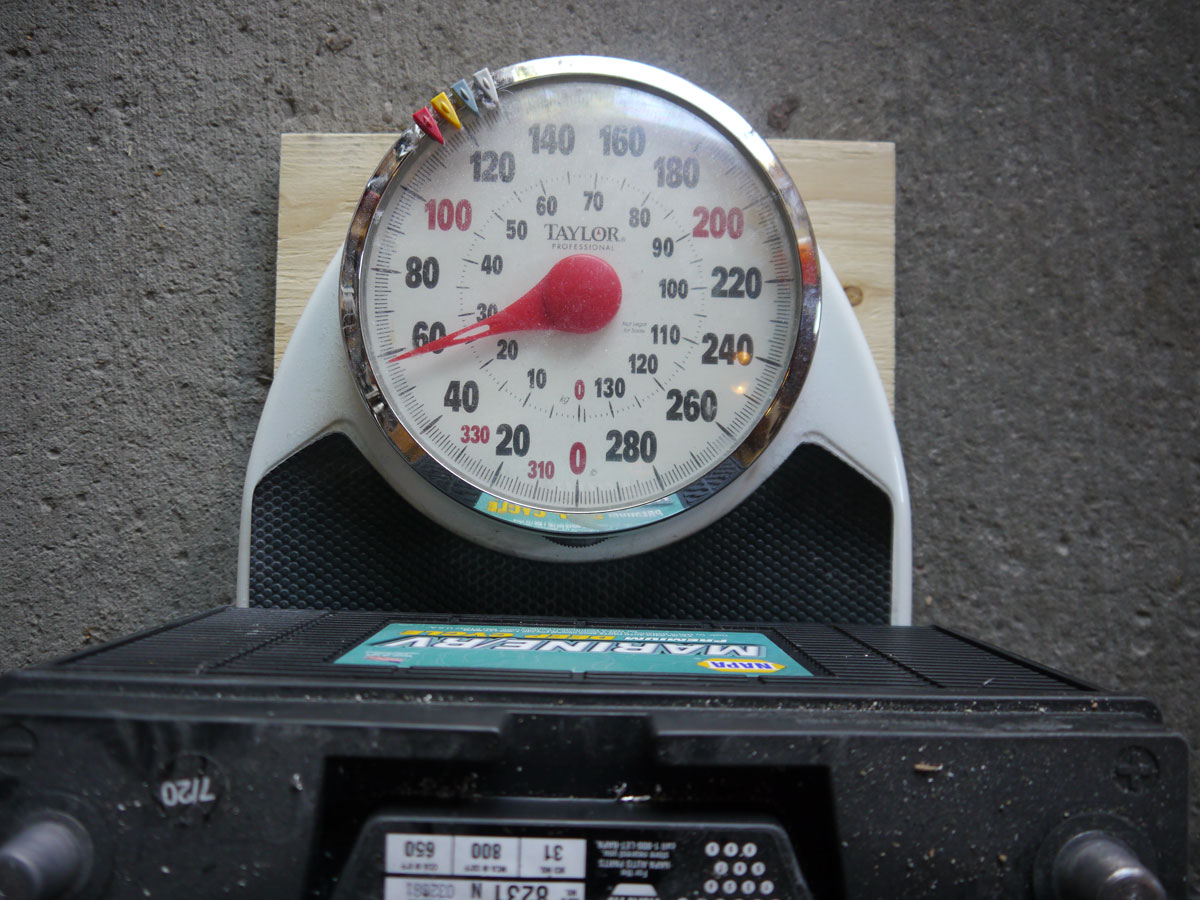
Our lithium upgrade to two Battle Born BB10012 105 amp hour batteries was the first mod we did – and we chose this mod for a few reasons. I wanted the weight reduction it would give us, as we have plans to pick the kids up every now and then and travel as a family of four. With four in the coach, and loaded for an epic adventure, there is very little margin to the Sprinter’s max weight of 11,030 pounds. Every pound counts. Another reason, of course, was we wanted to capitalize on the advertised increase in useful battery capacity – at least double the available power? That sounds good! And the last reason, but not the least, was to stop the painful exercise of removing the batteries for the winter and hauling them into the basement to keep warm. The AGMs in our last Class B were mounted up in the top right hand corner of the Sprinter’s engine compartment, and were a real bear to remove. Weighing in at close to 60 pounds each, it took two of us to remove them and every year would result in some form of back pain that would stick with me for weeks. Sure… we didn’t have to remove them, but we have previously lost batteries over the winter at the temperatures we get up here so I started that practice many years ago. Following this procedure, for both our coach and chassis batteries, they became problem free each year (but not my back). Now, with the lithium coach batteries, I can leave them in all winter and not have any worries.
(If the truth be told, now that we have the lithium coach batteries in all year, I am also leaving the chassis battery in as well. I simply disconnect it from the Sprinter using the quick disconnect located down by the gas pedal, thereby ensuring that there is no parasitic discharge occuring during the time it is in storage. With this chassis battery procedure, the new lithium coach batteries, and the two new disconnect switches I discuss on the Mods page, our winterization exercise has been greatly simplified.)
Before we invested in two LiFePO4 batteries we did our research on the web, read a bunch of reviews, and got as many facts as we could on the advantages of making the switch. Here is a lithium battery article that was very helpful, written by a company up here in Canada that specializes in off - grid systems:
How to find happiness with LiFePO4 batteries
And, here is a link to the user’s manual for the Battle Born Batteries we chose:
Battle Born BB10012 Users’s Manual
Do you need to install a DC - DC charger as part of a lithium battery upgrade? Well, that depends on what you are trying to do… Winnebago has already taken care of protecting the post 2019 model View / Navion’s Sprinter alternators from damage due to potential high charge rates that a lithium battery can withstand. But, if you consider the factory alternator charge rate too low on these newer View and Navions … then perhaps a DC - DC charger installation that bypasses the Charge Mate Pro 40’s factory protection is worth considering. For our operations we have not needed any more charge rate than what the 2020 and newer production alternator system typically provides. By the time we get to our next destination, after a number of hours of highway cruising, the coach batteries are nicely topped off, even after a night of dry camping. We just have not needed more than the 25 - 30 amps of alternator charging that came out of the factory. If you have a View / Navion that was made prior to 2020 and before the introduction of the factory installed Charge Mate Pro 40, have a look at this video from Grandpa Ron. He discusses the issue of alternator protection and charging rates in-depth. This video might answer your DC - DC charger questions:
Grandpa Ron and DC - DC Chargers for your View / Navion
The lithium battery install was very straightforward, with only one snag popping up: The Winnebago paralleling cables connecting the batteries were not quite long enough for the terminal post locations on the new Battle Borns, so I had to drop tools and go hunt down some new cables. I bought a couple of 2/0 AWG 18” cables with 3/8” connectors, and they worked fine. (The wire gauge is super important - when the microwave is being fed from the batteries via the inverter, you are pulling around 160 amps! Don’t skimp!)
I did not take the time to investigate flipping the batteries around so the posts were at the bottom: I just emulated the battery configuration that Winnebago settled on, thinking that my best chance of using their cables would be if I did the same layout. The Battle Born terminal posts are a bit of a pain; it would have been nicer to have the option to mount the cables with a bit more room to get tools on the lug bolts. But, the initial install was relatively quick, aside from the search for new paralleling cables…
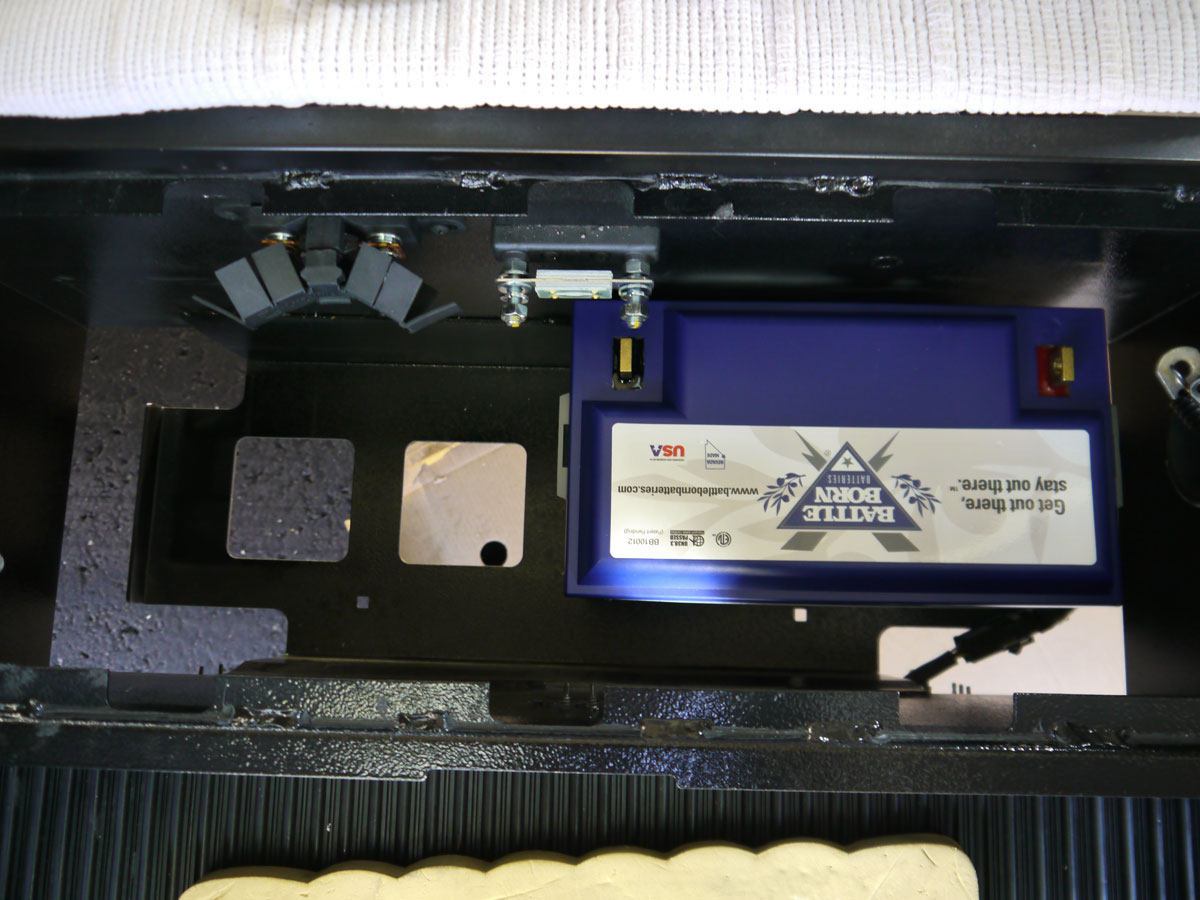
Now, when I later added the Victron BMV 712, a heating pad, and insulated the battery box - things got interesting as space became a premium. The batteries had to sit higher because of the rubber matt and heating pad they were resting on, and the batteries also had to move forward a bit to get some insulation on the back wall of the battery box. Also, the ground cables had to be re-arranged to get hooked up to the Victron shunt. But, those details are contained in another mod description.
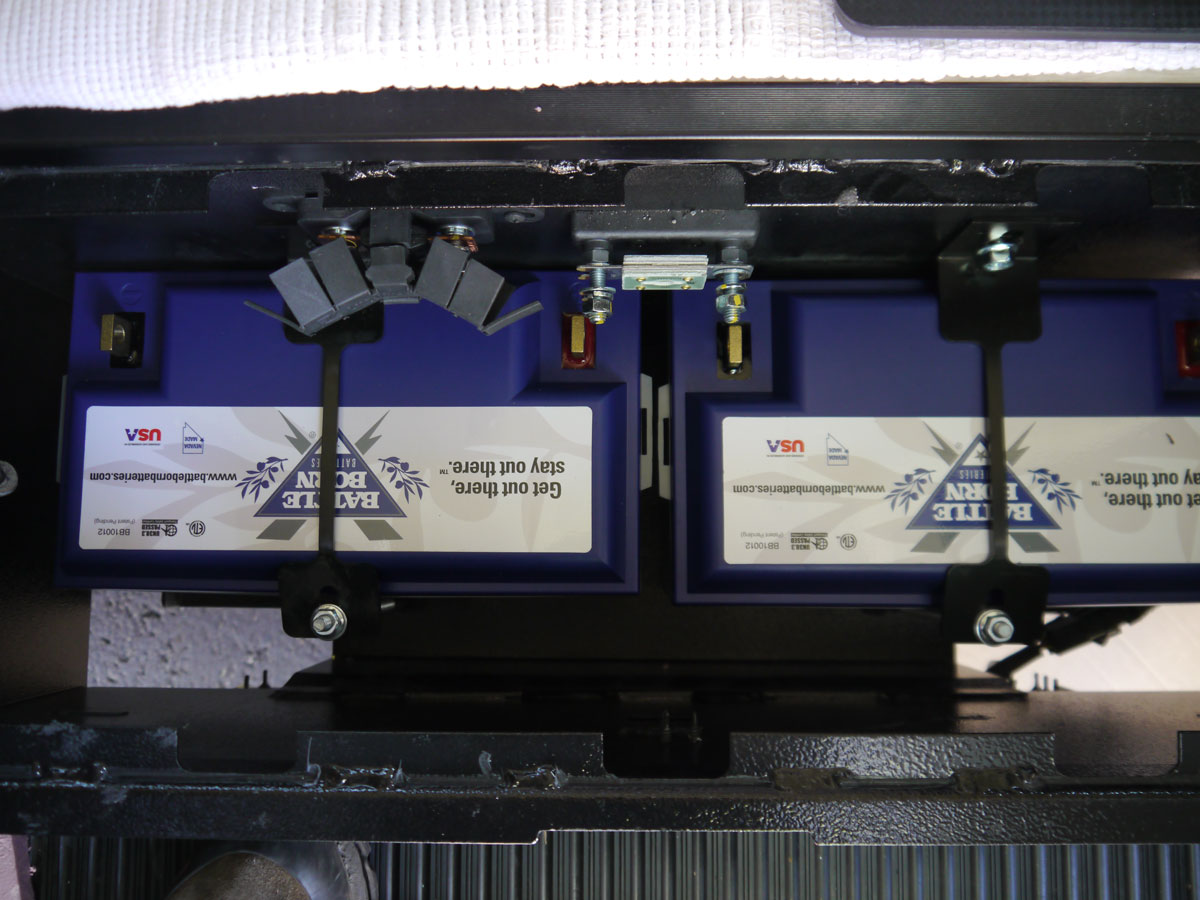
This is a photo of the Winnebago battery configuration - Until I became familiar with the cable orientation, I numbered them all to ensure I started off with the same placement as Winnebago had left them in:
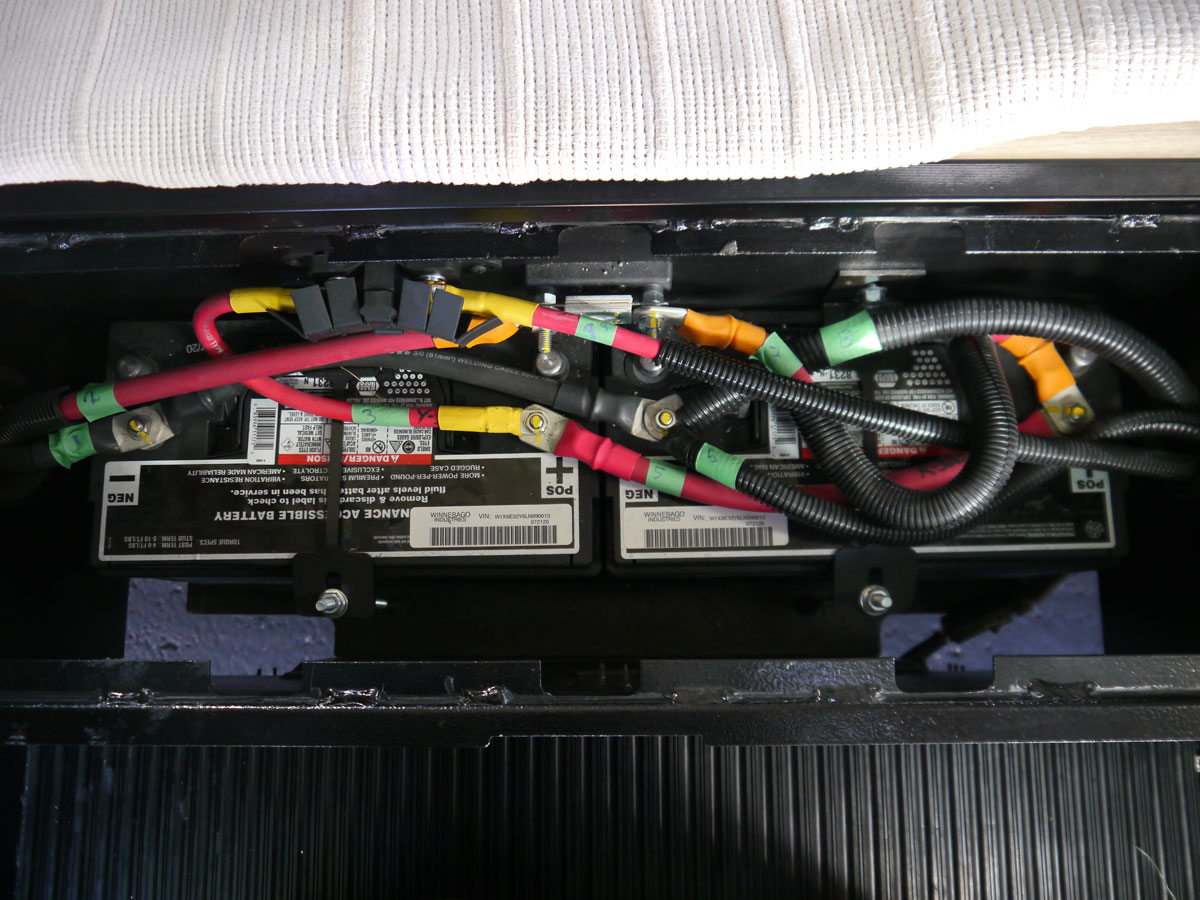
You can see that the batteries are essentially open to the outside world, in order to get a traditional lead acid battery venting safely: Later on when I installed a warming pad for these lithium batteries, I enclosed the battery box as best I could.
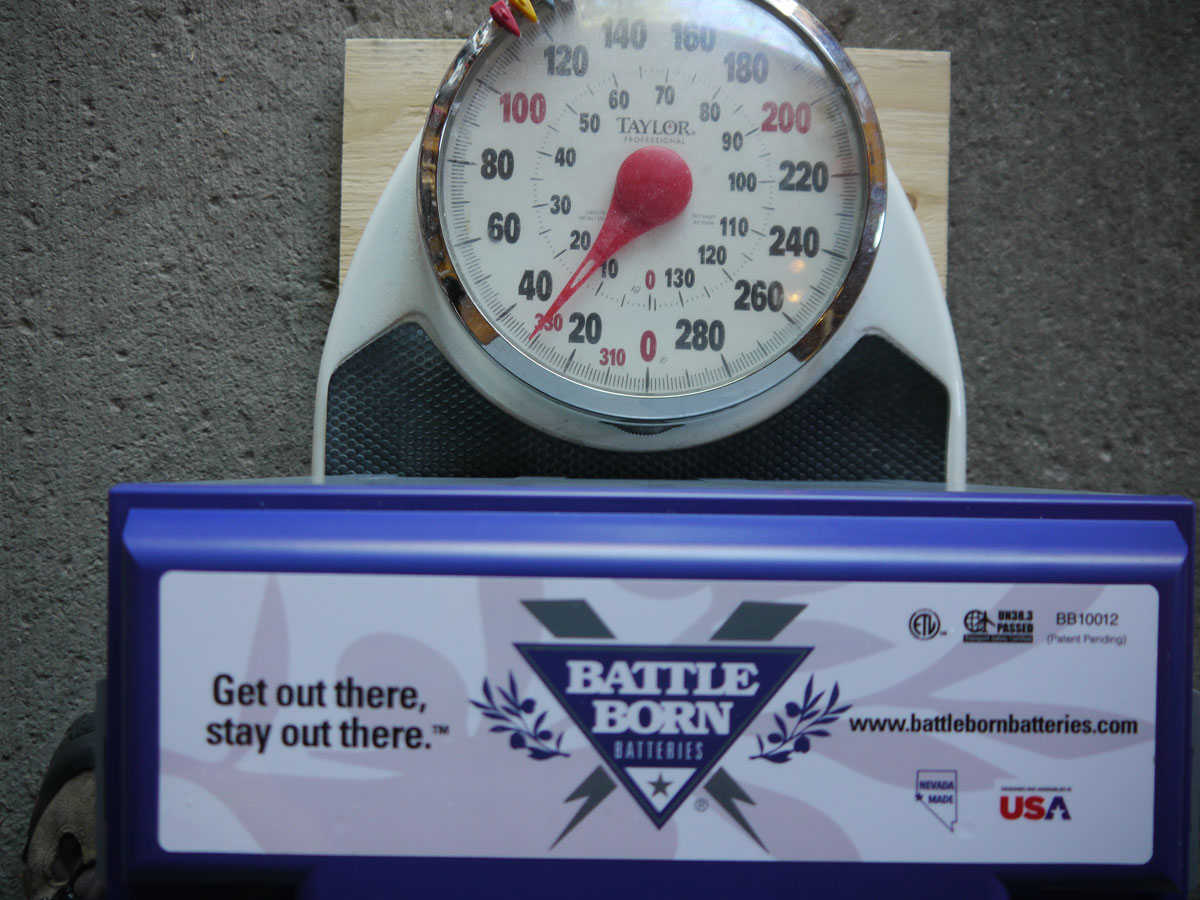
These shots show the weight comparison of the lead acid vs the Battle Born lithium batteries. Not quite a 50% reduction in weight, but pretty close:
Replicating what Winnebago had done regarding cable placement got us up and running fairly quickly.
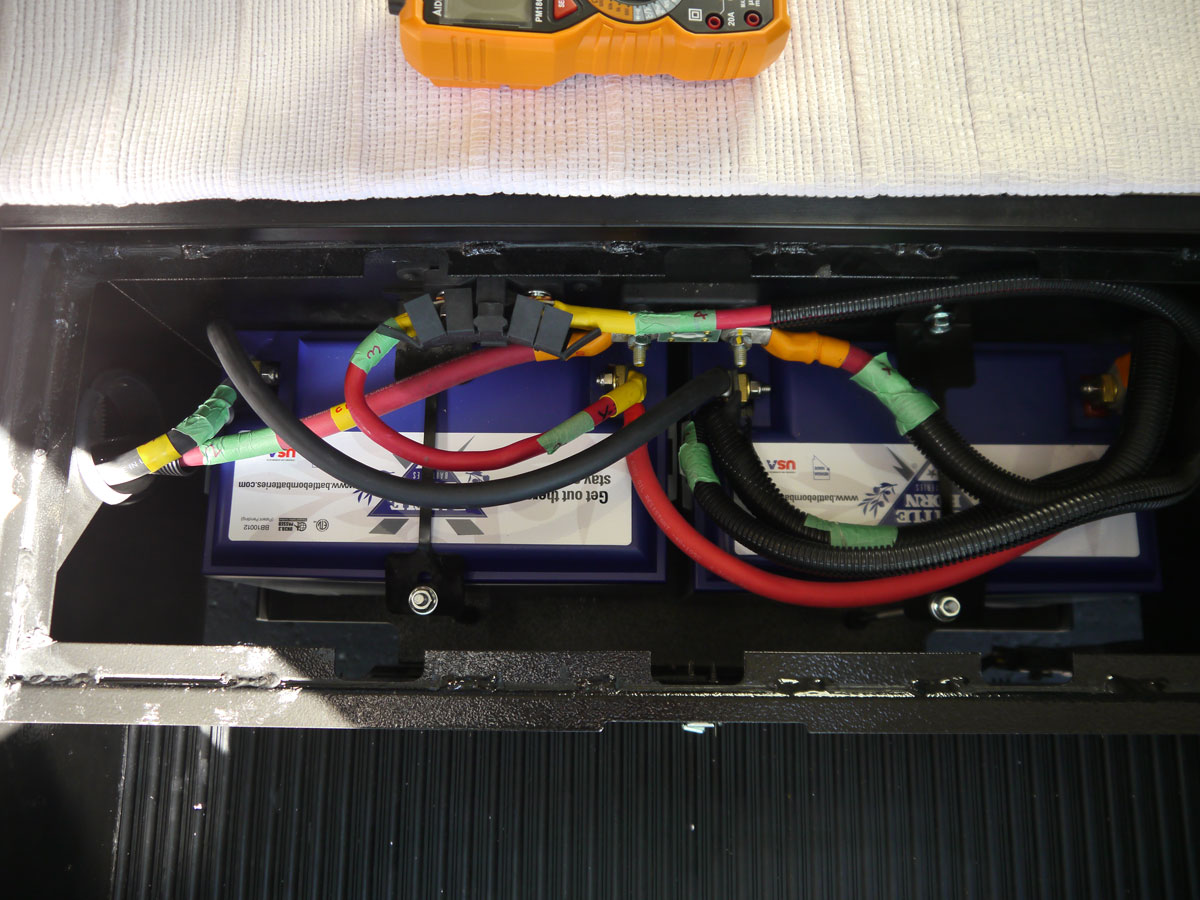
After the installation, reprograming of the Xantrex charger / inverter and Zamp solar controller to account for the new lithium batteries was very straightforward. Telling the Xantrex and the Zamp controller about the new batteries ensures optimum charging. The user’s guide for each of these systems details the easy reprograming procedure.
So, how do we like these batteries? Well, we are thrilled with them. In a load test I did, the advertised amp hour rating was shown to be conservative and the performance was jaw dropping compared to my experience with lead acid batteries, even AGM batteries. (The factory batteries were not AGM batteries, so this is a huge step up in performance.)
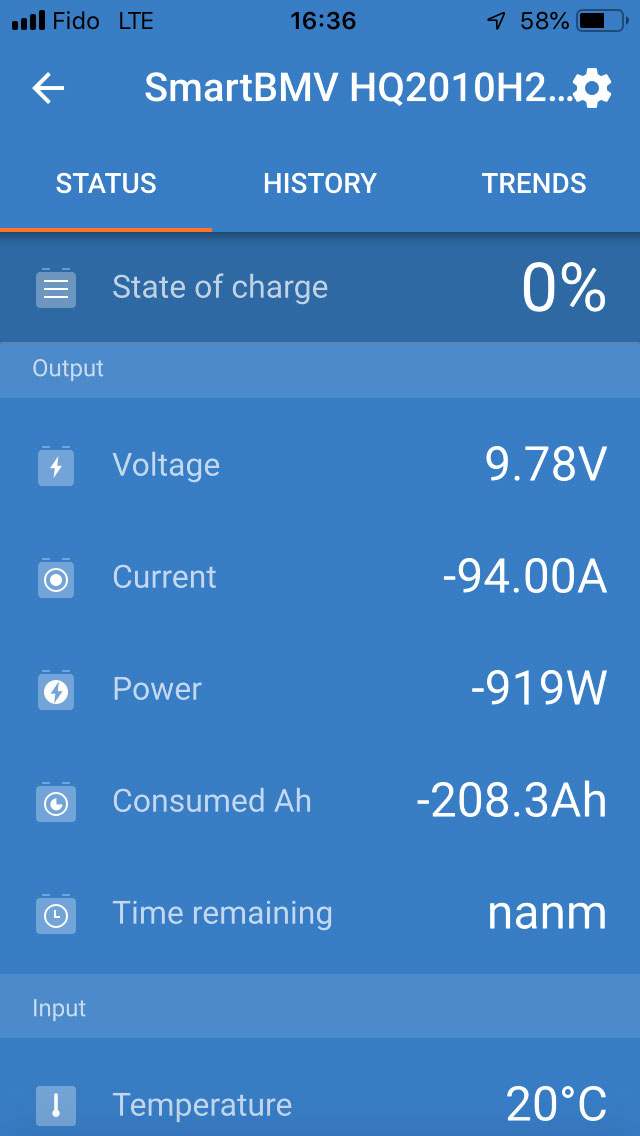
In the test I did, at the recommnedation of the vendor who sold me the batteries, I hooked up a heater and used the 750 watt setting to watch the performance. My Victron BMV 712 bluetooth app was handy to see everything unfold. Doing the arithmetic, I calculated that I should get 2.5 hours of heater operation out of the 200 amp hours of available Battle Born power - these batteries are really 105 amp hours each, but I like to be conservative and use 100. In the end, I exceeded 2.5 hours and also got more than 200 amp hours before I ended the test. I had expected the batteries to shut down at around 10 volts, but as you can see from the screen shot below, they were still humming along at less than 10 volts! It was here that I chickened out and ended the test. (I don’t know about you, but I was very impressed that these things would push out 85 to 95 amps for over 2.5 hours!)
We have done a bunch of dry camping in early spring and late December conditions, and are extremely happy with the battery capacity and charging rate provided by the generator. I have the Xantrex XC Inverter / Charger set to a max charge rate of 80 amps, and we get pretty close to this when the generator is charging them up.
To give you an idea of a typical warm weather dry camping battery drain we can see on the Battle Borns - arriving into camp with the batteries topped off to 100% - after using the microwave to thaw and heat up dinner, watching some TV, using some lights for nightime prep, having the fridge running all night on normal mode, and then running the microwave in the morning for about 10 minutes to cook breakfast - we usually hit the road with around 60% state of charge. (I’ve seen it as low as 40% if we have used the induction cooktop the night before for an extended period.) With the factory charging system from the Sprinter alternator, using a conservative charging rate of 25 amps, it takes three to four hours to recover the SOC from the above example, as you motor to your next destination. (For example, 50% SOC, 100 out of 200 amp/hr, charging at a rate of 25 amps for four hours reclaims the lost 100 amp/hrs of battery capacity.) It will be much less than half that time to recover if you hook up shore power, or start the Onan, and the Xantrex is charging at its 80 amps.
How about solar? After a deep discharge, if using the 200 watts of solar that came from the factory, it will take multiple days of solar charging to bring the lithium batteries back up to 100% due to the low charge rates and the variability of sky conditions. Solar is a strong player to keep the batteries relatively topped off when using normal coach loads, but its usefulness falls off quickly when you bring a toaster, microwave, or induction cooktop into the picture. Having said that, after we doubled our solar capability to 400 watts - our opinion of the usefulness of solar for everday operations changed considerably. 400 watts, on a sunny day, does a pretty good job of recovering from the breakfast and lunch use of the microwave, and is plenty for keeping the coach batteries topped up independently of the microwave or a toaster use. Yes, 400 watts of solar … very glad we did it.
Working as advertised.