RV Winter Camping | RV Mods
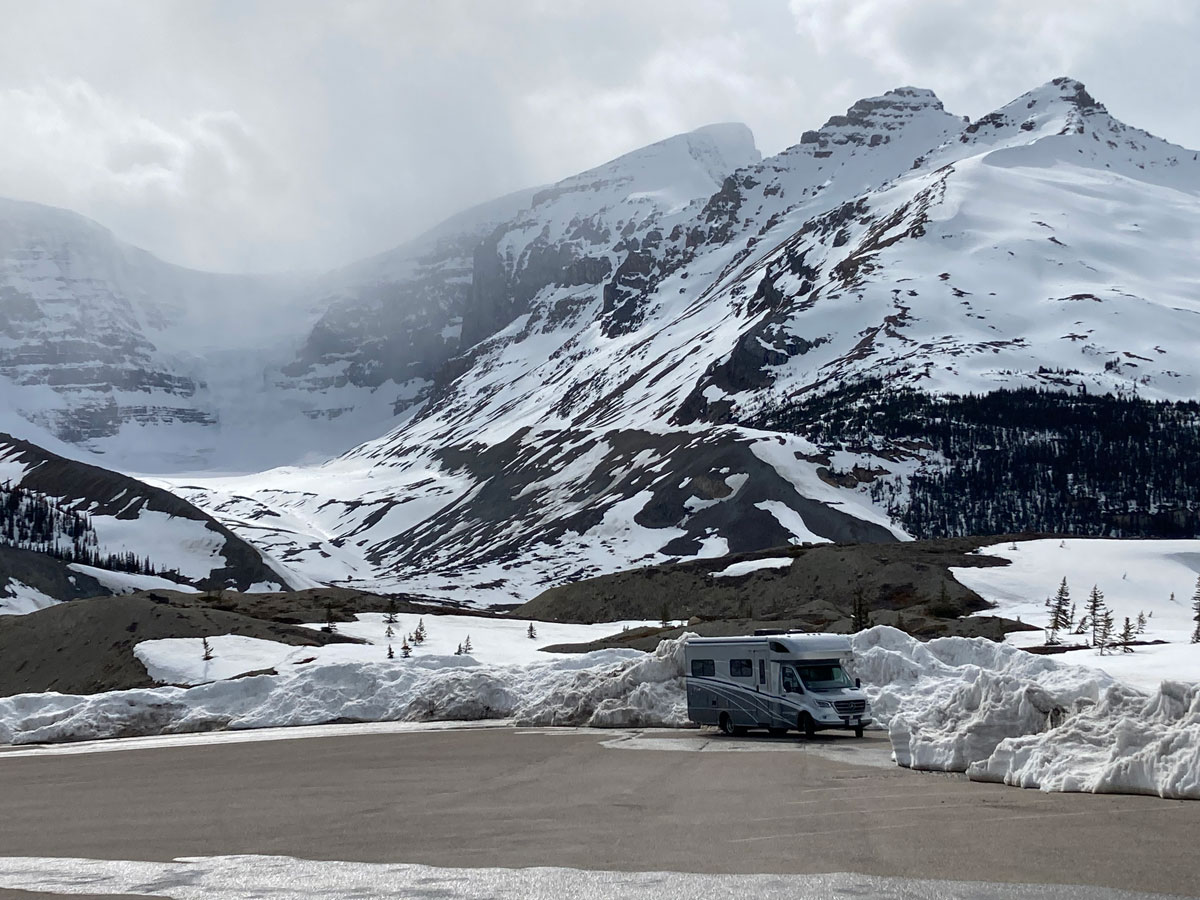
Icefields Parkway Discovery Centre - Jasper, Alberta - Yes, you can camp there!
One of the reasons we chose a View / Navion was because we felt the goal of being able to camp during cold temperatures was within reach. We were impressed that the fresh water tank and associated delivery plumbing was above the floor in the J model coach, and the Truma hot water system had a recirculation feature that would take care of any potential for the hot water lines to get cold. (The View / Navion V model for the 2020 / 2021 year has an external fresh water tank - something to keep in mind.) Our initial feeling was that if we could keep warm in the coach in the winter – the plumbing system in our J model was likely to be Ok as well. There are many reports on the web of being able to camp successfully in a View / Navion J and D model in the winter, so we crossed our fingers and hoped that those early spring and late fall nights could be tolerated, and cruising down the highway when the temperatures were below zero would be Ok as well.
But, not so fast … unfortunately (or maybe, fortunately) I found this really valuable video by the Newstate Nomads - it does a great job of revealing what the weak spot in a View / Navion J or D model is when trying to use the coach in seriously cold temperatures. The good news is that the solution to the problem is not a big deal. So, first, have a look at the problem:
This was great to discover, as I had been wondering about the wet bay design and how that spaghetti box of exposed plumbing, behind the wet bay panel, made its way into the heated area of the coach. Here is the culprit - behind this panel is where things freeze up:
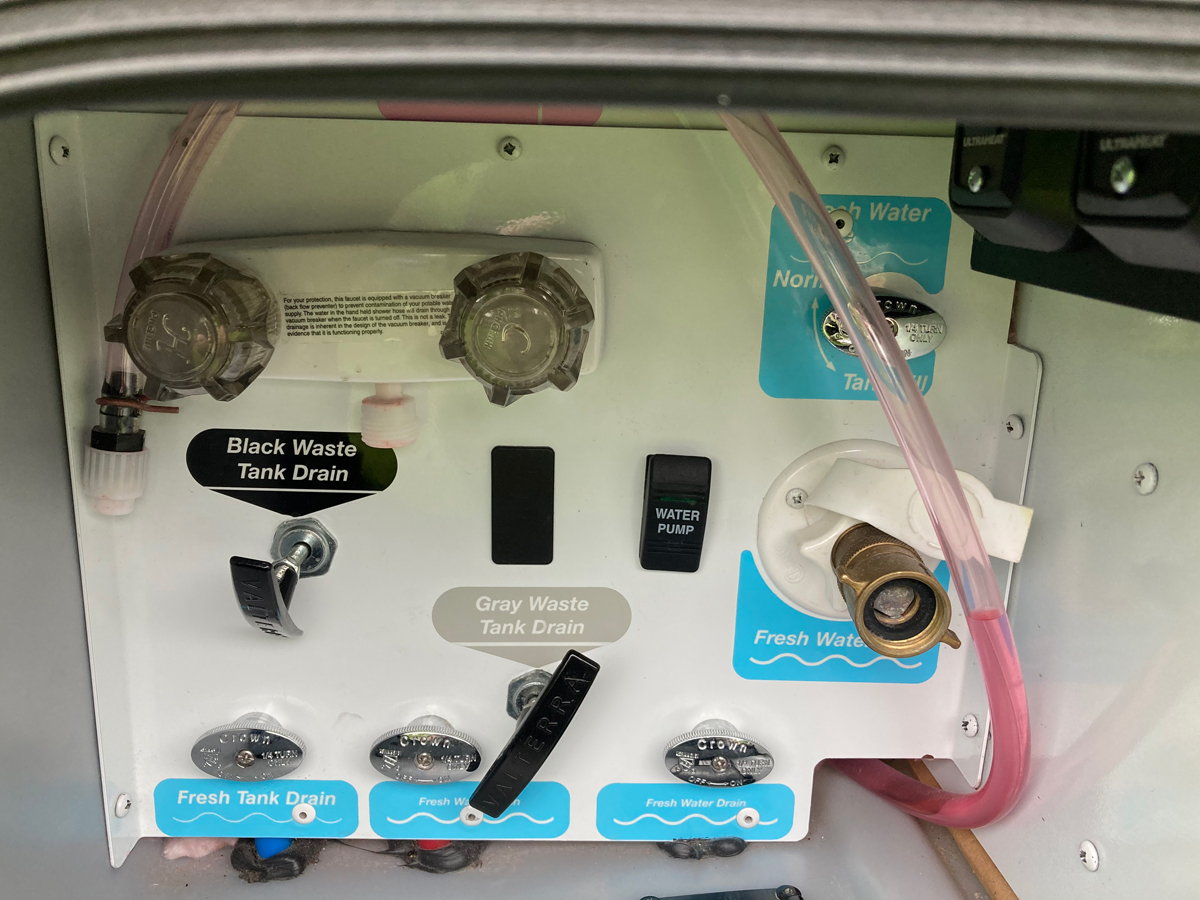
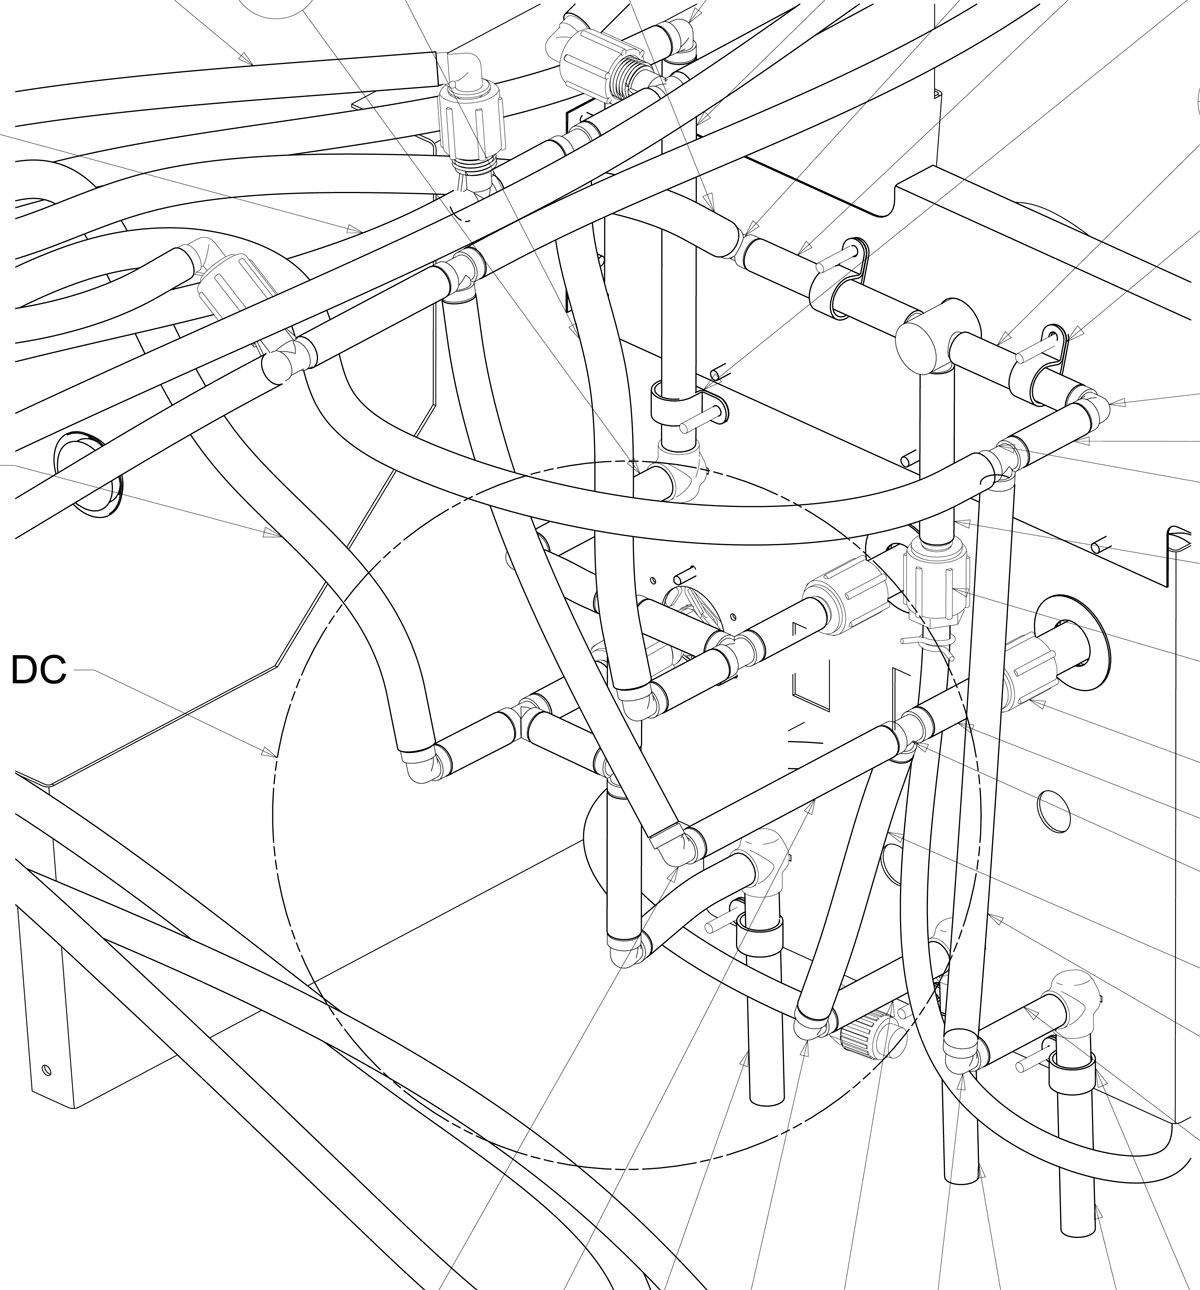
However, just watching the Newstate’s video, I couldn’t visualize exactly where their emergency heat was being applied to solve the issue. Looking at the drawings helped a bit - here is one of the internal plumbing directly behind the wet bay panel you see from the street; the panel is at the right hand side of the drawing … it is very easy to see why things freeze up when temperatures drop:
It wasn’t until I could get to the RV that first spring that things all came into focus… the electrical area of the wet bay locker is fully open to the back of the wet bay and up to the floor of the shower! The back of the wet bay, and floor of the shower area, is open to air exposed to that locker with no insulation of any kind. Winnebago has provided a propane powered heat duct to the water pump area and plumbing coming from the wet bay, but the wet bay plumbing is not protected.
If you stick your camera in far enough to the elecrical side of that wet bay locker, you’ll see the bottom of the shower and the plumbing entering and leaving the wet bay:
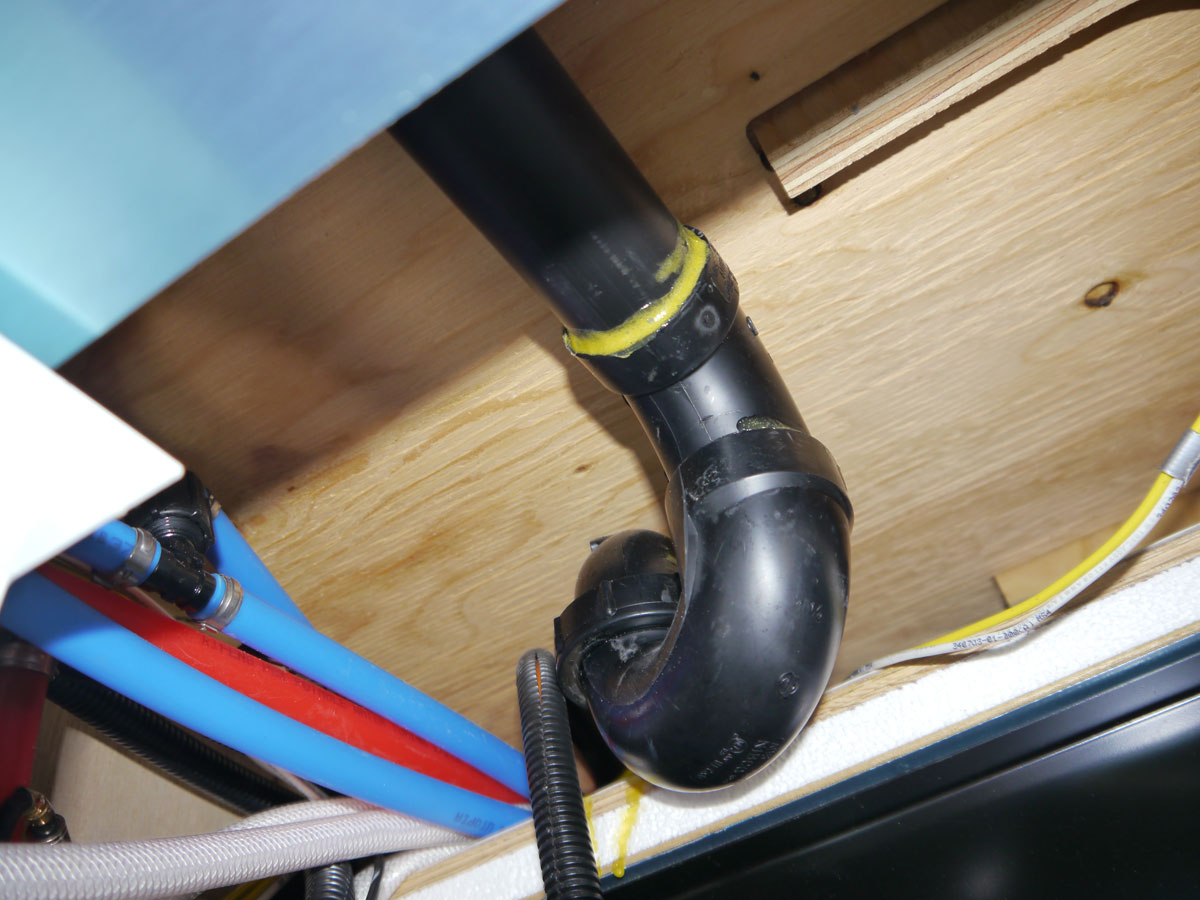
Here is another view, looking into the locker from the street:
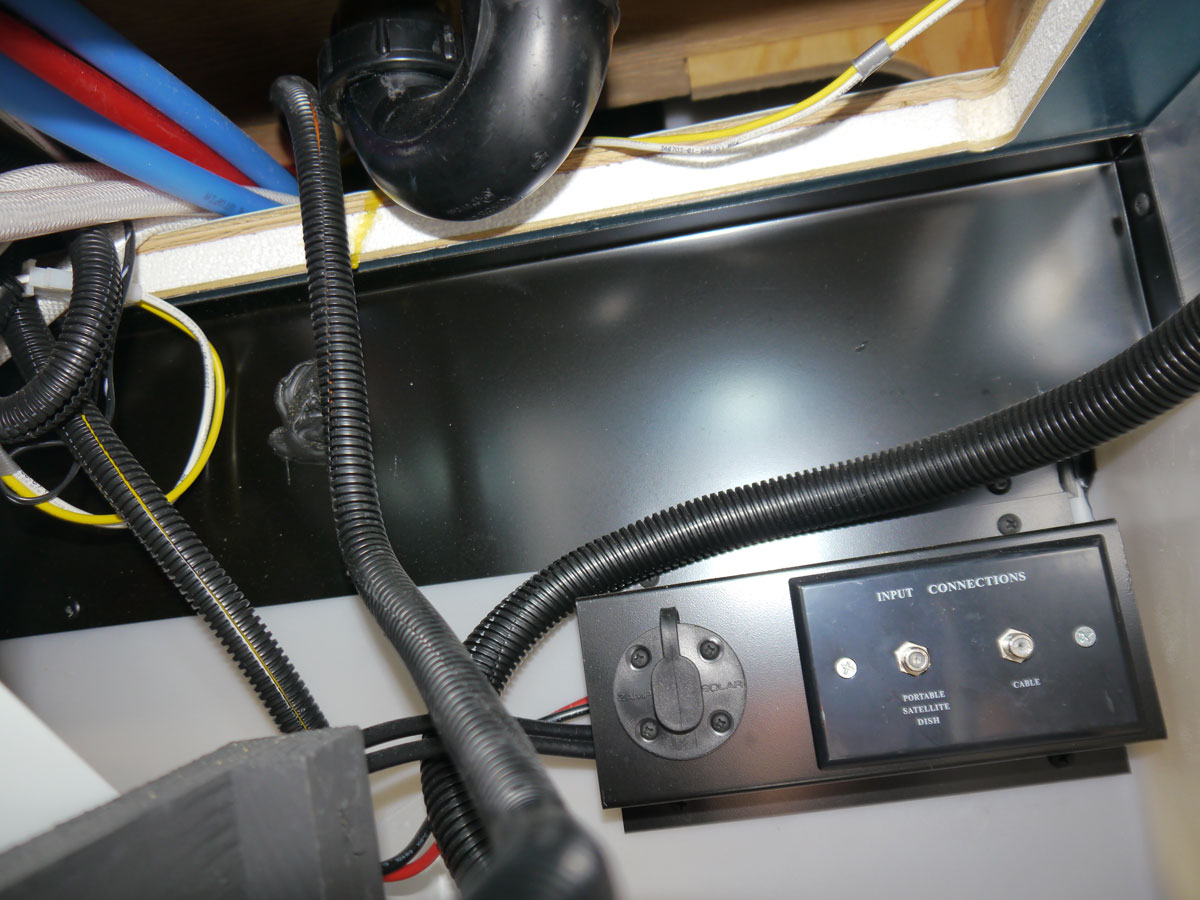
Here is a view of under the shower - You can see the square hole cut in the floor just above the wet bay:
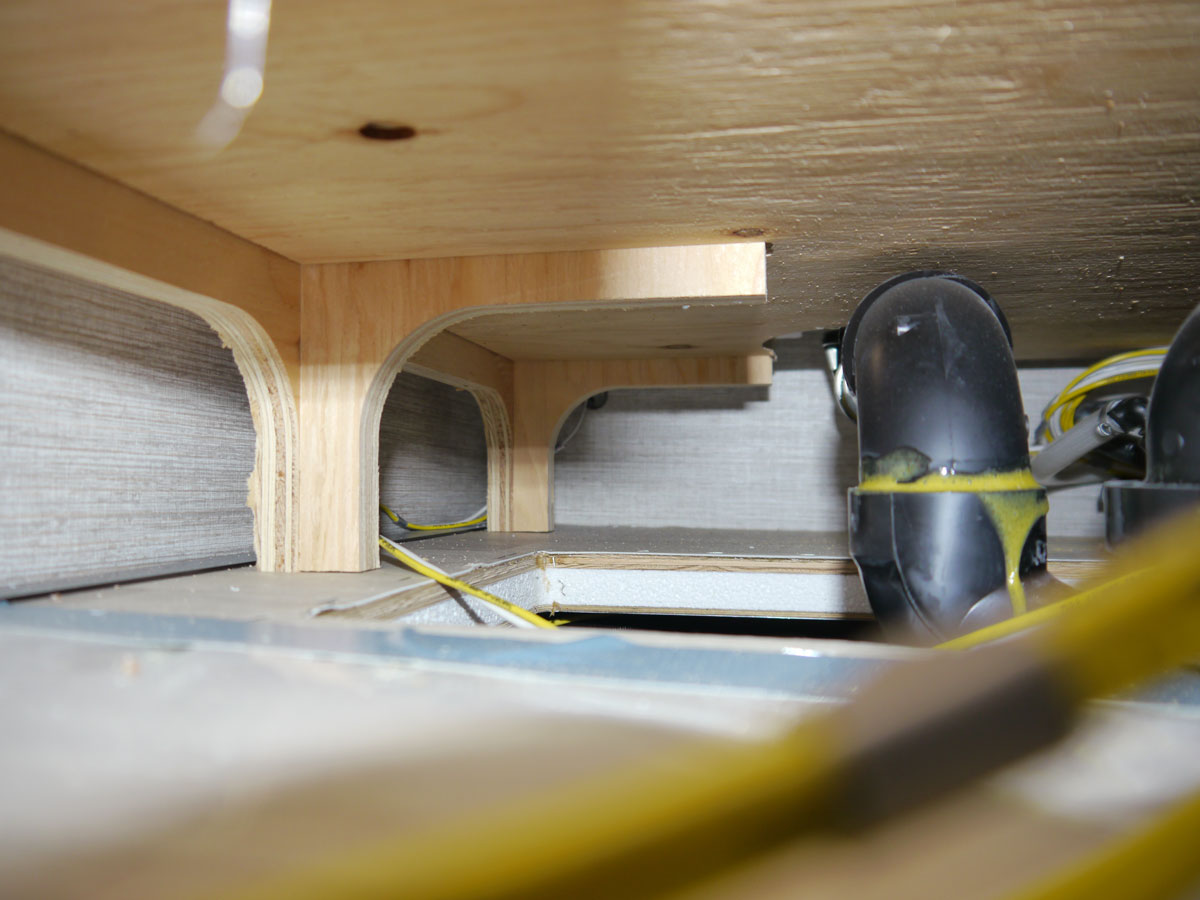
So, after giving this some thought, and remembering how we keep warm while camping, some areas requiring careful consideration started to become clear if we were going to be able to camp in sub-zero temperatures for any length of time.
When using shore power, we use independent electric heat to warm the coach. Winnebago has used the propane furnace duct system to provide warmth to the plumbing, and even has a loose duct underneath the bed in the aft equipment bay that can be directed at the water pump or under the shower - but it is not long enough to get to the wet bay! (Even though the Winnebago drawings show the hose directed down into the wet bay) So, when using a stand-alone electric heater like we do, the plumbing pipes don’t get direct warmth from the cold furnace ducts and no heat of any kind will make it to the wet bay.
Consideration 1 – The wet bay needs to be heated regardless of which type of heat is used - neither the propane furnace nor a stand-alone electric heater is going to be able to get heat to the area.
Consideration 2 – Experiments I did in early spring showed that electric heat in the coach was not good enough to penetrate the bed area and heat the area of the water tank and water pump - some sort of heating is required for the water pump and associated feed lines.
Consideration 3 – If the Truma is powered up and in “comfort” mode, there is no need to worry. But, if DRIVING in cold weather, either the Truma needs to be drained, or the commercially available “Truma auxillary electric heating system” needs to be installed to keep the Truma system from freezing.
Consideration 4 - We couldn’t forget about heating the lithium batteries - if we were going to operate in cold weather while dry camping, we needed to ensure the batteries could accept a charge.
Consideration 5 - Winnebago has provided 12 volt electric heat to the grey and black tanks, but the heat is not sufficient to warm the water down at the gate valves. As a result, the gate valves do freeze up when exposed to prolonged subzero temperatures. Waiting until spring to dump is not a practical option! The dump system plumbing needed to be heated.
Consideration 6 – Could we successfully power whatever we came up with for solutions to all of this - while dry camping, with no shore power plugged in?
Some things to think about! Here is what I came up with:
Consideration 1 – Heating the wet bay
After spending a considerable amount of time coming up with exceptionally clever, but overly complex and unrealistically impractical, ways to insulate and heat that area, I opted for the same method that is shown in the video above: a trouble lamp with an old fashioned incandescent light bulb. Knowing that a 75W bulb was enough to thaw the frozen PEX in the video, I figured that the same would be enough to keep the area warm and prevent freezing in the first place. A low wattage light bulb – simple and safe… I like simple and safe…
How do you get at the back of the wet bay to stuff some insulation in there? Well, Winnebago has installed a bottom of the locker access panel to both the wet bay and the electrical storage bay. That black metal strap that initially looks like support structure, is actually the access panel.
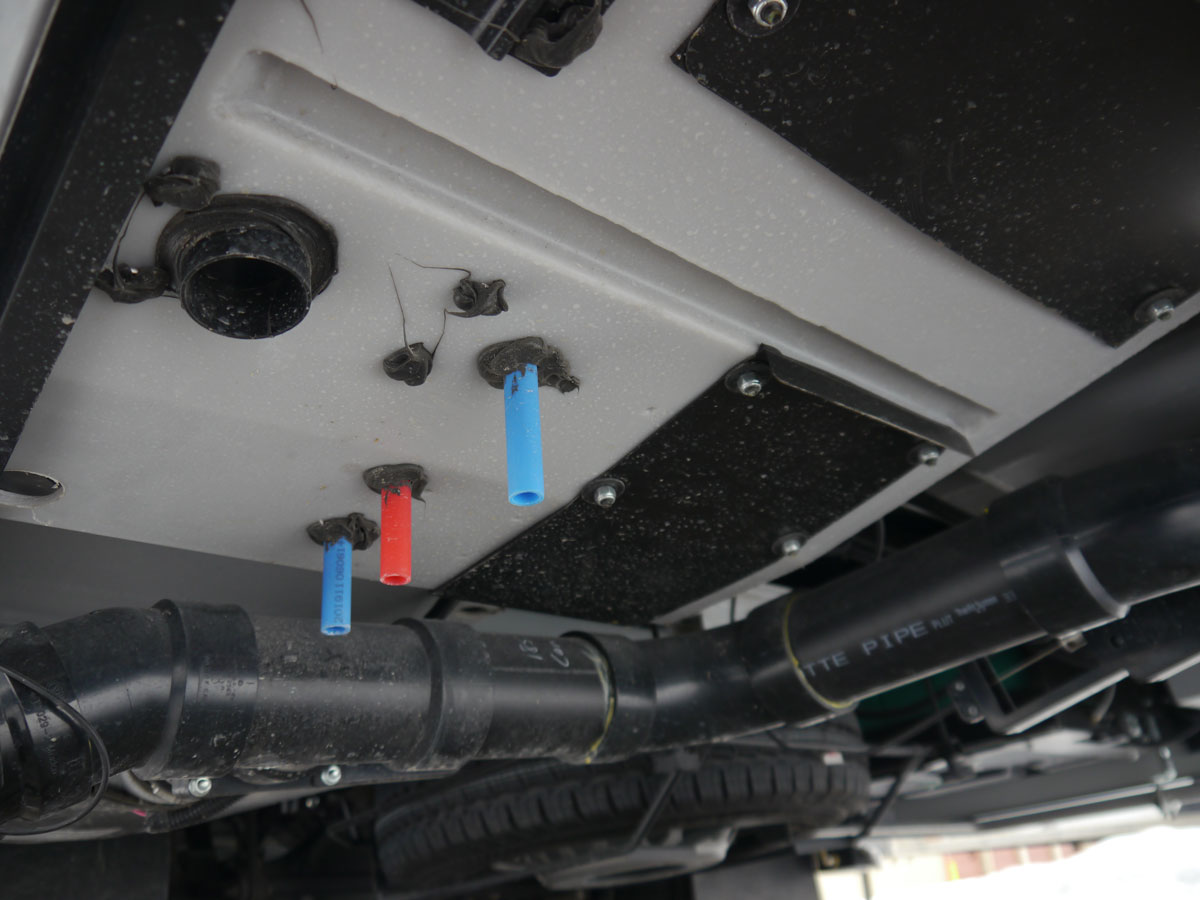
Removing it is easy, and allows pretty good access to the back of the wet bay panel. Here are a couple of photos of the panel removed, and the start of my insulation work:
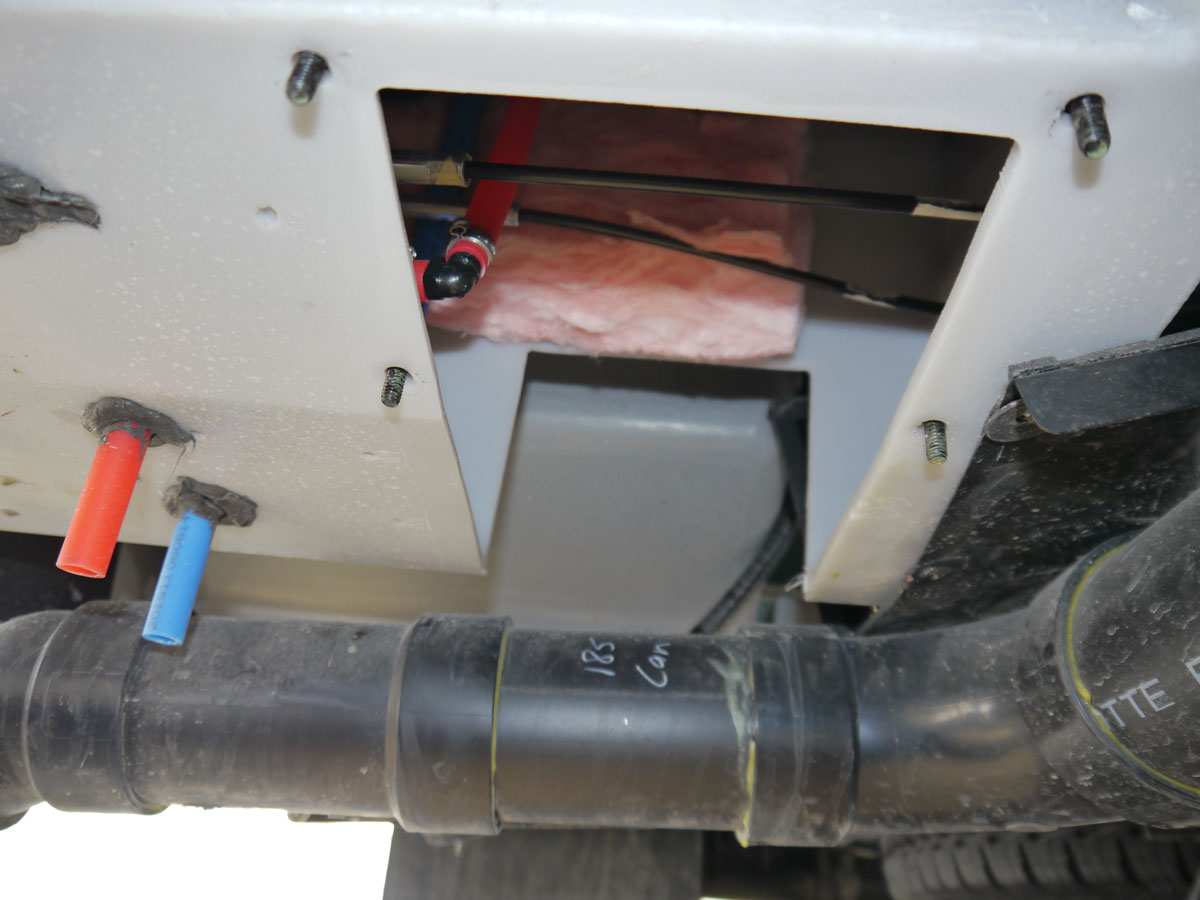
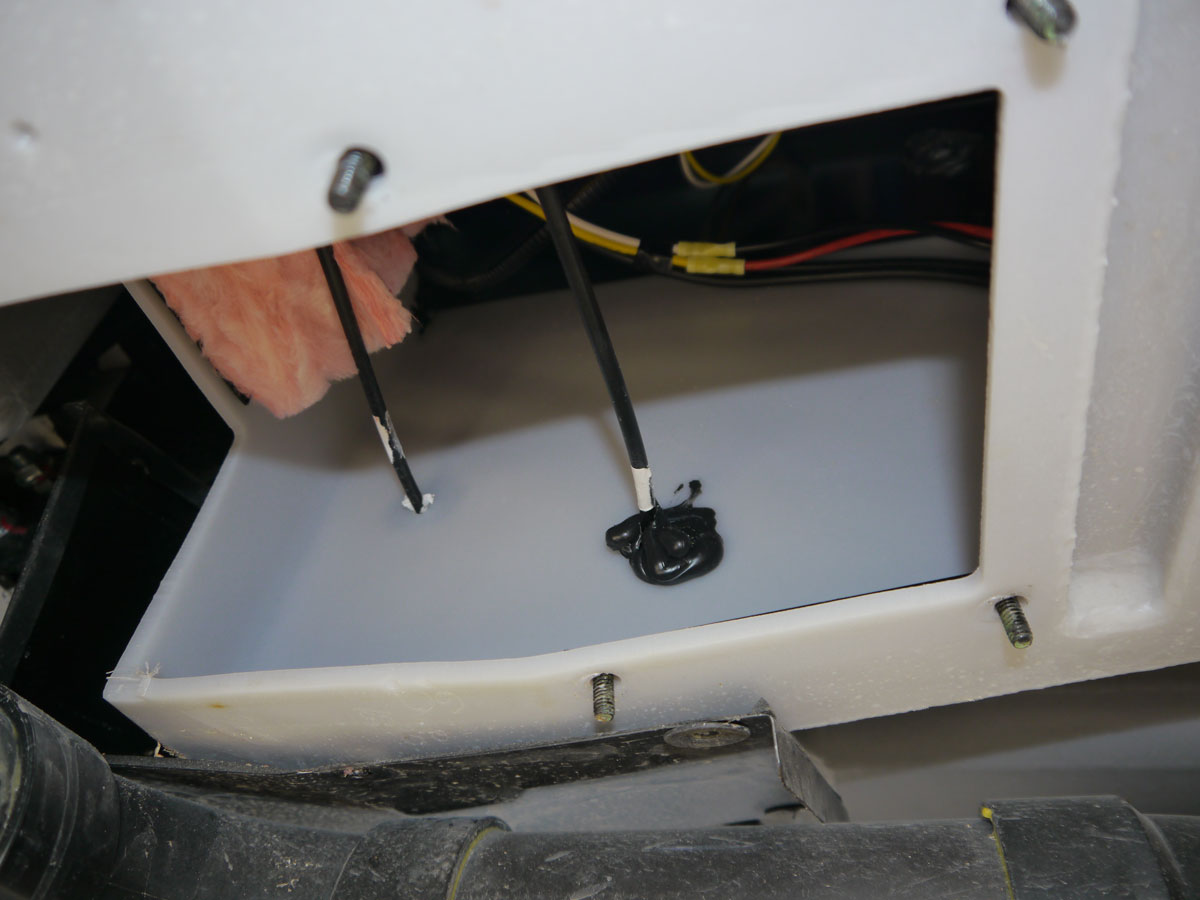
I laid in some pink fibreglass R15 insulation to the walls of the wet bay box, and to the floor as well. I didn’t go crazy, as the whole idea was to leave an air cavity that could be heated by the trouble lamp. After getting the insulation in, I tied one of the temperature probes from a monitoring system I purchased - up to a lanyard, and dropped it in the wet bay.
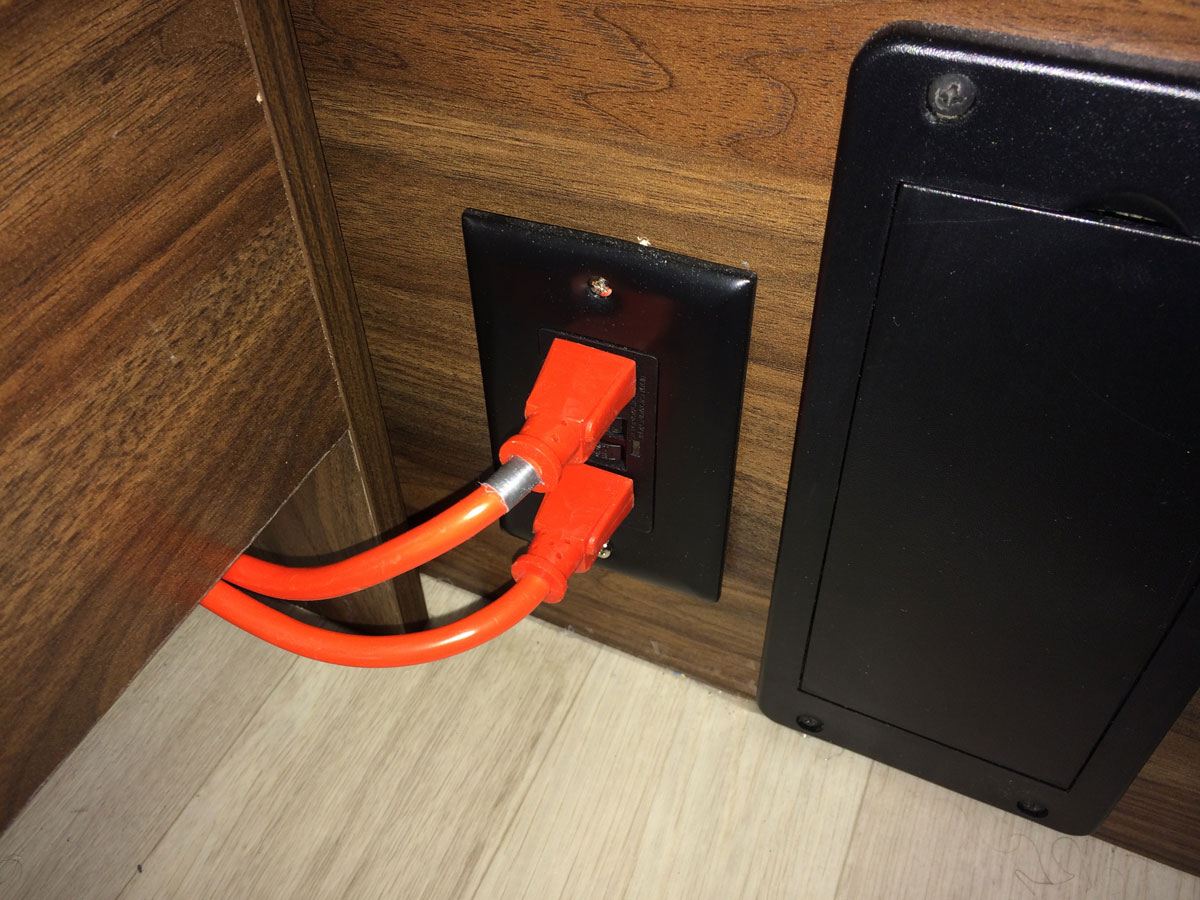
The trouble lamp itself was inserted from the electrical storage side of the locker, and the chord was fed straight up underneath the shower pan and out towards the water pump and under-bed aft equipment bay area. From there, the chord was fed into the hot water area, and then around the corner, and stored loose under the fridge where it can be hidden until needed. When needed, I tug the chord out and plug it in to the 120V outlet at the foot of the bed.
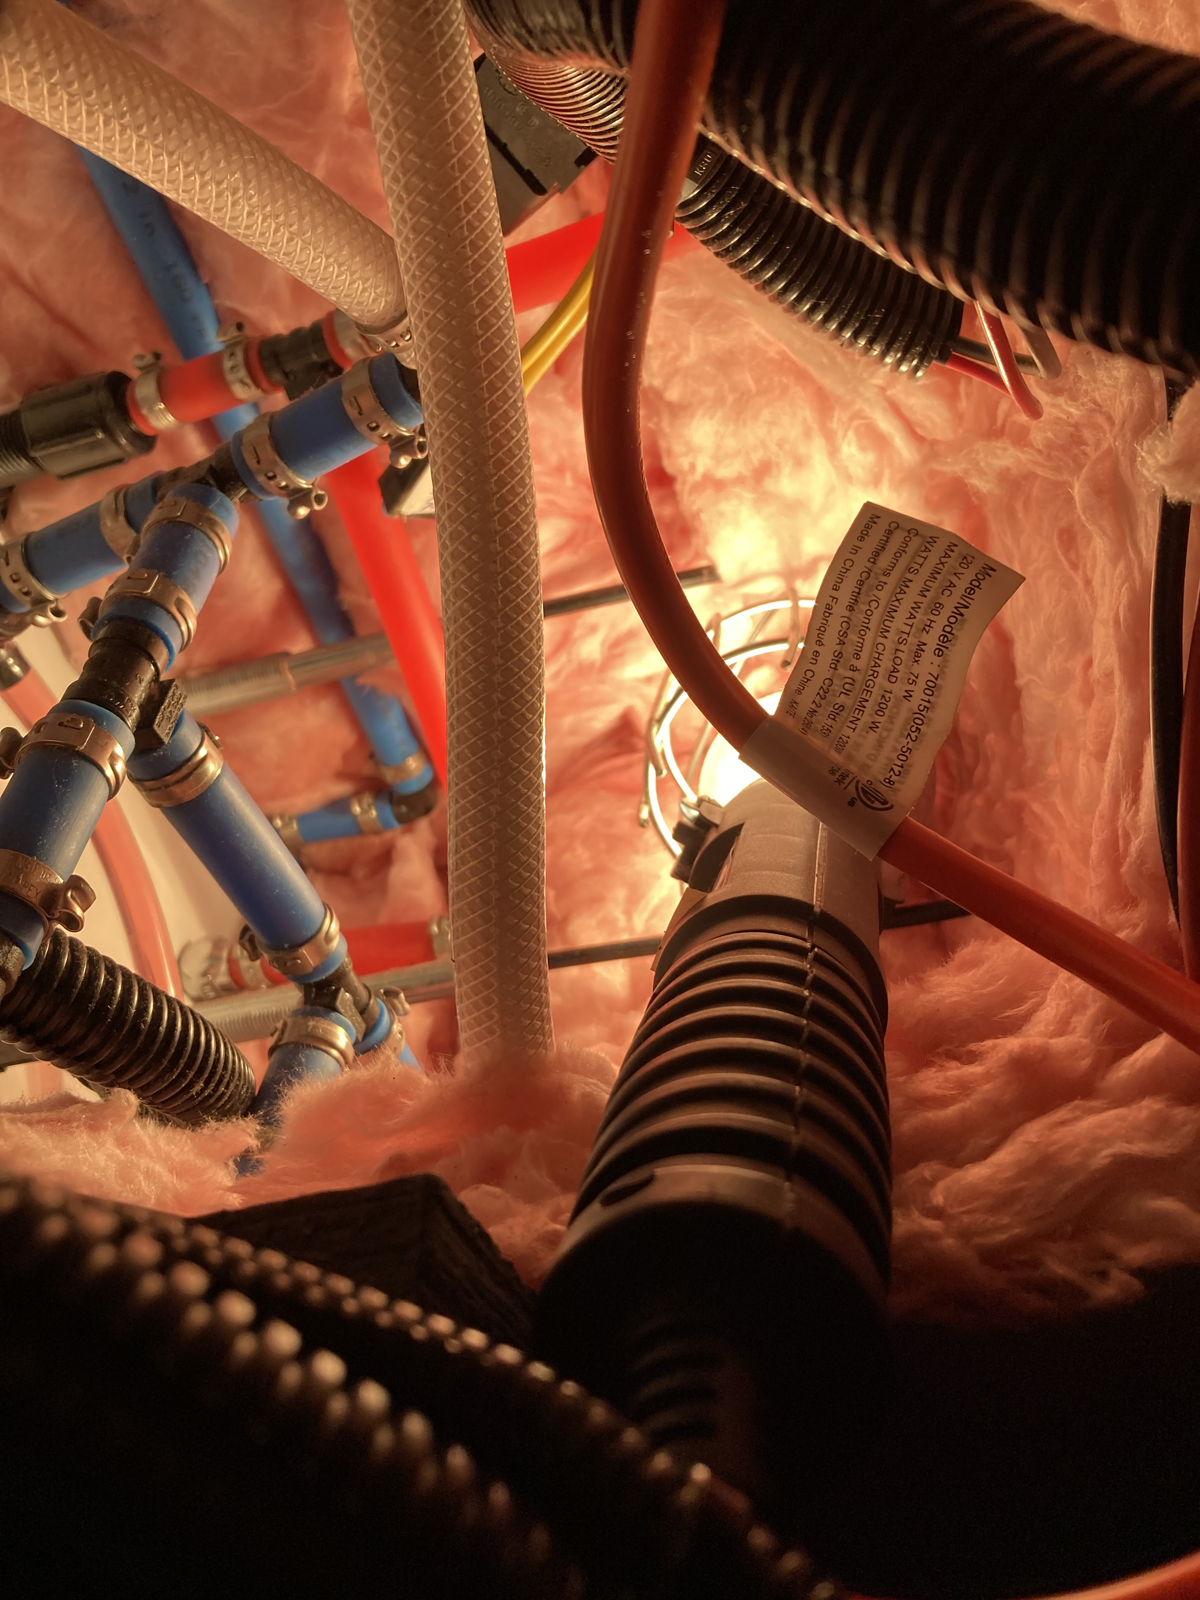
With the trouble light sitting on the bed of insulation, with the bulb positioned up to the plumbing, I closed off the wet bay area from the electrical area with more pink insulation:
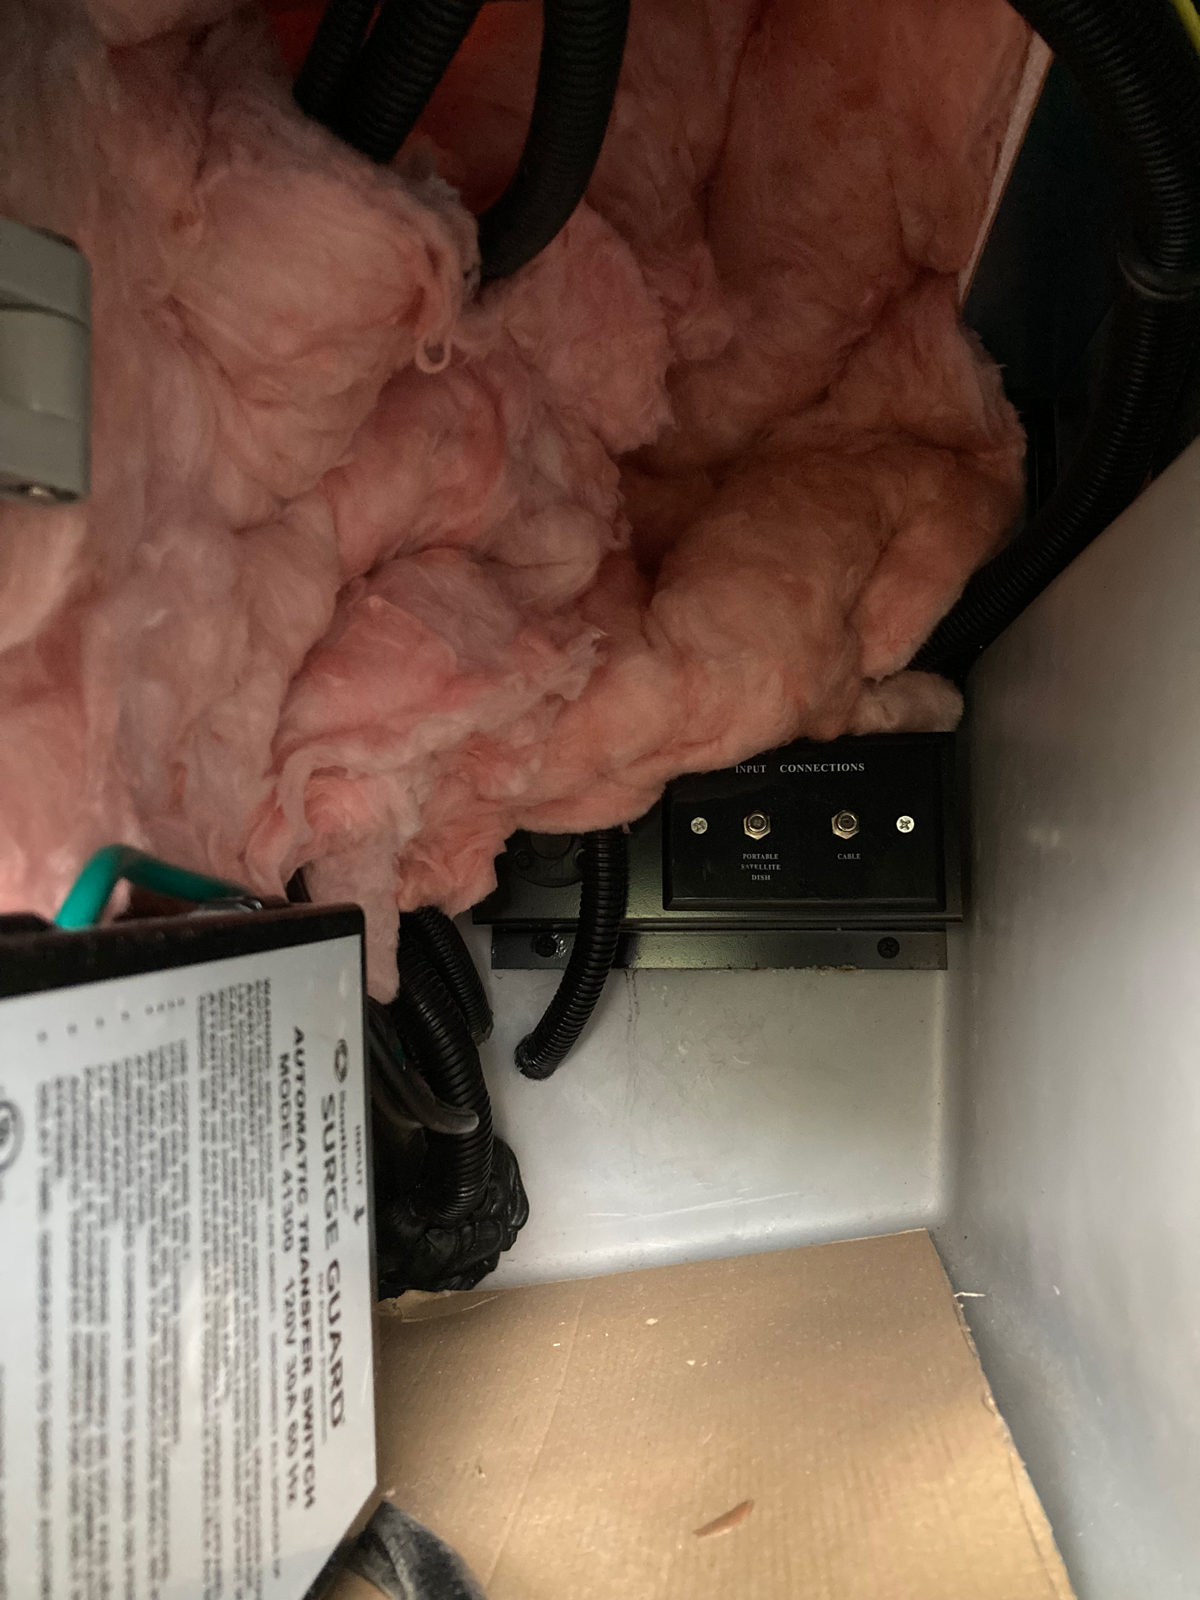
During cold weather I also install a batt of insulation inside the wet bay door, up against the wet bay panel:
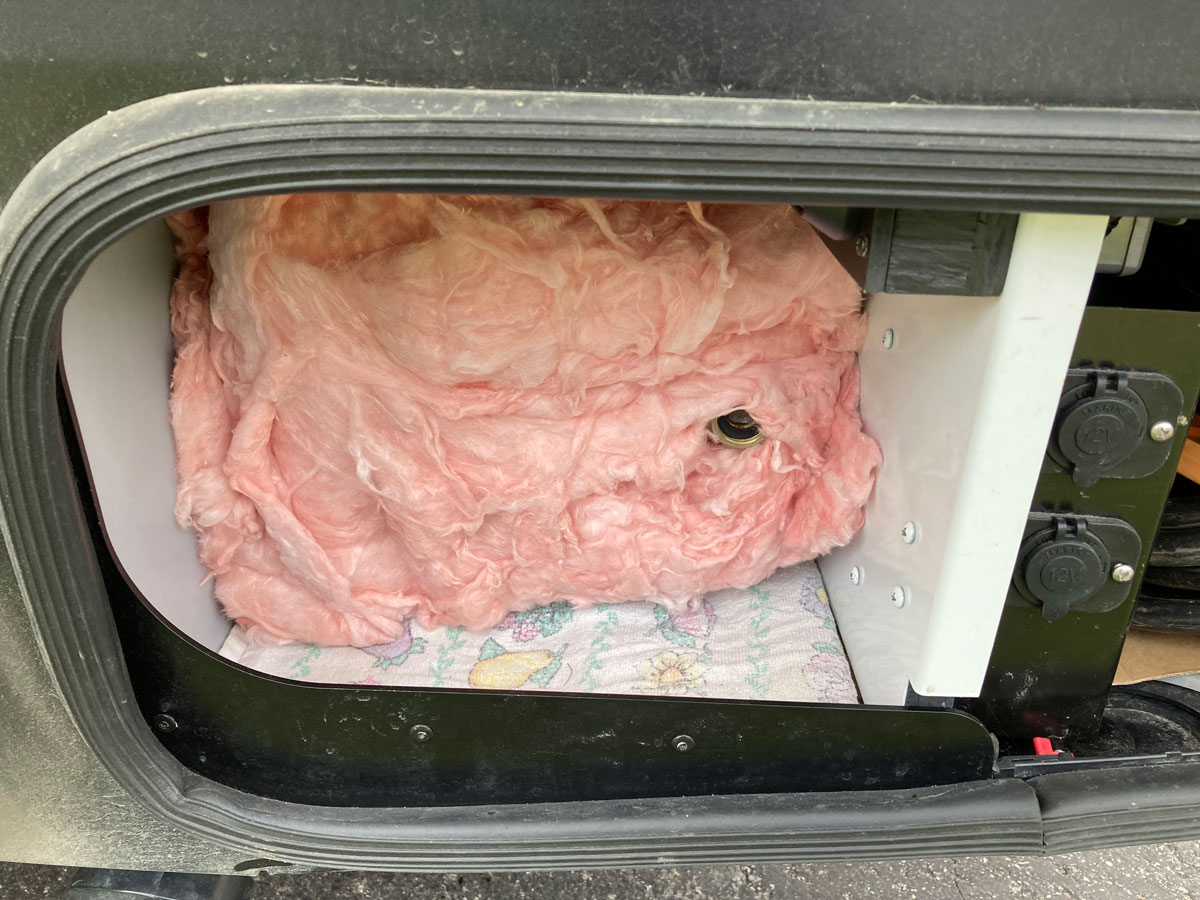
It all works very, very, well. With outside temperatures approaching – 13 C, the wet bay was maintained well above freezing with a 60W incandescent light bulb. The rating on the trouble lamp is 75W, but up here in Canada you can’t buy incandescent light bulbs any longer of that wattage. All I could find was 50W or 60W “rough service” bulbs, so I’ll keep my eye open for other options when on the road.
Consideration 2 – Heating the water pump area
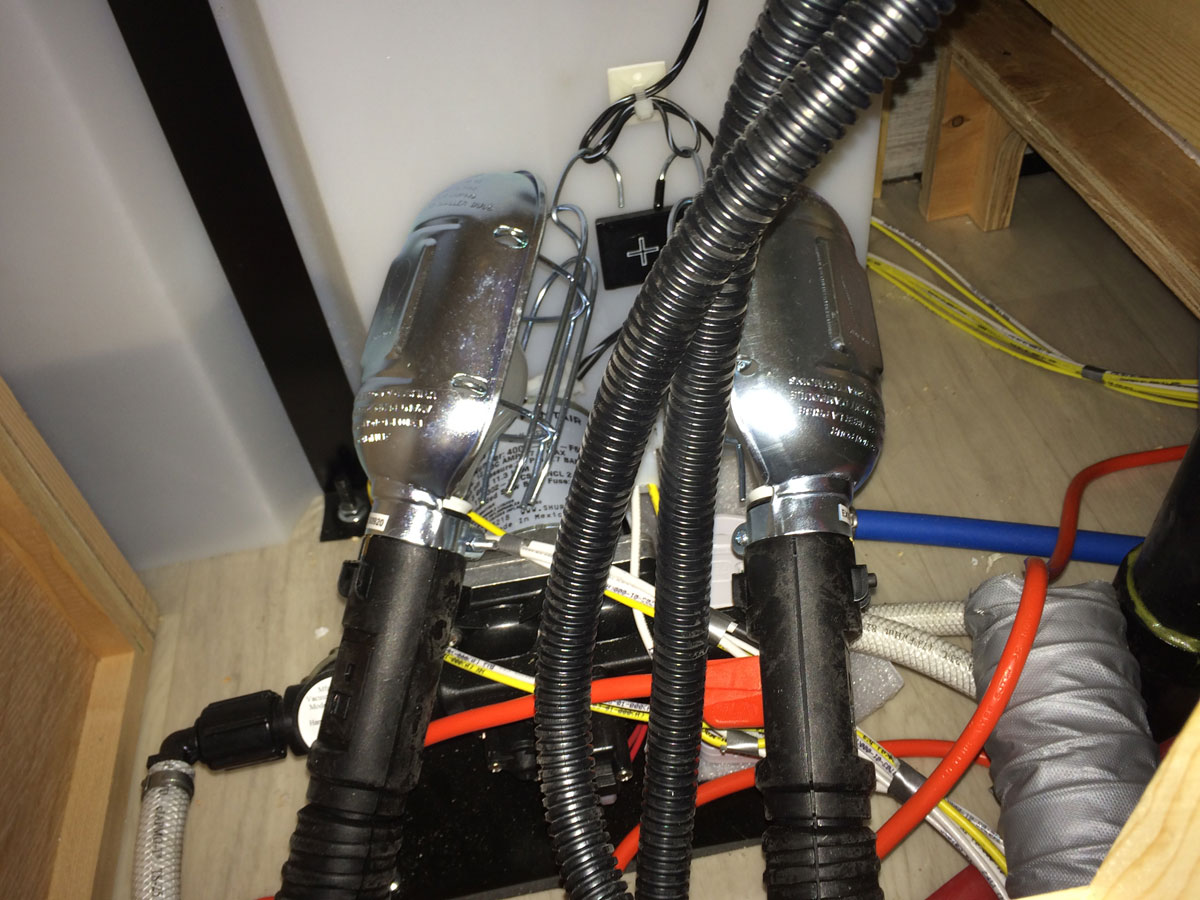
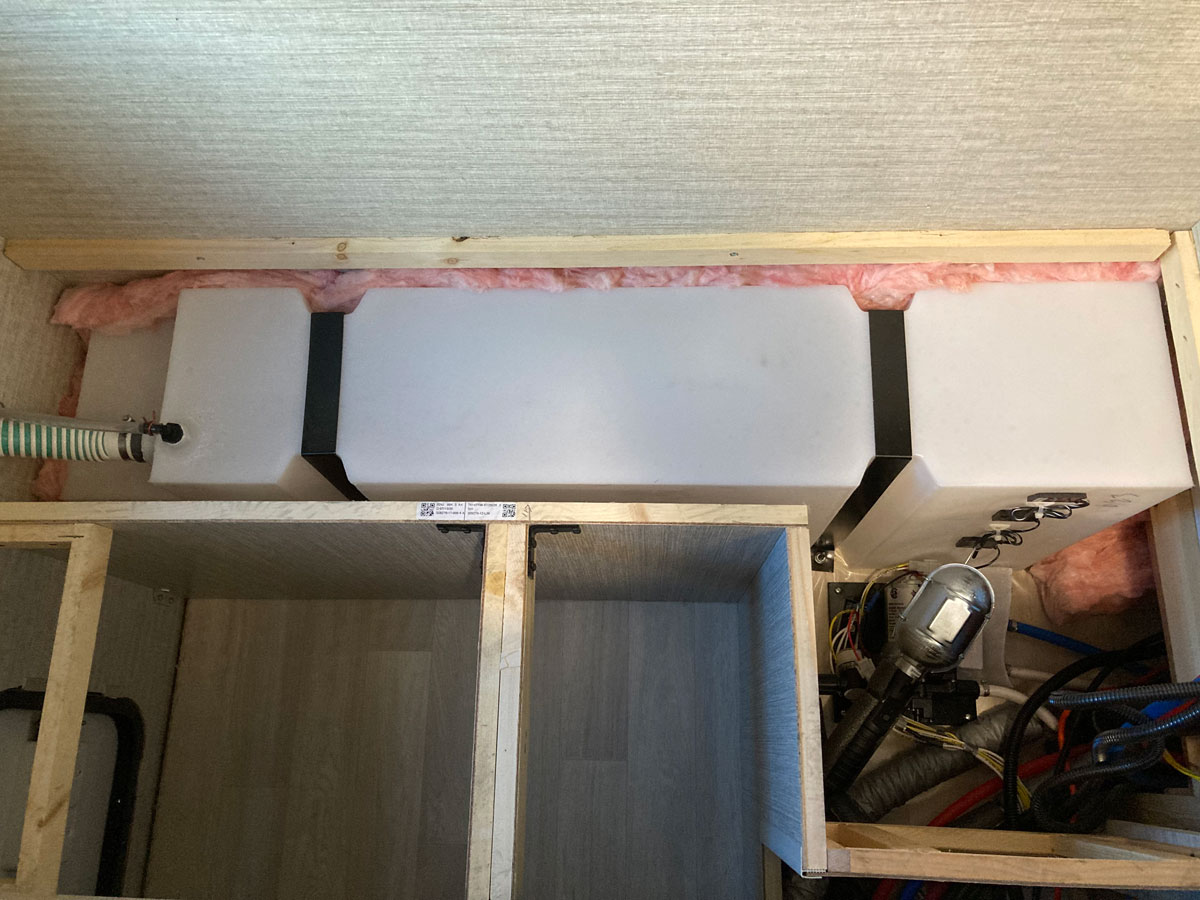
Well, a trouble light in the wet bay worked so well, why not a trouble light near the water pump? I hung a couple of lights above the pump, and during spring tests was able to keep the area well above freezing when the coach was sub-zero. I resorted to two lights, as all I could find were 50W “rough service” bulbs in our area. I plugged one light into the other, and then fed the remaining chord along the same path as I had used for the wet bay heat. Two 50W bulbs was plenty of heat, so sometimes I turned one light off and just had one bulb powered. (I put velcro on this water pump acess panel to make entry easier) In the right side of this picture, you can see the orange chord coming from the wet bay trouble light, and also the loose propane furnace heat duct that you can position as you see fit. I have ours aimed at the water pump feed area. I finished off this part of the mod by throwing in a bunch of pink insulation along the back wall under the shower and beside the fresh water tank.
Consideration 3 – Keeping the Truma happy during sub-zero travel
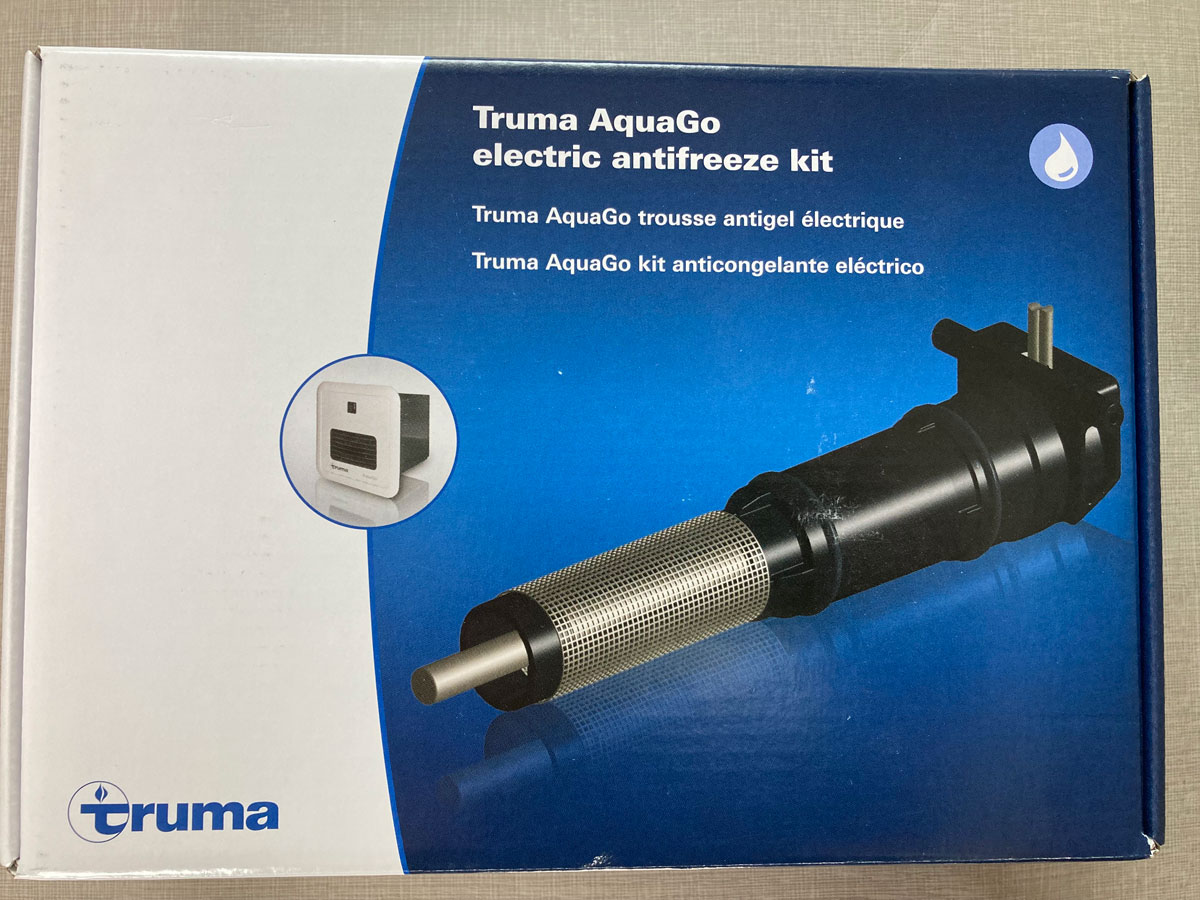
On previous motorhomes, we had a big six gallon propane water heater that was not going to freeze during transit through cold weather. But, as with a standard hot water tank system, you can’t run the propane to keep the Truma happy while driving. To solve this one, I resorted to purchasing the Truma Aqua Go Electric Anti-freeze Kit.
Truma Aqua Go Electric Anti-freeze Kit
This kit is NOT an electric option to heat water. This kit only provides enough electric heat to the internal Truma water system to prevent the heater from freezing up - used in conditions when you can’t run propane to keep it warm. Once the kit is installed, it is pretty easy to flip back and forth between freeze prevention and normal operations. The only thing you have to do on the outside is install the intake flue plug when electric heat is required, or remove it when back to normal operations. The rotary knob is used to provide the in-coach selection of either function - freeze prevention or normal operations.
Installation was straightforward. Here are some pictures of the heat cannister wiring hooked up, the intake flue plug inserted, and the the reminder that the protection system is installed:
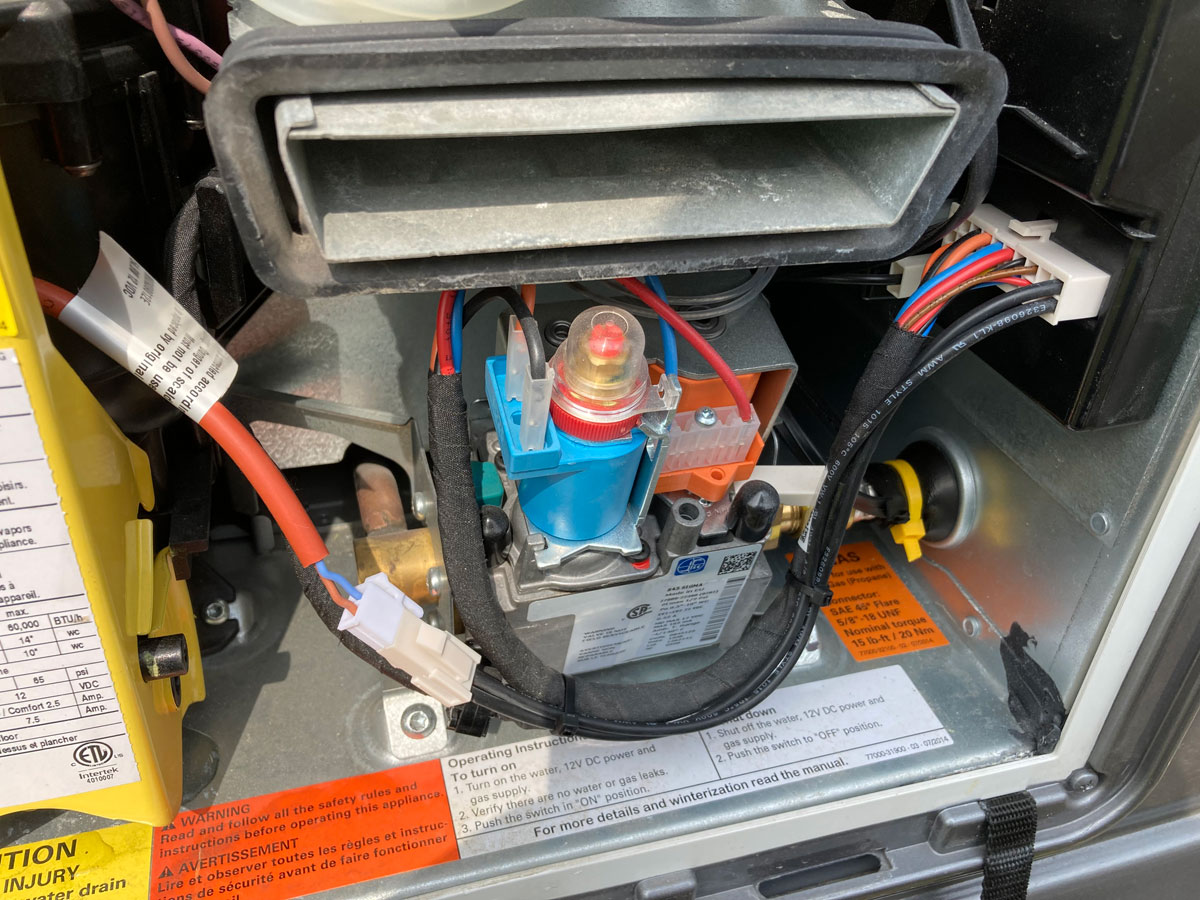
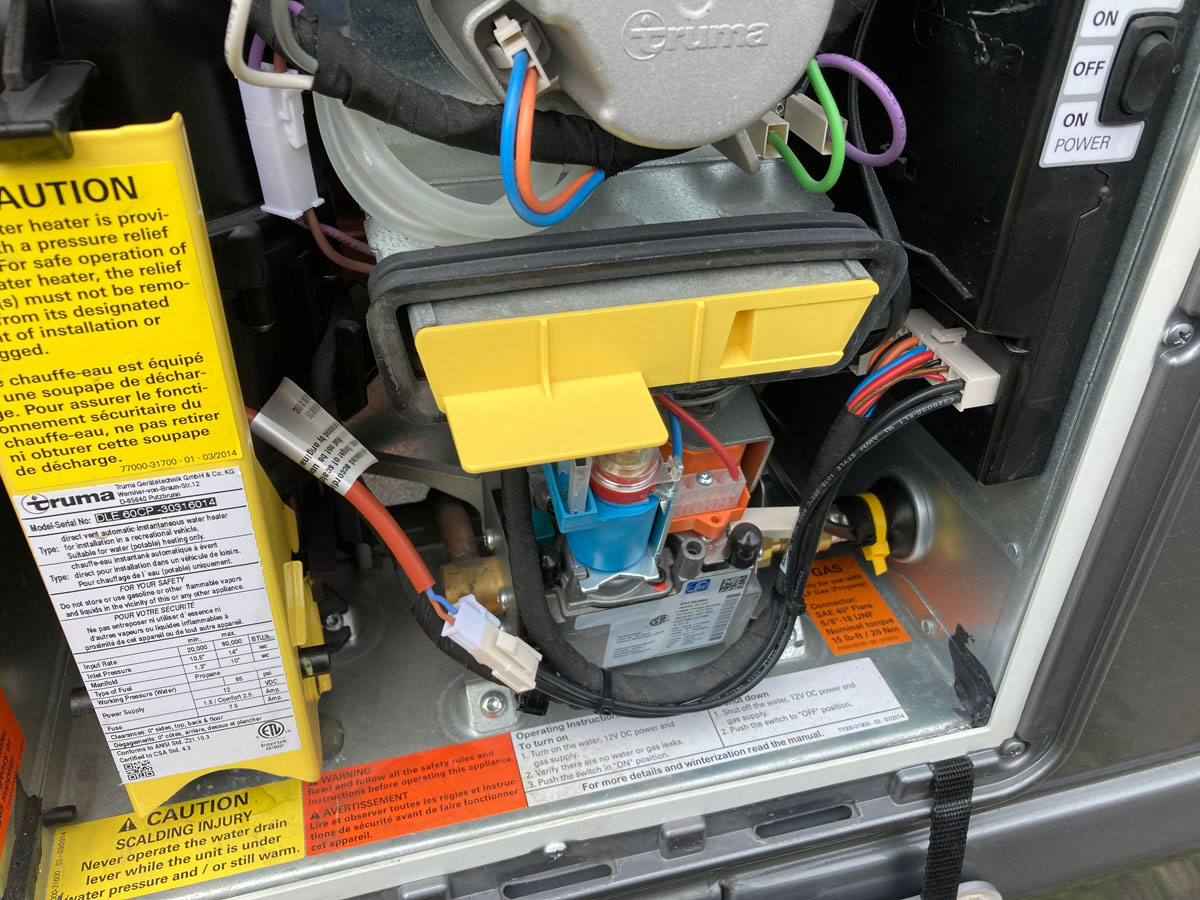
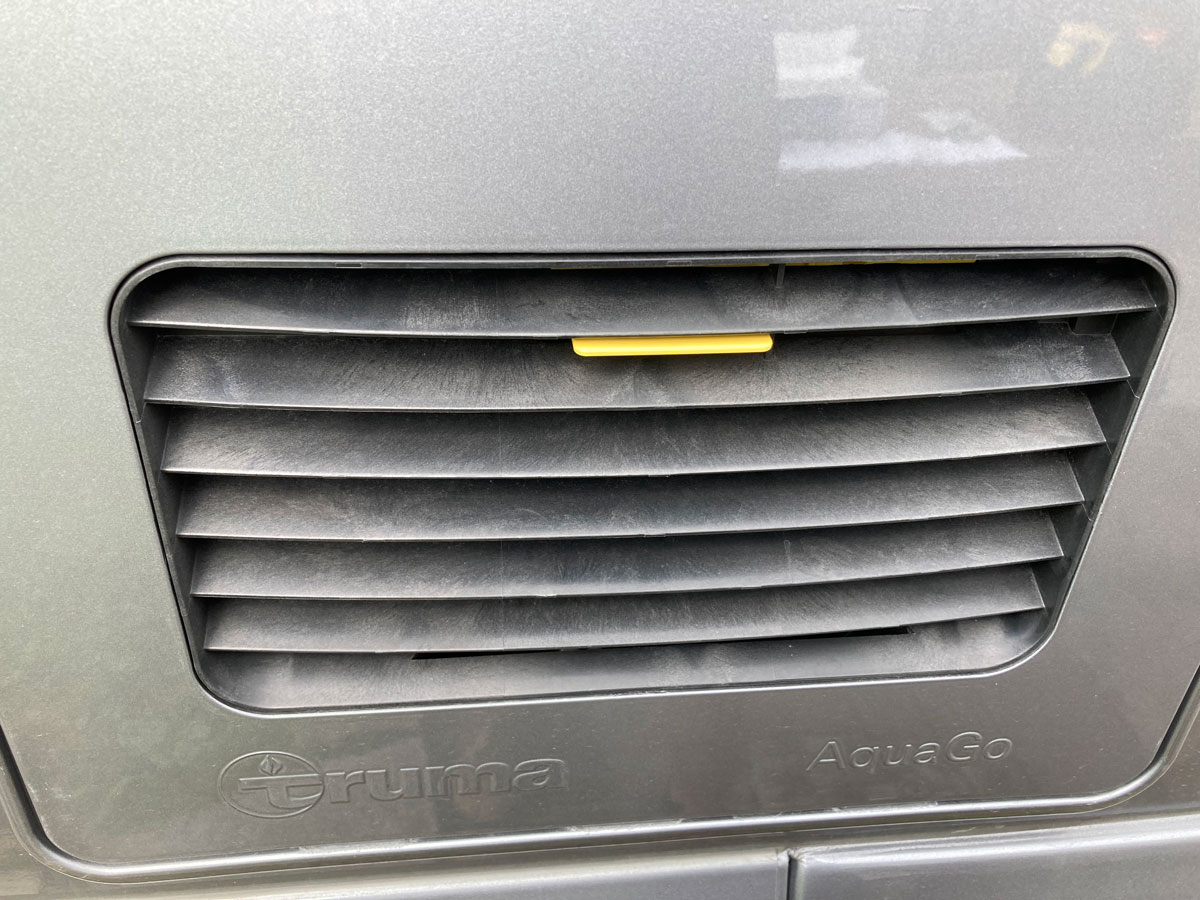
Now - there is another option, other than purchasing this component, but it involves fixing a flaw in the Winnebago winterization procedure associated with the Truma system. If fixed, you can easily drain the Truma without winterizing the rest of the coach plumbing system. It is a very easy, and less expensive, option – if you are interested, have a look at the mod page I did for this one:
Consideration 4 - We needed to ensure the batteries could accept a charge when we woke up the next morning after a cold night of dry camping. Here is how we got some heat on the batteries to accomplish this goal:
Consideration 5 - The dump system plumbing needed to be heated. Our first winter we were able to time our dumps for days when daytime temperatures were above freezing. Future winters might be different, so this mod had to be done. Here is a YouTube video that gave me lots to think about:
Grand Adventure - How to keep your RV Dump Valves from freezing
I bought the supplies to replicate this mod, but in the end, elected NOT to do it this way. Instead, I purchased some RV gate valve heating pads for the dump valves and some lower power heating pads to wrap around the “tower” that holds the valve when it is open. The vendor I used was Ultraheat, and their products can be found here:
Here is what they look like:
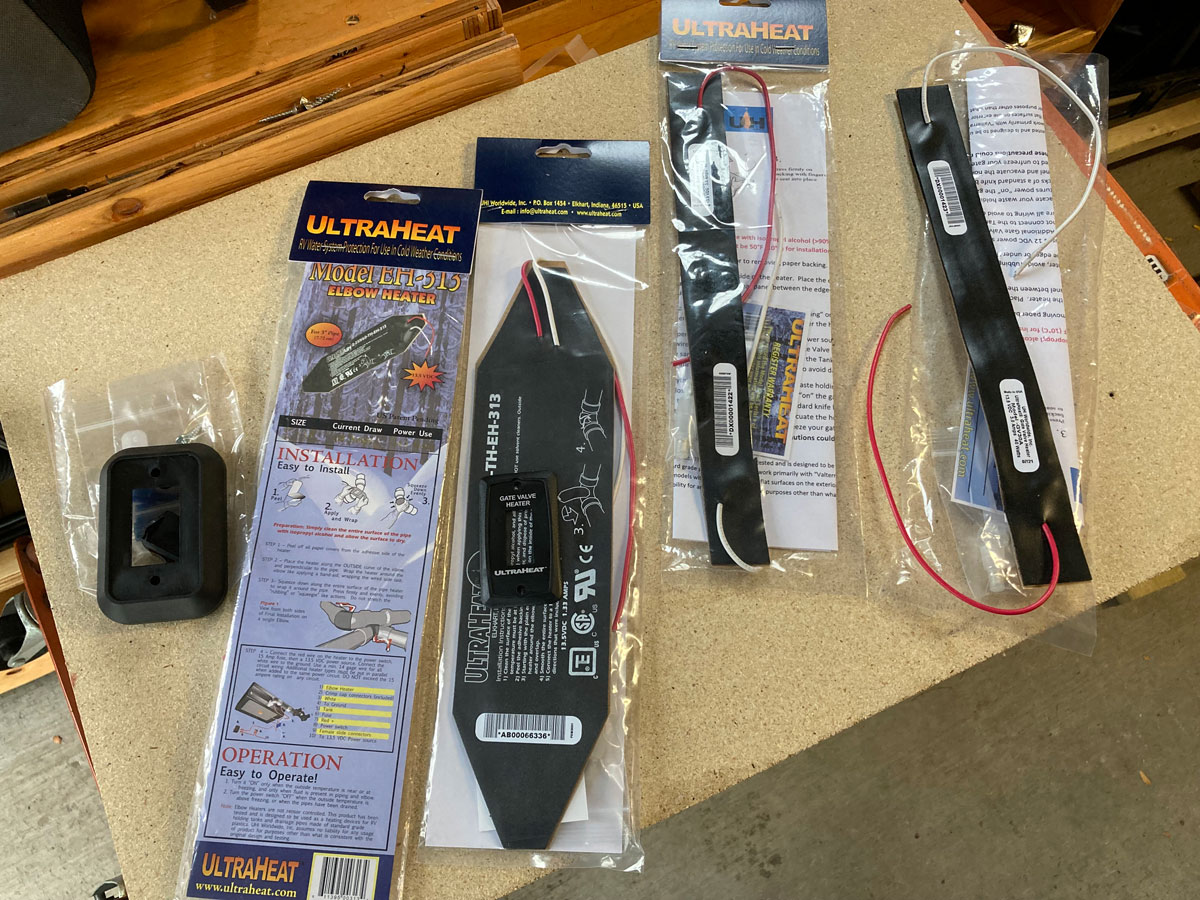
I opted for just heating the gate valves because I was not real crazy about the idea of heating an empty ABS pipe – the manufacturer of the heat cable I originally bought was very clear that this was not a good idea. (On our View, the majority of the exterior plumbing run used by the grey and black tanks sits empty for most of its life, only seeing fluid when you pull the valves.) Now, there were some advantages to going with the idea of an 120 volt AC heating cable – simplicity was among them – but in the end I decided that wiring up the RV gate valve heaters to the coach’s 12 volt system would give us some flexibility, be safer, and result in less power consumption.
The general concept for the installation was adding a fuse and wiring to the 12 volt fuse panel, running the wires under the bed, under the shower, and then down into the electrical cord storage bay, sticking on the adhesive backed heaters, adding a couple of switches in the wet bay to be able to control the gate valve and gate tower heat independently, wiring it all up, and then adding some insulation and weather protection to the gate valve areas.
Here is how I wired things up:
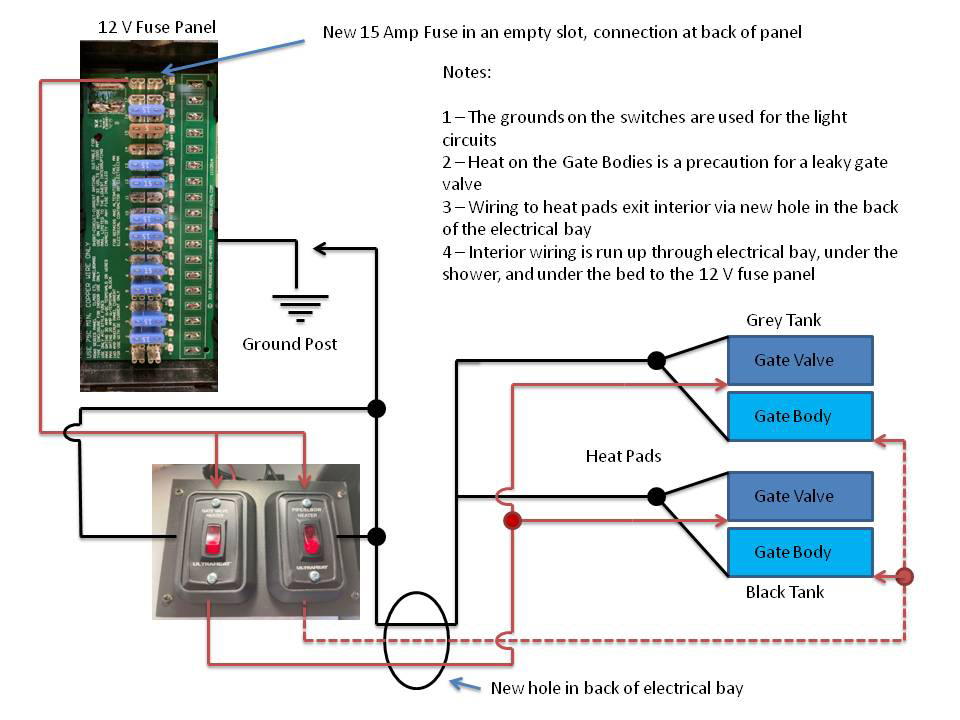
I wired the two types of heating pads up independently, at the recommendation of Ultra Heat. They said the gate valve heaters were higher power, and were designed to be used only for a short period of time to prevent damage to the gate valve. The product packaging reflects the higher wattage, but my experiments did not support the statement - they pulled the same current as the elbow heaters I used on the gate body. The total draw when both switches are on is about 5 amps, and all four pads are providing only a gentle heat. As a result, I have been turning the heat pads on about an hour in advance of a dump and things have been working out just fine.
A few pictures to make things clearer:
The wires from the fuse panel came into the electrical bay via the hole in the floor under the shower …
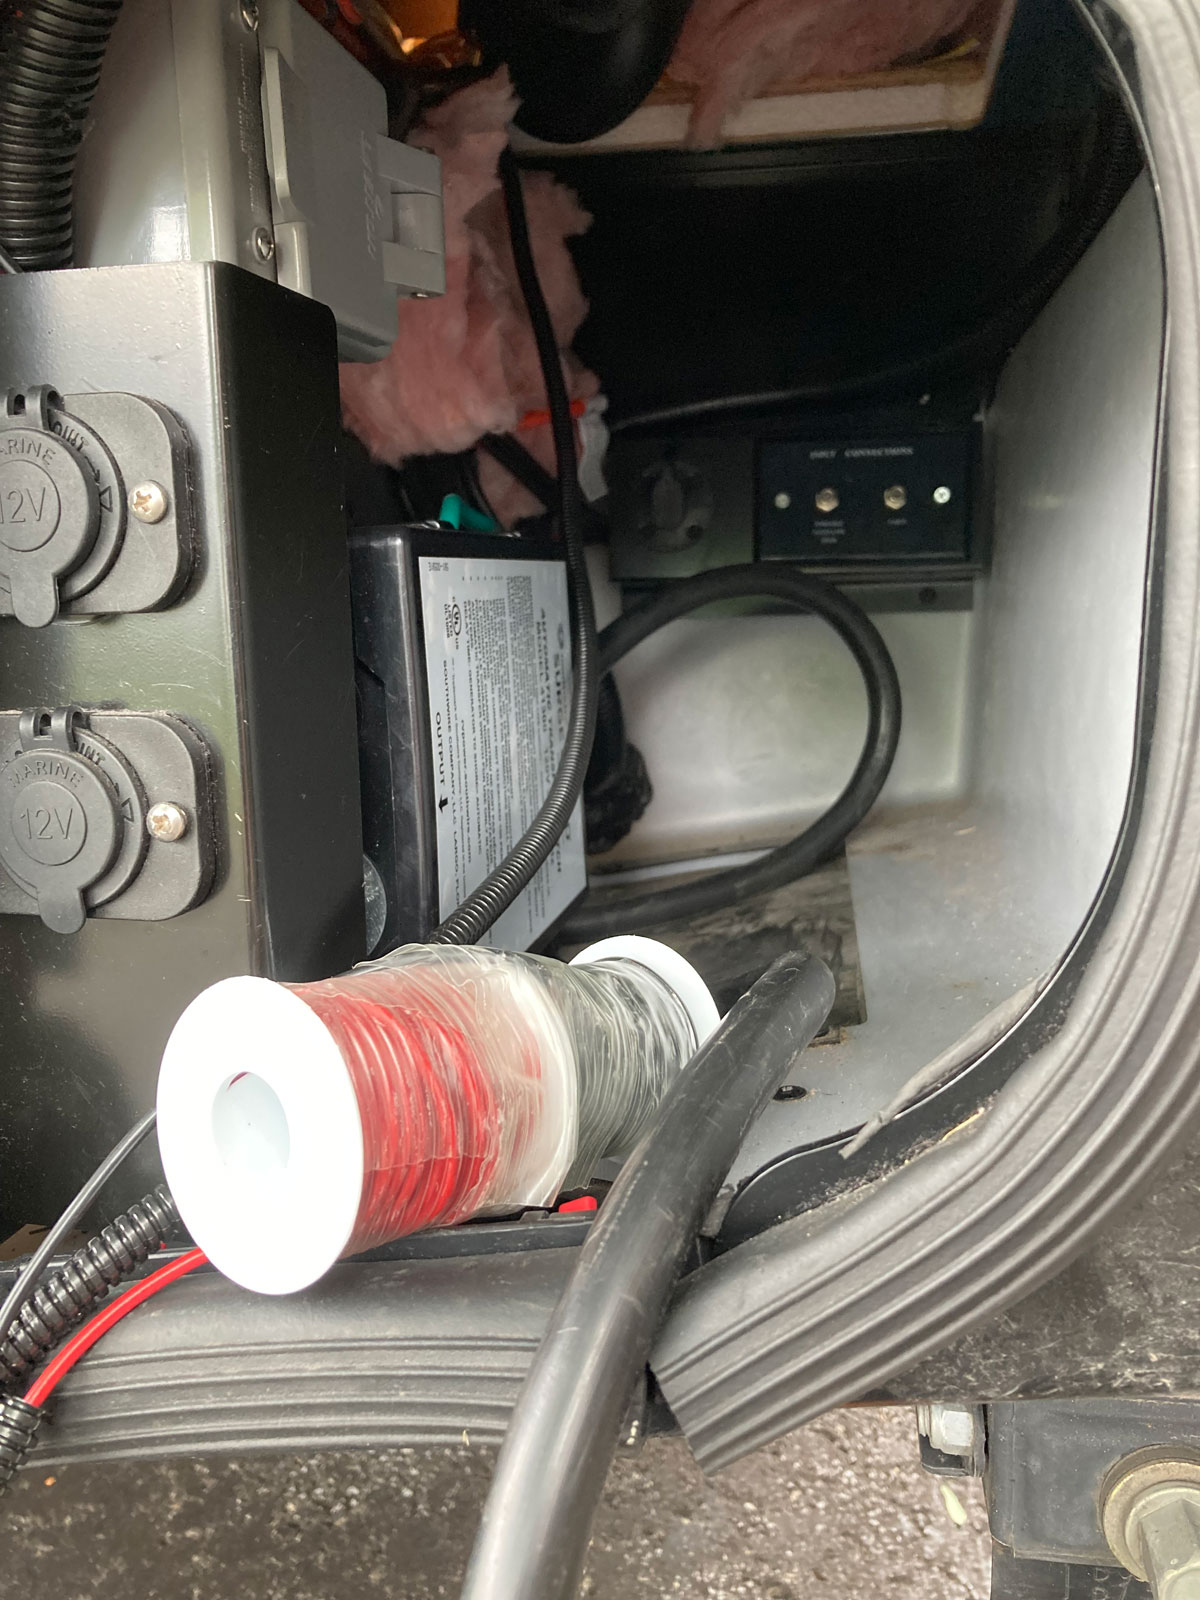
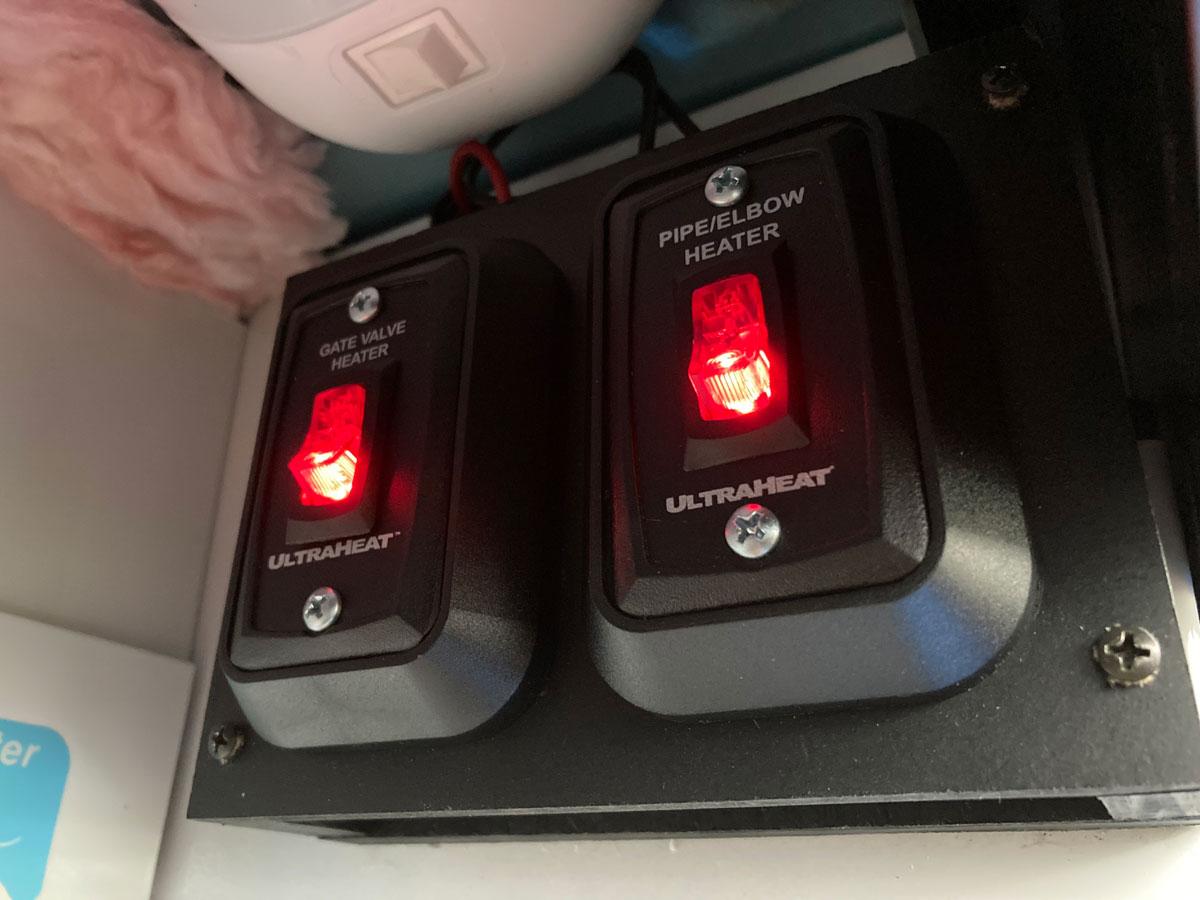
and then went to the new heat pad switches in the wet bay through the holes where my stabilizer switches were once located…
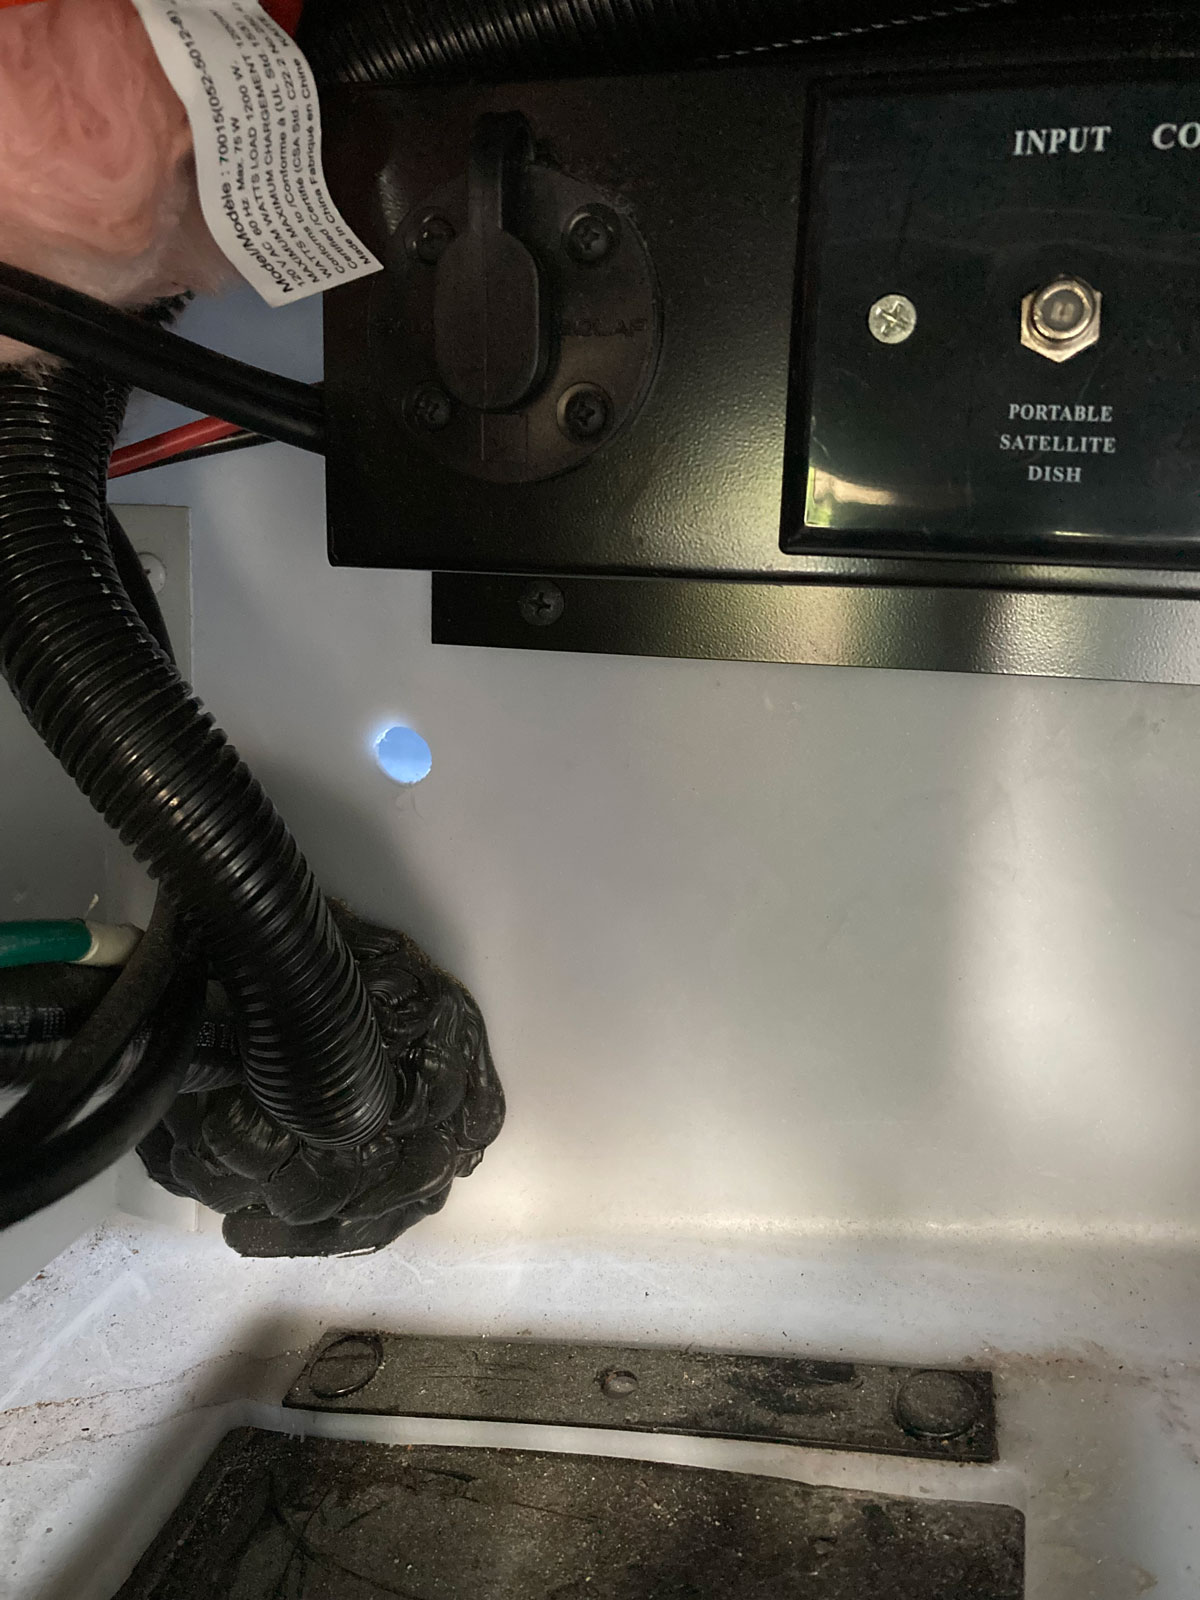
and then the wiring went back outside the electrical bay to connect to the heaters via a hole I drilled in the back wall:
After the heating pad installation, the wires were all gathered up and connected to their associated power wires and ground wires coming from the electrical bay. Here is what one of the gate valves looked like while doing the wiring.
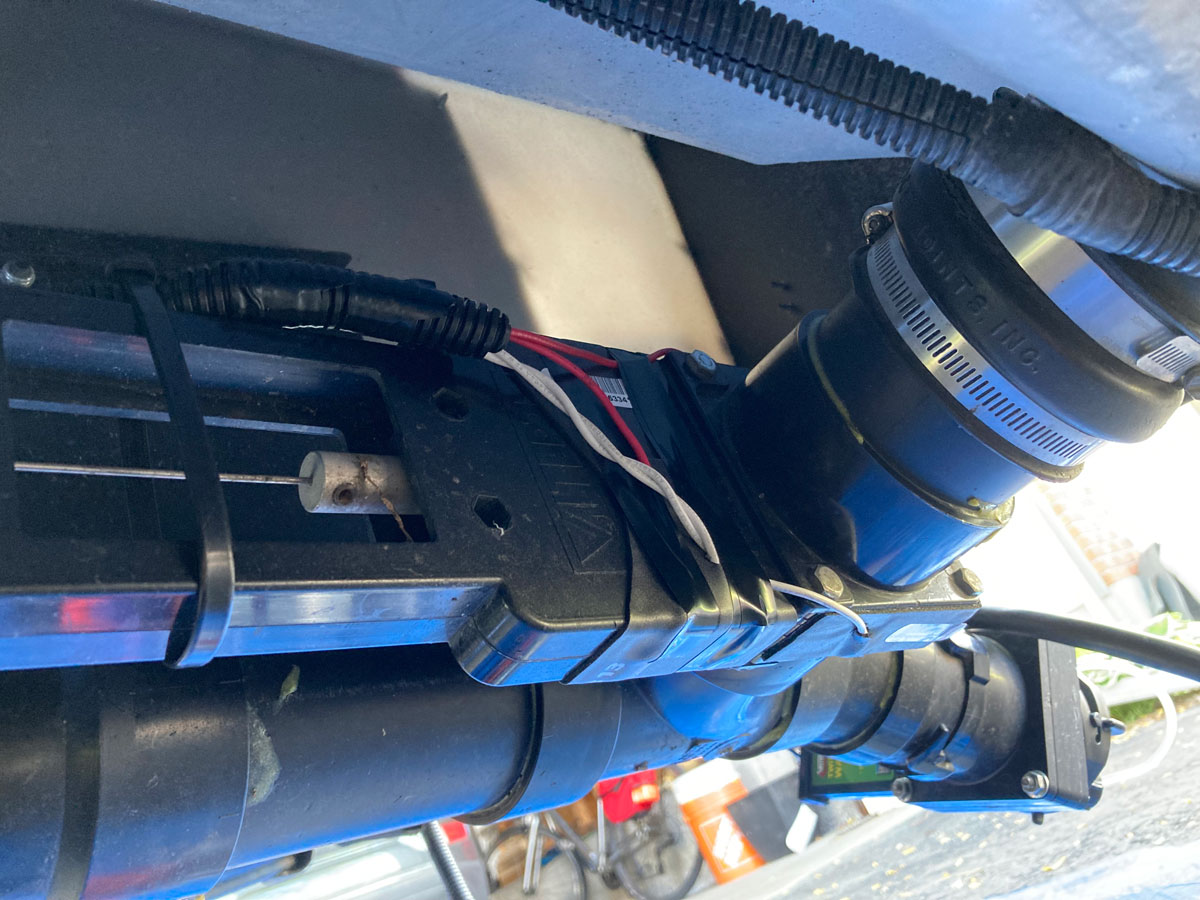
After it was all tested, I added some insulation and enclosed both valves in a plactic wrap:
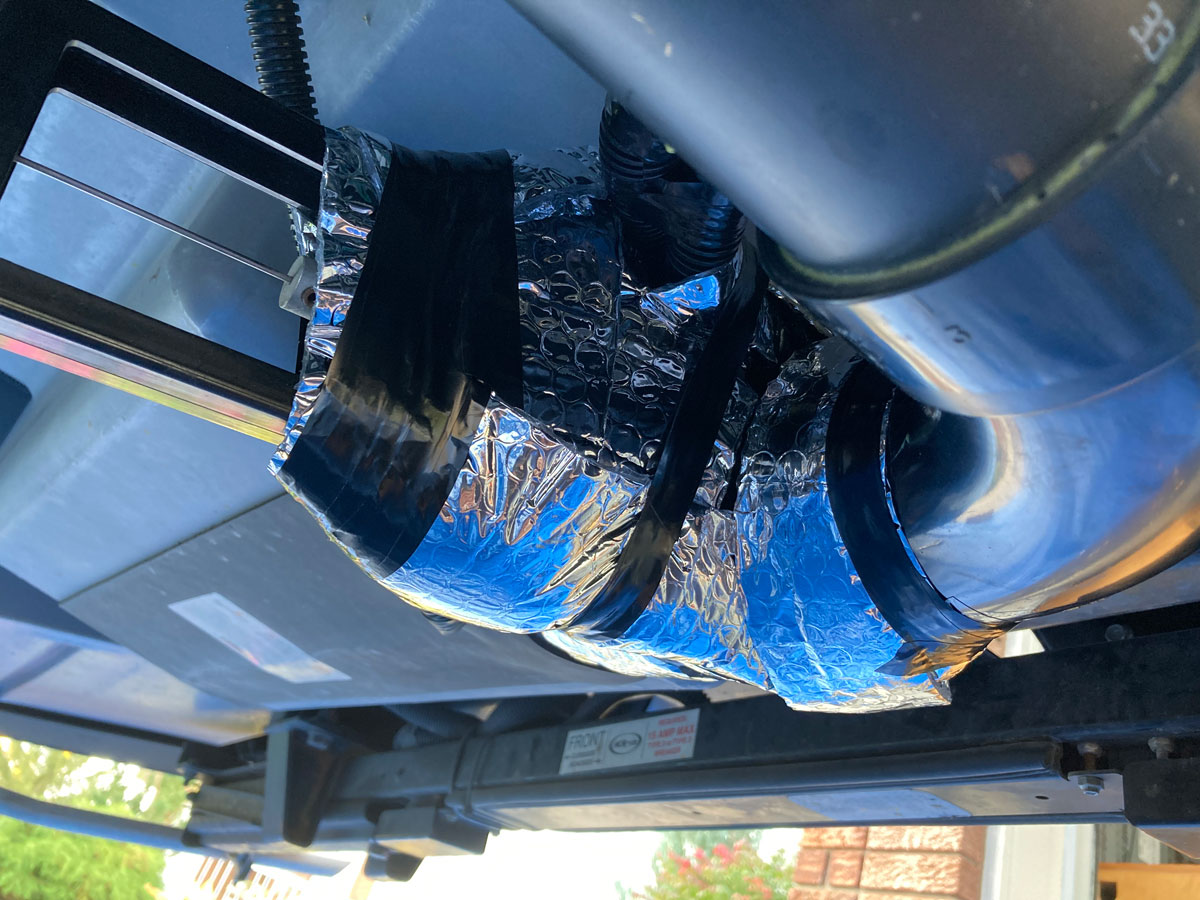
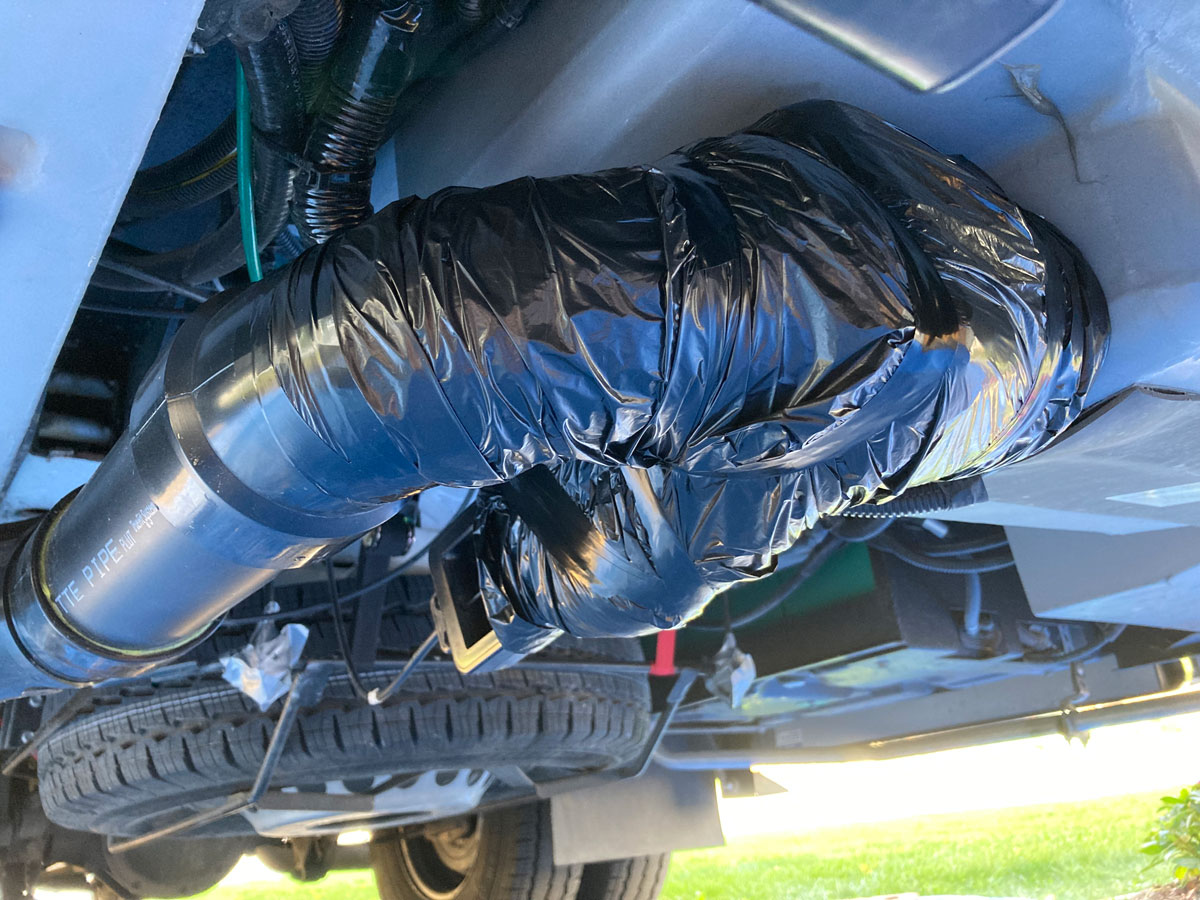
How did they work during our first Christmas camp? They worked great. I turned the heaters on about 30 - 60 minutes prior to a winter dump, and the operation went as smoothly as during the summer. (I did have some RV antifreeze in the tanks because our tank heaters were inoperative at the time, so that might have helped a bit too.)
This was, without a doubt, the highest workload electrical mod I had done so far due to the amount of wiring that needed to be connected - all while lying on my back underneath the coach. Would I do all of this again? Well, yes I would. This project was intended to be insurance; an additional measure to go with the tank heaters and the use of RV antifreeze. Heading into yet another winter now, the combination of RV antifreeze, grey and black tank heaters, and now these gate valve heaters gives us a good measure of peace of mind.
Consideration 6 – Can we power all of this stuff while dry camping, with no shore power plugged in?
After thinking about all of the above, you can see that these various 12 volt draws do indeed add up. Let’s look at the scoresheet for these DC amps:
- Wet bay heat - 5 amps
- Water pump area heat - 5 amps
- Truma auxillary electric heat - 5 amps
- Battery heater - 5 amps
- Grey and black tank heaters - 10 amps
- Dump valve heaters - 5 amps
- Inverter - 2 amps
- Fridge and other “normal” coach loads - 5 to 10 amps?
That is a lot of DC amps potentially drawing down our batteries, if we are dry camping. But, not all of these apply at the same time - depending on what the temperatures are out there, we might only have a few of these on to cater for the current situation. The Truma heat won’t be on if we are camping (normal use of the hot water system allows the Truma to take care of itself), if we are using propane heat the water pump area heat is not neeeded, we’d only use the dump valve heaters for an hour before we headed to the dump station, if the tanks are getting full - and temperatures are popping up above zero during the day - we’d likely not turn on the tank heaters for extended periods of time, and our wet bay heat and coach battery heat are on timers. Now, when plugged into shore power, this loads issue goes away as the Xantrex can easily keep up with the necessary charging of the batteries.
All that to say, we have “armed” ourselves with this capability, as we have been in situations where we have needed these various heat sources to ensure trouble free camping.
Results of all these Mods
So, during the times when we did need the help, how did all of this turn out?
It turns out it was all very worthwhile. In the first spring of the Pandemic, a family emergency forced us to dig the View out of a snow bank and dry camp in sub zero temperatures out of town at a Walmart. We don’t use the propane heat while sleeping, instead we prefer to stay warm in our winter bags and then use the furnace to come back up to temperature in the morning. With the light bulbs powered to keep the wet bay and water pump area warm, the Truma circulating hot water throughout the kitchen and bath plumbing systems, the lithium battery heater powered, and with other coach normal system current draws, we used about 40% of our batteries capability overnight. Once we were up in the morning and had the furnace powered, we could unplug the water pump heat and just leave the wet bay heat, tank heaters, and battery heat on. With the generator running during breakfast, we brought the batteries up to close to full charge again. Temperatures during the day were above freezing.
During the second Christmas of the Pandemic, we did both dry camping and shore power camping in temperatures approaching 14 degrees F, or -10 C. Not super cold by Canadian standards, but uncomfortable enough for us that we sure were hoping that things would turn out Ok. The mods all worked great, but we were let down by the Winnebago installed holding tank heaters failing. I noticed that when the tank heaters were selected on, we would pull only 1.8 amps, instead of the expected 9 to 10 amps. With daytime temperatures not forecasted to go much above the freezing mark, there was a real danger of holding tank freeze up. I reverted to using RV antifreeze to keep the tanks in liquid state - there are lots of people on the web who advertise that this has worked well for them, but I could not find anyone who offered up a magic formula describing the concenetration ratio of antifreeze to tank contents. We were left to improvise and test things ourselves. I believe we went ultra conservative, but it worked. I poured 2.5 US gallons (9.46 litres) of pink ethanol based RV antifreeze down each 41 US gallon tank, and then continued to be conservative and resorted to using antifreeze in the toilet bowl for each flush. We dumped the tanks at approximately half full each time - for the grey tank that works out to about a 12% ratio of pink stuff to water, and for the black tank it was much more because the only water introduced was from the bathroom sink. At the time of our sub-zero dumps, I turned on the dump valve heaters about an hour in advance and had absolutely no issues at all. Everything went as smoothly as a summer operation.
UPDATE NOTE: The use of RV antifreeze in our waste tanks was later proven to be just a “warm and fuzzy”. Our tanks did not turn to slush (or worse) only because we were lucky that the overnight low temperatures did not stay there very long, warming up close enough to freezing during the day that the antifreeze / water mixture stayed liquid. See below for the experiment I did later on that lead me to this conclusion…
The 120 Volt Outlet Timers we have on the wet bay and coach battery heat cut down on the coach battery drain considerably. The batteries have considerable thermal inertia due to their density, so cool very slowly, and the wet bay heat only needs to keep things slightly above freezing. As a result, we have programmed our timers to only provide inverter power to the outlets for 20 minutes out of every hour.
The Truma electric antifreeze kit - while driving around in freezing temperatures, this system was a real bonus. After installing the flue protective cap, and then switching the antifreeze system on via the rotary knob, the Truma was protected. However, we noted that the recirculation pump ran continuously. I have read others observe this as well, so I guess that is standard operation.
Anything else to mention? Well, our Easy Thermal Blanket between the cab and coach worked very well, the rooftop heat pump gave us useful heat down to a few degrees below freezing, the kitchen fan did a great job of removing humidity while we were cooking, our dedicated 20 amp circuit allowed us to use an electric heater to supplement the heat pump and propane furnace, and keeping the slide IN greatly reduced the volume of coach we needed to heat and resulted in very comfortable living temperatures.
Yes, it all worked as we hoped it would. Some of these mods mentioned above were pretty easy mods to make, but they changed the game considerably on being able to use the motorhome when the temperature dropped.
Future Operations? I added an ammeter on the grey and black tank heaters circuit, to allow for an easy assessment of how well they are working. During testing for that ammeter mod, I finally zeroed in on the fact that the original heat pads left the factory inoperative due to a ThermaHeat defect. When I finally got to replace those pads, this ammeter mod was very handy. (If you have heating pad issues that are fustrating you, the info captured in this Tank Heater Ammeter Mod might be useful.)
My RV Antifreeze Experiment
After a few winter seasons of using antifreeze in the tanks, I did some RV antifreeze testing to see just how cold it needed to be before antifreeze added to our waste tanks became ineffective. Sadly to say, I was dissapointed at the results. It turns out adding antifreeze to tanks might just be more of a psychological benefit than an actual advantage.
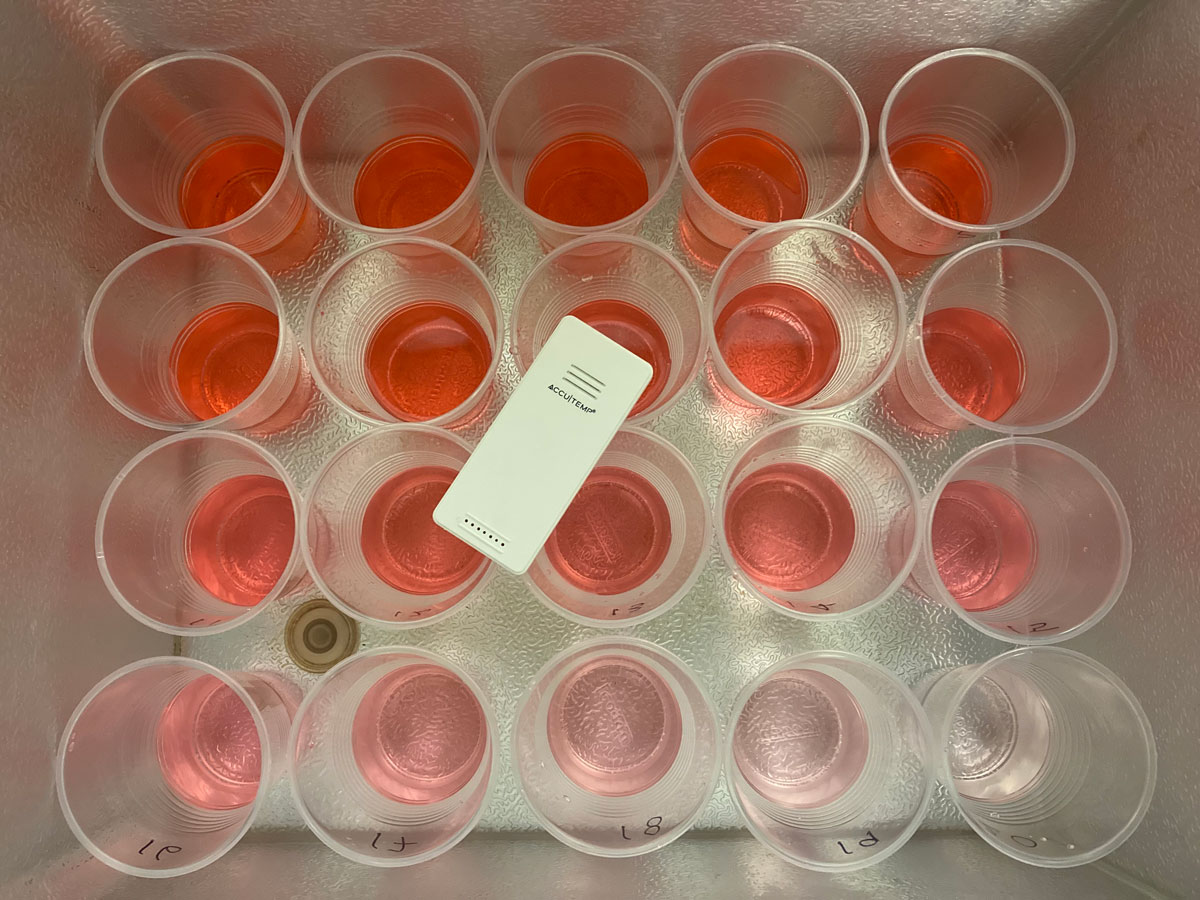
The experiment I did used 20 samples of various concentrations of the pink stuff and water. I started with 100% RV antifreeze, and then diluted the samples at 5% increments down to 5% antifreeze and 95% water. As best I could, I ran 5 tests at increasingly cold temperatures. (Getting the exact temperatures I wanted was not possible - I could only get to within 2 or 3 degrees of what I wanted.)
At 19F / -7C the samples turned to slush at 30% antifreeze and 70% water. For a View / Navion, assuming you pour in 2.5 US gallons of RV antifreeze to start with, this means at a 20% tank level … you are slush from there on if things stay at that temperature for an extended period of time.
At 9F / -13C the samples turned to slush at 85% antifreeze and 15% water, and frozen solid by the time you reach 50 / 50. For a View / Navion, assuming you pour in 2.5 US gallons of RV antifreeze to start with, you only need to add 1/2 US gallon of water to turn things to slush at this temperature. It doesn’t take much more water to turn things to solid ice, if you stay at that temperature for an extended period of time.
At 3F / -16C the samples were all either slush or frozen solid. At 85 / 15 and beyond the samples were all frozen solid. Yes, even the 100% antifreeze sample was slush at this temperature.
You can guess what further decreasing the temperature did - things certainly didn’t improve.
So, what did I consider a failure? Although slush was not going to be a problem for damaging the tanks, a tank full of slush kinda would make it difficult to dump the next morning. Frozen fluid? Now, enough of the frozen fluid could be a structural problem for the tank depending on how full it was, but for sure it would be difficult to dump the next morning. If you didn’t damage your tanks, you could wait for spring … I guess.
What did I take away from this? Well, for the years we have been winter camping in temperatures just slightly below freezing … we have been very lucky. With our factory tank heaters inoperative for those early years, if it had got much colder for an extended period of time - there is no way we would have been able to dump our tanks. Yup, just lucky. And, flushing the toilet with pure antifreeze doesn’t help as it doesn’t have to get very cold to turn your tank to slush regardless of how much pure antifreeze you put in. You really need tank heaters if you are going to be spending time in temperatures consistently well below freezing. The RV antifreeze method for winter camping is just inaccurate folklore at extended temperatures seriously below freezing.
But, here is where adding RV anti-freeze to the grey and black tanks is a very good idea - RV anti-freeze to start off the tank contents will allow you to turn the tank heaters on without the worry of cracking a tank due to insuffcient fluid on the floor of the tank. The manufacturer of the tank heaters cautions against turning on tank heat unless the floor is submerged in fluid. So, how much fluid is enough to take away the worry of cracking a tank? Well, I’m not sure - but adding a couple of gallons of RV antifreeze to the tank prior to our cold weather trip departures has allowed us to turn the heat on right away and forget about the concern.
I mentioned earlier that I can keep an eye on the wet bay temperature. Here is the temperature measuring kit I purchased - I mounted one sensor in the propane locker to get an outside air temperature, one in the wet bay, and one near the water pump:
I hope all of this helps. Winter Camping - why not?
( Ok, that’s all just great; but you don’t feel these mods are for you? Well, have a look here to see what we do when there is no time to transition the coach from winter storage mode to “Summer Mode” while preparing for unexpected winter camping. There is another way! )