RV Lithium Battery Heater | RV Mods

Highway 40 - Kananaskis Country, Alberta Rockies
NOTE - As of 2024, self-heating lithium coach batteries are now quite commonly available to RVers who are upgrading their factory electrical systems. At the time of our Battle Born Lithium battery install, self-heating batteries were just a futuristic dream. If we had to do it again, we would not hesitate to look into lithium coach batteries that have this feature. But, in the meantime, this is how we heat our lithium coach batteries in cold weather…
As you know, the only down side to having lithium batteries is that they are not happy charging at sub-zero internal temperatures. Most of the RV lithium battery applications have a battery management system built in that prevents the destructive effects of cold charging by inhibiting a charge cycle if the temperature is too low. The Battle Borns that we installed have one of these battery management systems.
Experiments I have done indicated that the BMS shuts down the charge cycle at about -2 degrees C, as measured at the terminal post the Victron 712 temperature sensor lead is attached to. (I can’t say it was -2 C every time, but right around there.) Knowing that we would be dry camping in sub-zero temperatures - the trick was going to be to keep the batteries warm enough to accept a charge again - when we woke up from a long winters night. I thought of a bunch of schemes that involved thermal blankets, and researched battery warmers from our national institution up here – Canadian Tire. These were pretty low wattage, so seemed like they might be Ok for current draw while dry camping. But, after looking at the manufacturer’s specs, I noted that they were not recommended for lithium batteries because it was possible the blanket temperature could damage the lithium battery casing. I’m not so sure about that, after talking with the vendor that sold me the batteries, but I elected to continue the search. There are lots of solutions out there on the web for battery pads, but again, the pad temperatures were pretty high.
For starters, I settled on something simple I had in the basement - a low wattage therapeutic heating pad from Sunbeam (about 30.00 Cdn). Because this pad runs on 120V AC, the pad only sees a .4 amp draw - whether from shore power or via the Xantrex inverter. (If using the inverter, the DC draw from the batteries is about 5 amps.) Experiments I did showed the surface only gets to around 40 degrees C on high, which makes sense when considering it is used for therapeutic heating. Over that first winter I did some experiments in the garage, and when an insulated lead acid battery was sitting on the pad, with the overlapped edges running up the battery sidewalls a bit, it took about 8 hours for a cold soaked battery at -11 C to warm up to over 0 C. This does seem like a long time, but my thinking was that if I insulated the battery box well enough, and fired the heating pad up well in advance of cold exposure, I could maintain the battery above zero for the times I needed it heated. Also, I have noted that the battery temperature does rise with use and charging – so internally it is helping out anyway.
During our first spring of dry camping in cold temperatures I found that … yes, it did work. Now, it was a bit clunky, as I had to run the pad wiring out the step well and plug it in to an outlet over the cooktop. But, the important part – if I had the pad plugged in well in advance of cold overnight lows, the battery temperature did not go anywhere near sub zero. (Hey – maybe it would not have dropped below subzero anyway just due to the thermal mass of a battery, but with the pad operating there was absolutely no issues of finding out the hard way that I needed some sort of supplementary heat.)
Now, there is a fairly big drawback using the Sunbeam heating pad I found in the basement – the pad controller has an auto shutoff set for two hours. That meant that initially we had to remember to keep resetting it, and overnight we were out of luck for heated batteries. After recently doing the arithmetic, and measuring the resistance of the heating pad itself, I noted that the wattage of the heating pad was independent of the control circuit. With this in mind, recently I removed the controller, added a switch with an LED indicator, and added a 3 amp fuse for peace of mind. (The heating pad pulls less than 1/2 of an amp, so the 3 amp fuse I borrowed from a string of christmas tree lights is plenty.) The heating pad is now configured to allow continuous heat to the batteries when desired.
I added a receptacle on the entry side wall of the kitchen base cabinet so I could easily plug in the pad. The receptacle has a split circuit – one plug is a dedicated 20 amp circuit for an electric heater, and the other plug is tied to the house receptacles using the existing inverter capable supply.
The details for this “bonus” outlet mod can be found here:
The heating pad installation was not too bad – but since I already had the lithium batteries installed, I had to remove them and do it all over again. The workload was going through the process of disconnecting and then re-connecting the cables when the insulation was in. Insulating the battery box was straightforward enough; I used what I had on hand. I cut up a foam rubber tile used for cushioning on the basement floor for the batteries to sit on, found a sheet of packing insulation that worked well for the back of the battery box, and then used pink fibreglass insulation for the bulk of the cavity to close it off from the outside. (I packed the outside exposed insulation in plastic bags to protect it from external elements.)
There were two snags, both tied to the fact that I tried to retain the Winnebago battery retention system. Because the batteries now sat taller due to the foam pad and heating pad they were sitting on, the threaded rod was not long enough to meet the hold-down bracket. And, the bracket had to be flipped upside down to be able to match up with the threaded nut attached to the back wall of the battery box. I had to head out and pickup some 5/16th threaded rod, washers, and nuts in order to get the job done.
Once the batteries were positioned on the matt, with the extra pad width overlapping the back of the batteries up the rear wall, coverage was pretty good. There was about a half of an inch on each end without any coverage, and I left zero overlap on the front of the batteries so there was no danger of the threaded rods damaging the pad while the coach is in motion (not very likely, but a consideration). Jamming in insulation to close off the box was the last step.
Here is what I started with - the soft cover and the controller have not yet been removed:

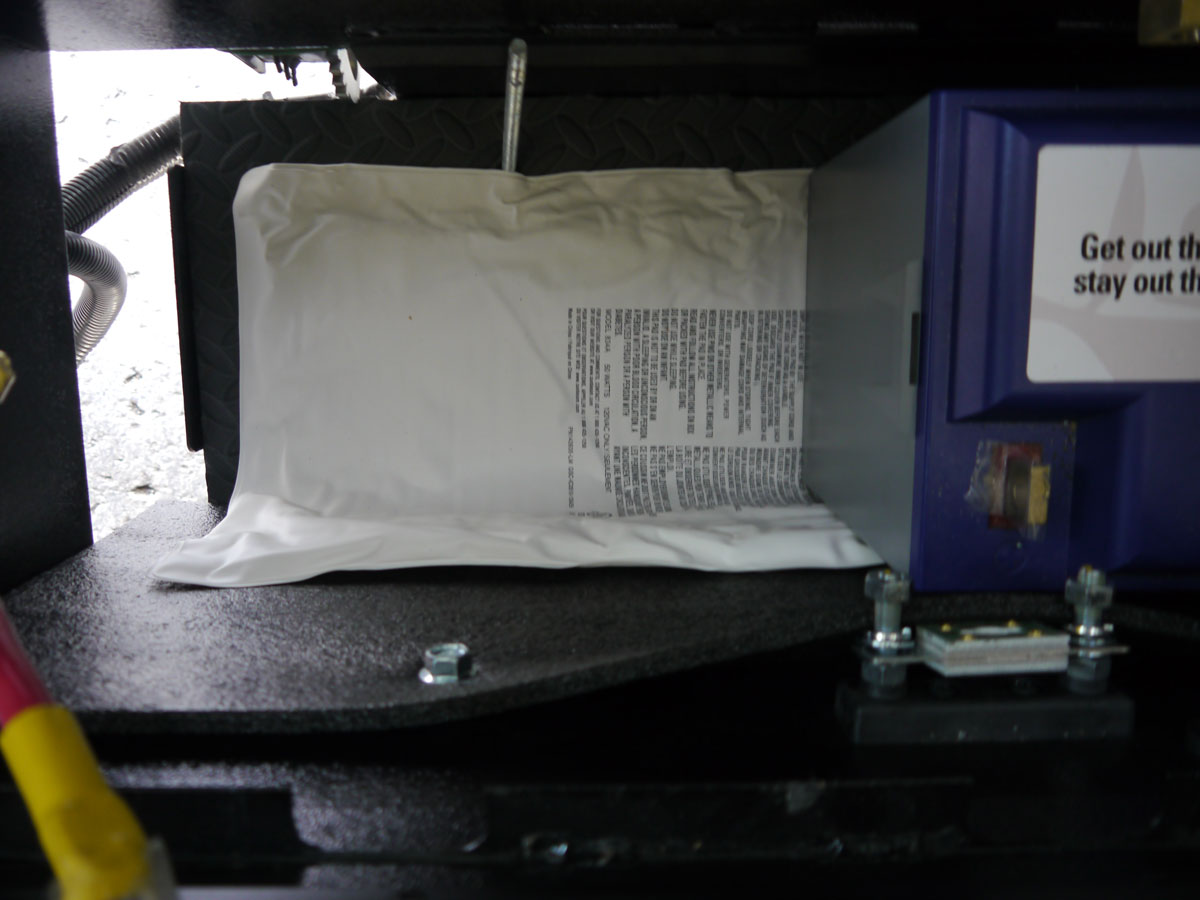
This is a shot of the orientation of the pad in the box, with the floor and back wall padding:

And this is one of the batteries loosely positioned. The pad was tucked up further to the back, to leave zero overlap up against the threaded rods:
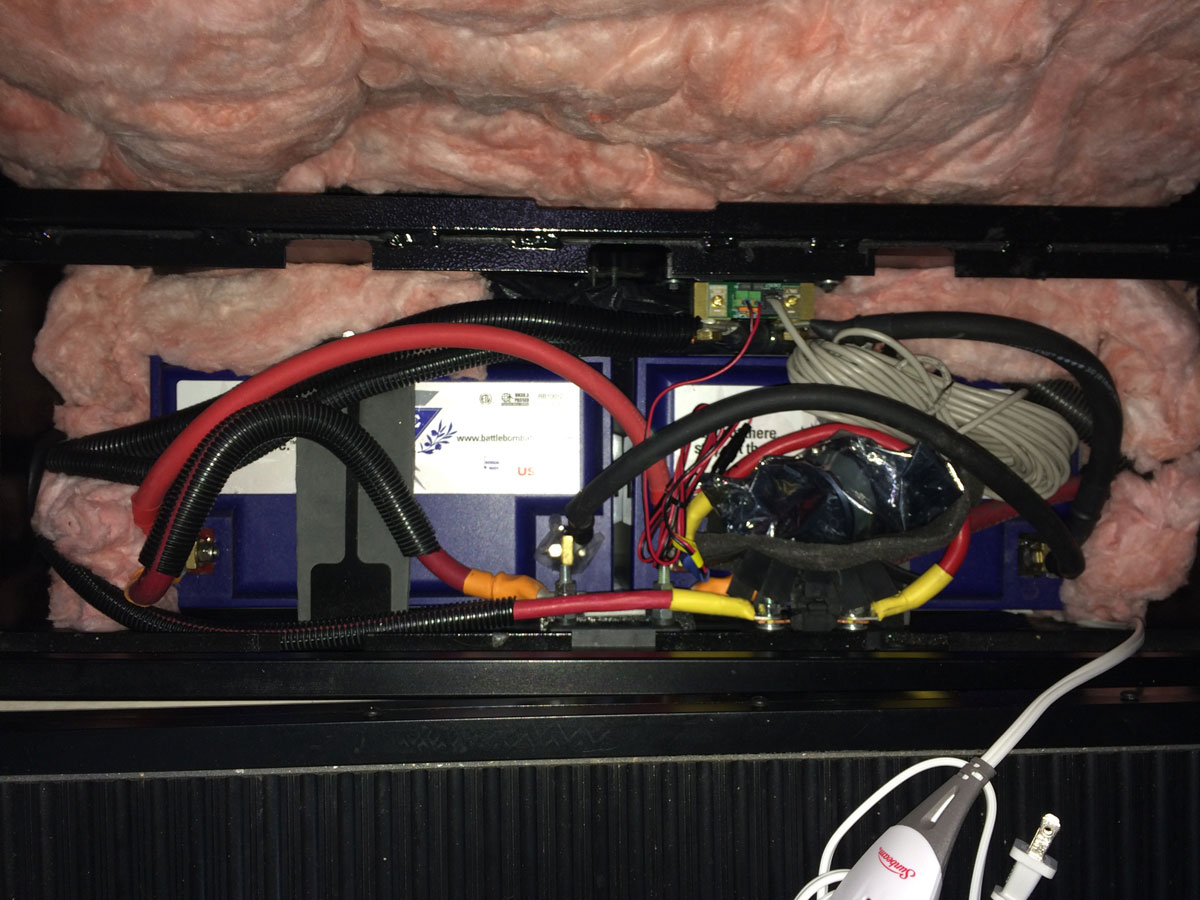
Fibregalss insulation was stuffed in the loose areas. Insulation that was exposed to the outside elements is protected by plastic bags, and the pink insulation you can see here is placed to sit on top of those protected areas. The insulation at the top of the photo will be placed to sit on top of the batteries, before the step is replaced:
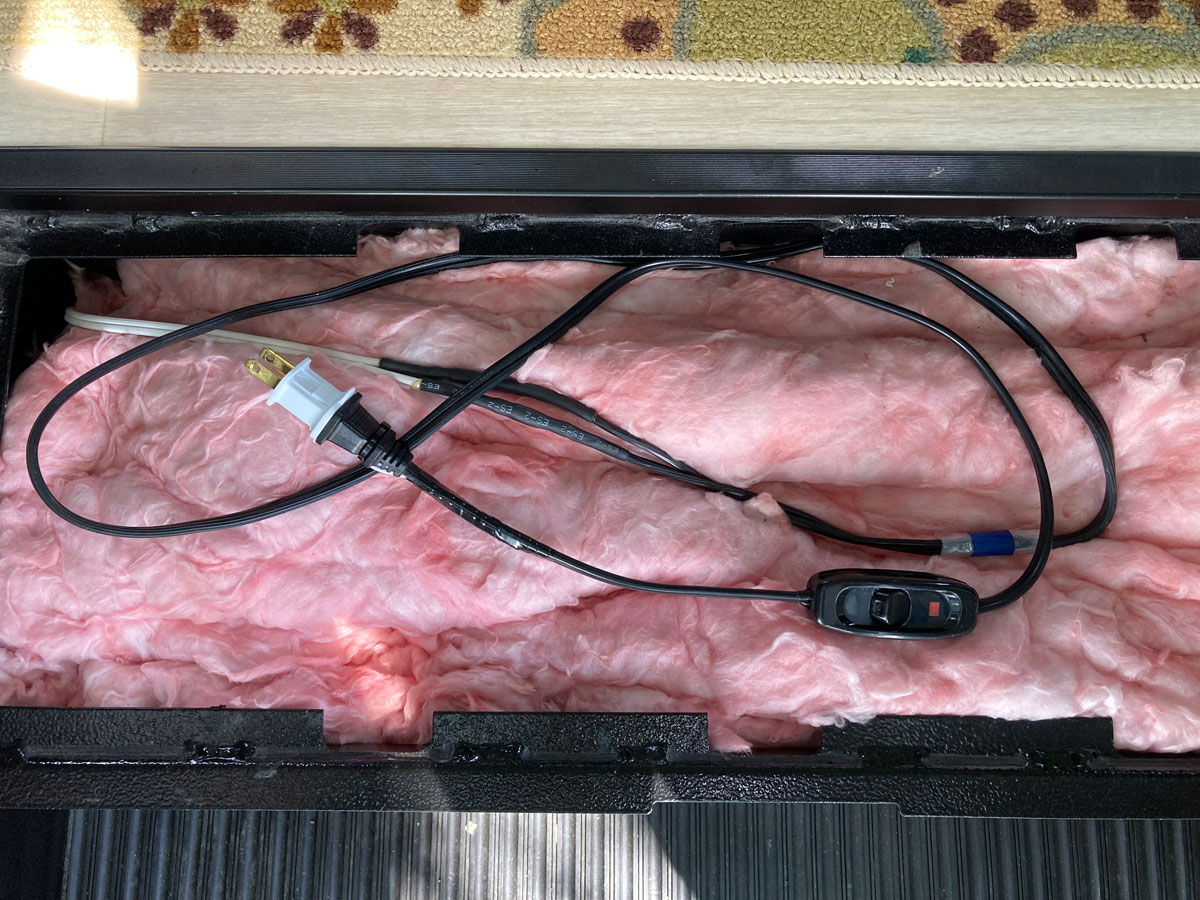
The loose cord, with the controller removed now, sits on top of the finished bed of top insulation. In this next photo you can see the switch I added after removing the controller, and a white plug I scavenged off of some christmas tree lights that contained a 3 amp fuse. The draw from the heat pad is only about a half of an amp, so the 3 amp fuse is plenty - and simple to incorporate. The blue tape you see on the cord is holding a package of 3 amp fuses that came in the christmas light box.
In order to get the pad cable out of the battery box, the removable step is unlatched and the step is slid back about a half of an inch to allow the cord to poke out. The step is plenty secure during these infrequent times when the battery heat is required.
Working as well as we hoped it would.