RV Backup Camera | RV Mods
Our Winnebago View came out of the factory with a large smudge on the inside of the backup camera lens, which made the picture somewhat unusable. After backing into a low hanging tree limb and doing some damage to our top rear roof trim cap - on our very first camping trip - I decided that we’d need to get a better picture out of the camera. The dealer was quoting a 6 – 8 week booking delay, and then indicated that they would have the motor home for about a month. Not ideal…
I took the camera fairing off, and using a mirror to help me unscrew the camera from the fairing support bracket, I wondered if I could unscrew the lens cap to allow me to clean the inside of the lens. Things were pretty awkward there, so after consulting with the factory and being told the connector was right up at the camera, I did my best to unplug the unit. Well, that was bad info, as there is no connector there. During my attempts to get it disconnected, I evidently broke some wires rendering the camera completely inoperative. Great. Just great. That smudge was looking pretty good.
After going back to the factory to see what was up with the intel they gave me, they indicated the original info was incorrect, and the connector for the camera is actually buried in the back wall - accessible only by removing the top rear roof cap. Oh Really?
Well, that put this project on hold for close to two years, as I researched just what exactly what were my chances of being able to remove the top rear roof cap, change out the camera, then put it all back together again correctly - without any leaks. In the meantime, I found a replacement camera on Ebay that was one half of the price of the Mercedes dealer’s price, so optimistically had it shipped up. (I looked at alternative methods of hooking up an aftermarket camera, but deep down knew that every time I used it I would be cursing the fact that our big 10” Sprinter MBUX centre display would just be sitting there … doing nothing.)
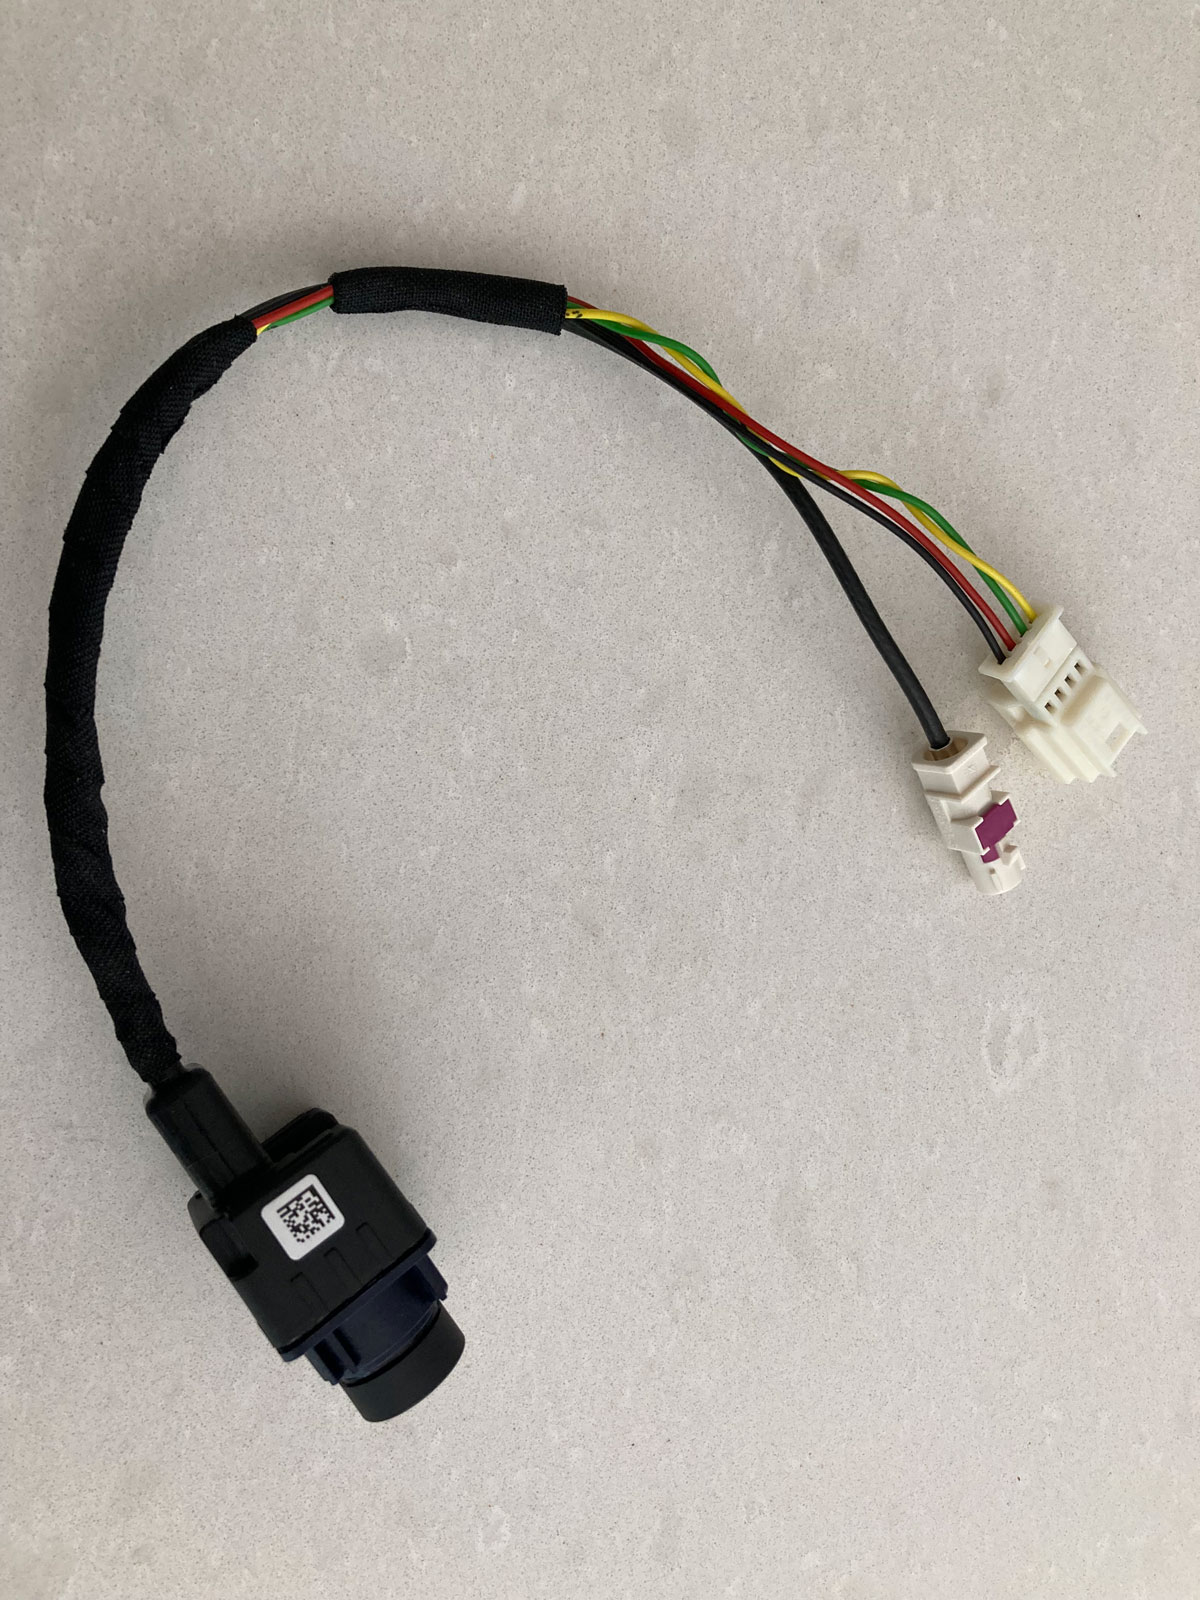
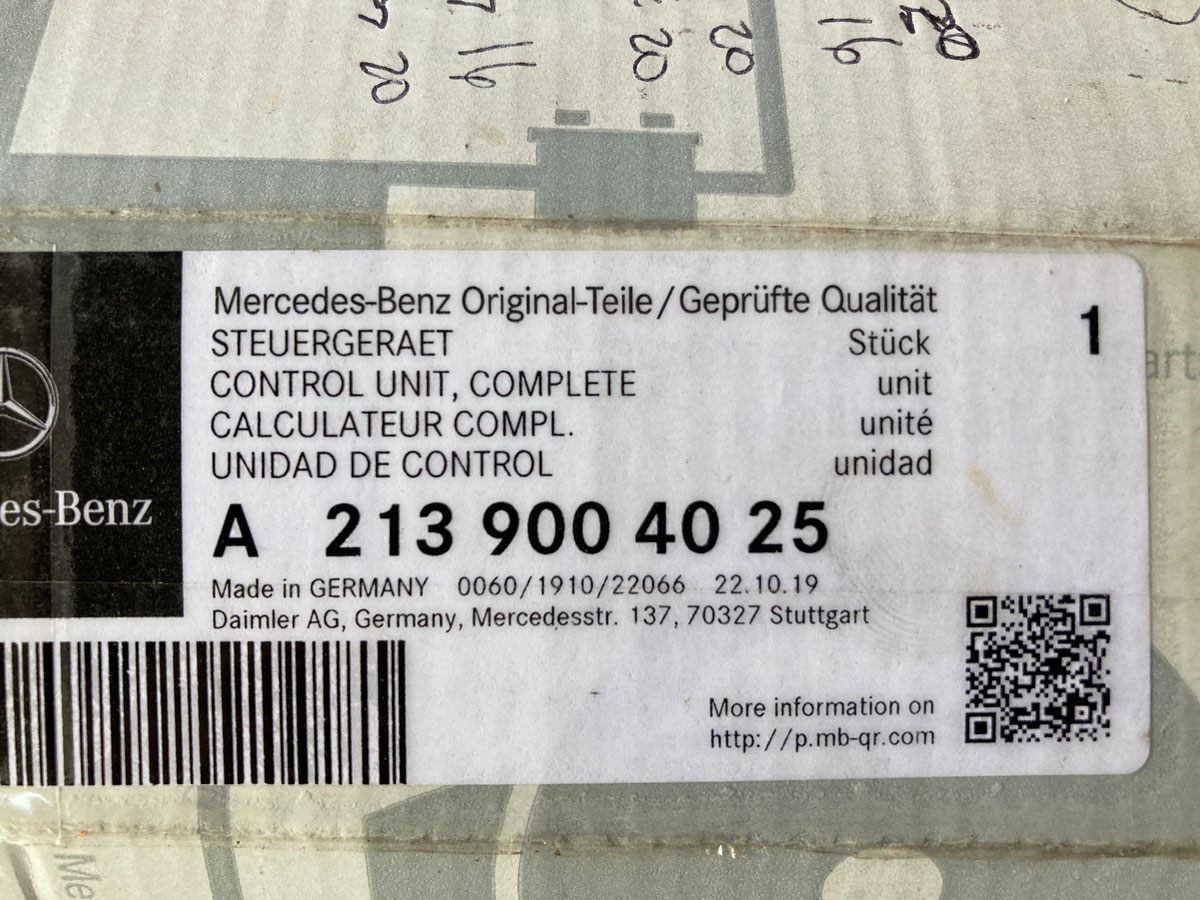
Here is the replacement part and info - note the 4 wire connector:
After close to two years of backing into some pretty crazy places to go camping, both my wife (human backup camera) and I agreed that things would be safer if we had a camera. So, I steadied my nerves, and got into this project. I’ve decided to document this camera replacement, as there were a number of things I learnt that I really wish I’d known about in advance. There is a better way to do this, so there are some considerations that might be helpful if you are contemplating starting this project. At any rate, here is how it all unfolded:
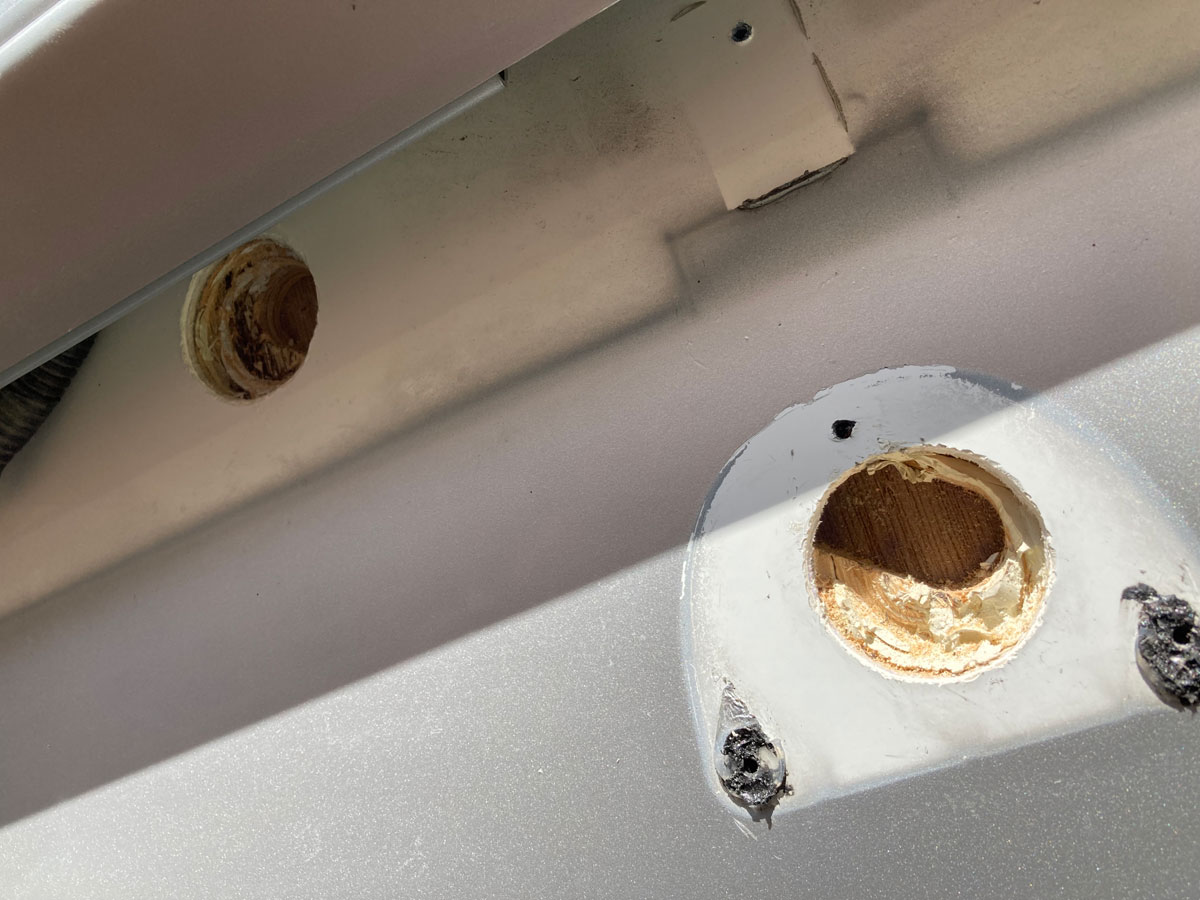
After you remove the camera fairing, eventually remove the camera from the support bracket, and then clean out the caulking from the wall, here is what you are left with.
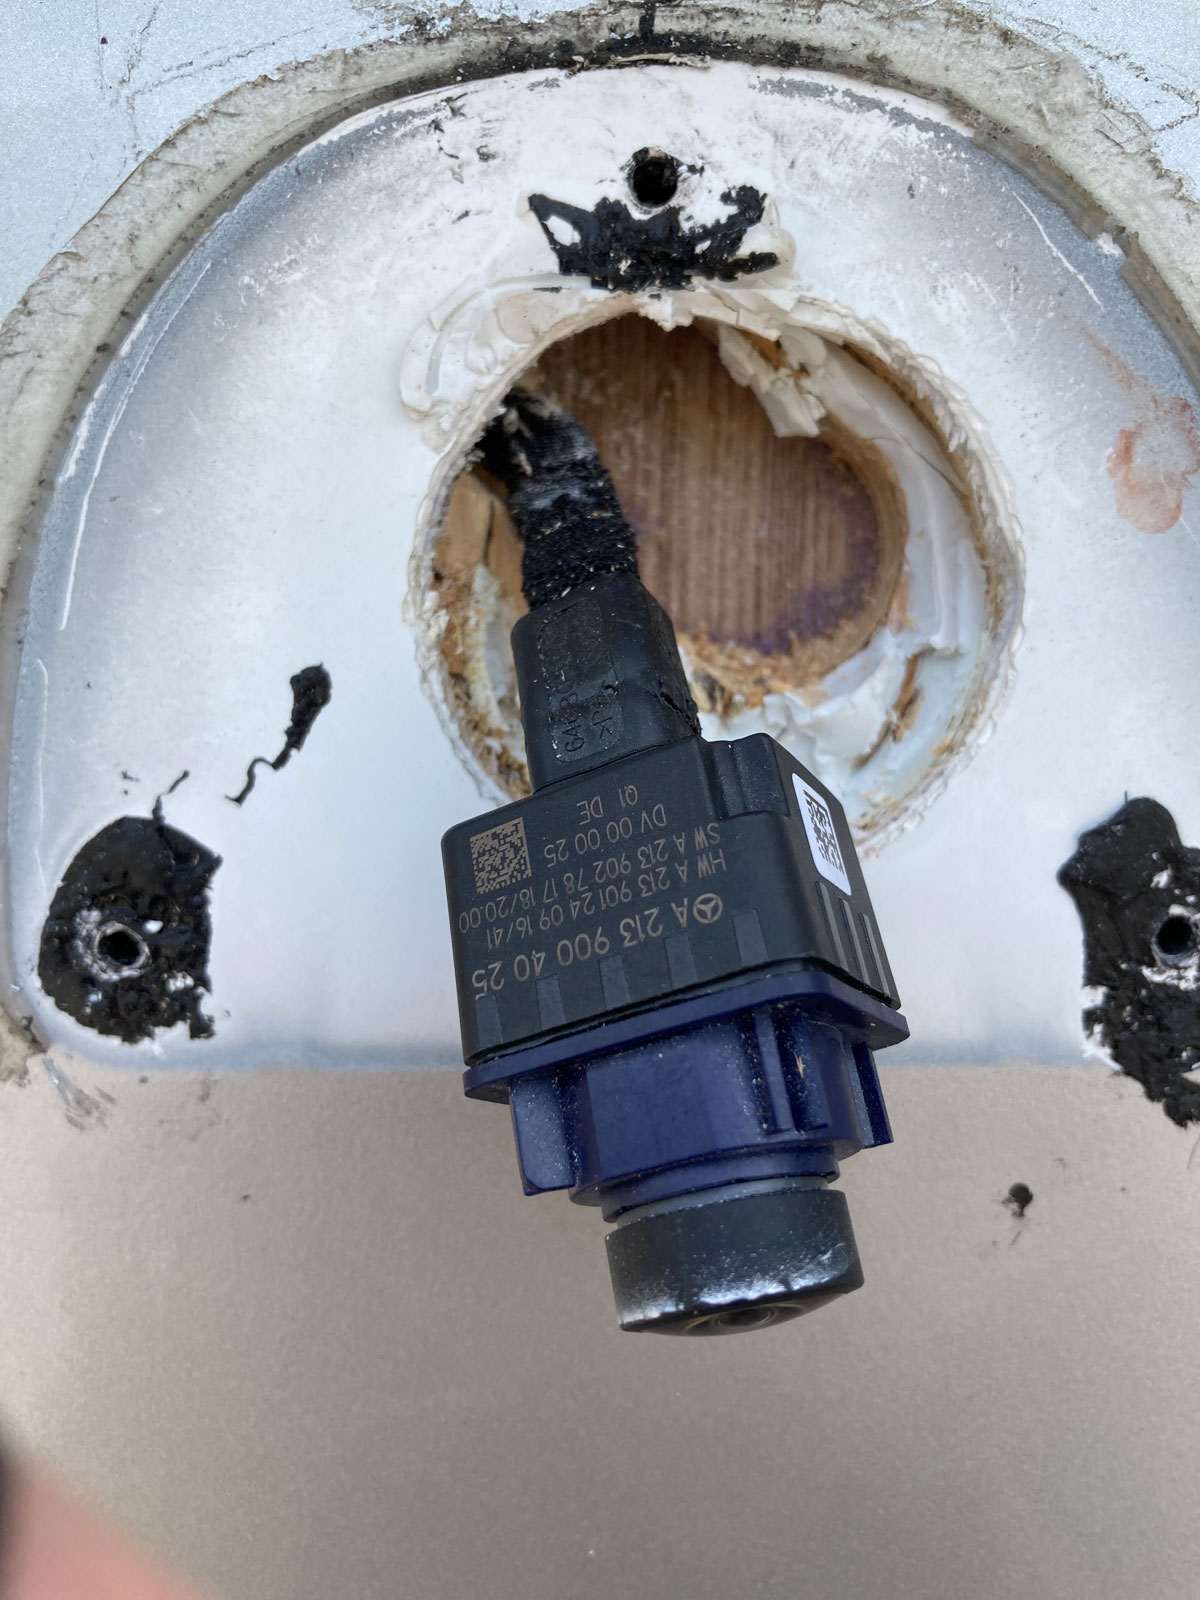
Tip number 1 – don’t remove the camera from the fairing just yet. It is not worth the hassle of getting at the tiny screws holding the camera bracket to the fairing; wait until you’ve got some slack in the line, or until you cut loose the old camera. If you are intent on replacing the camera, I see no harm in just cutting the old camera away to make it easier to remove the caulking.
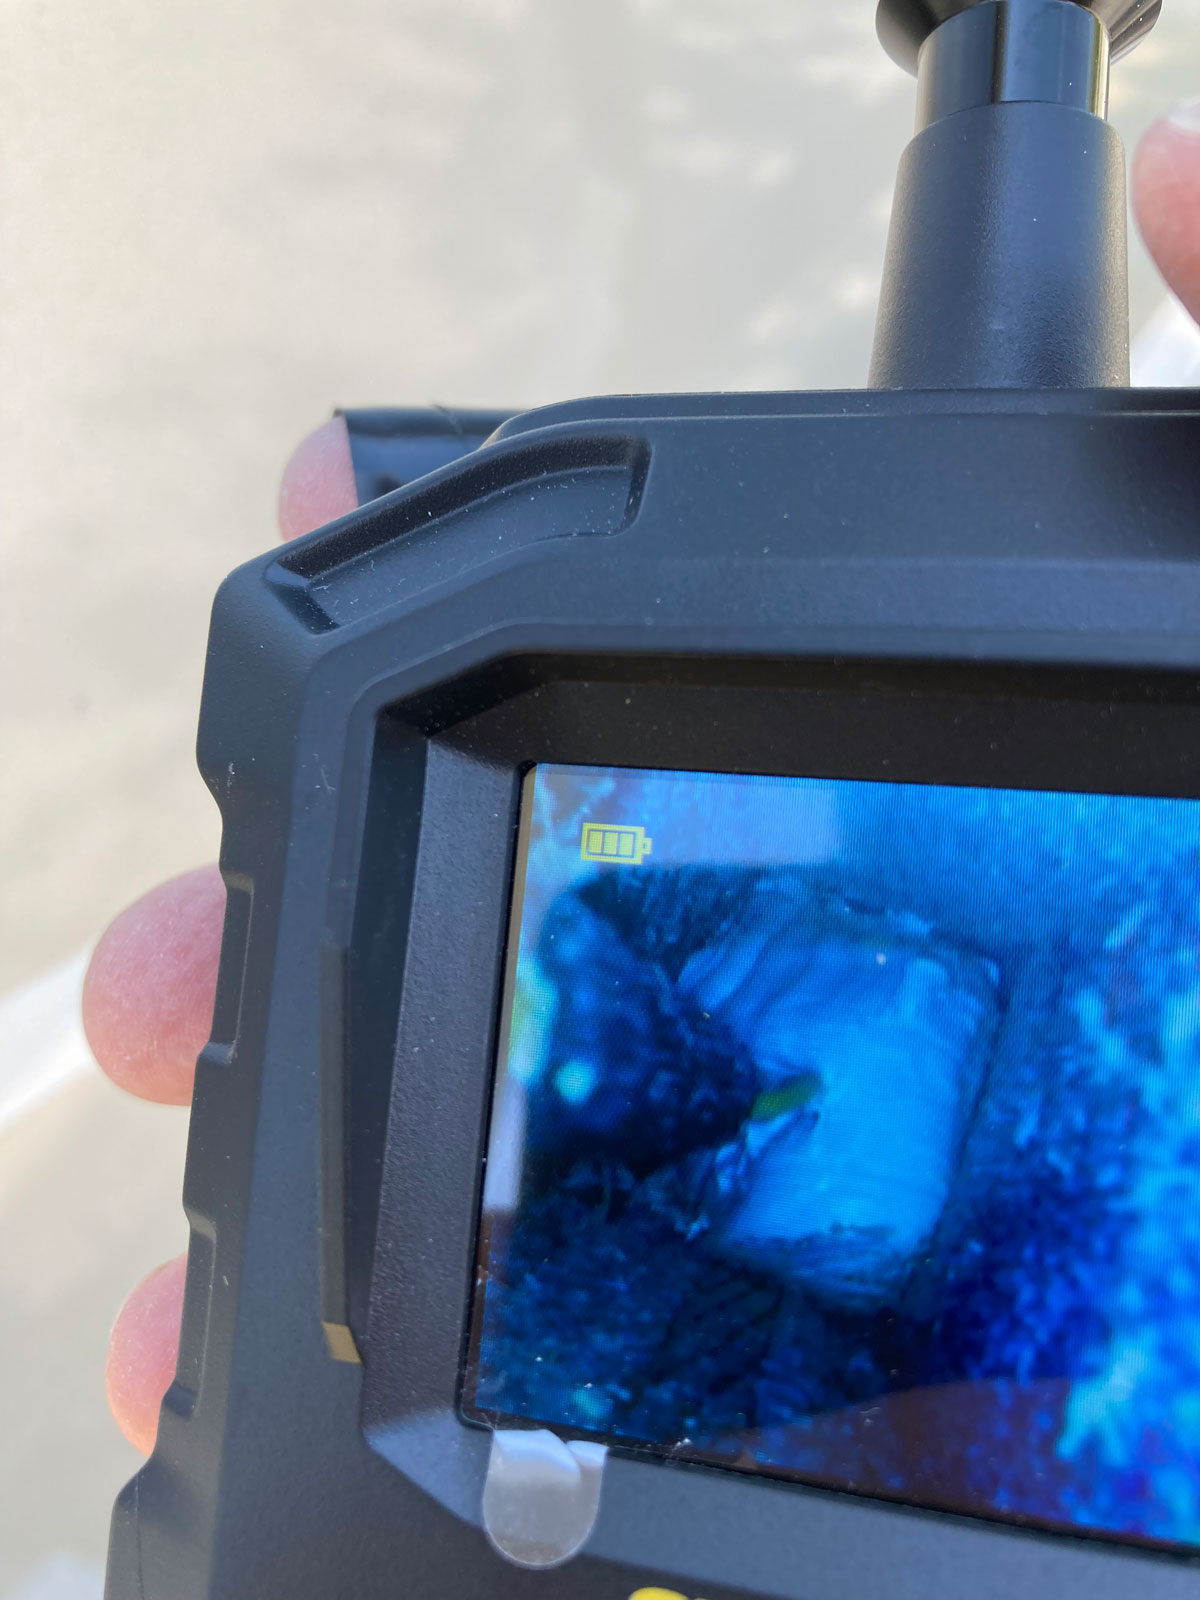
Here is the view looking looking in the wall, as you can see the wire bundle disappears into a block of what looked like insulation. There are no connectors in sight:
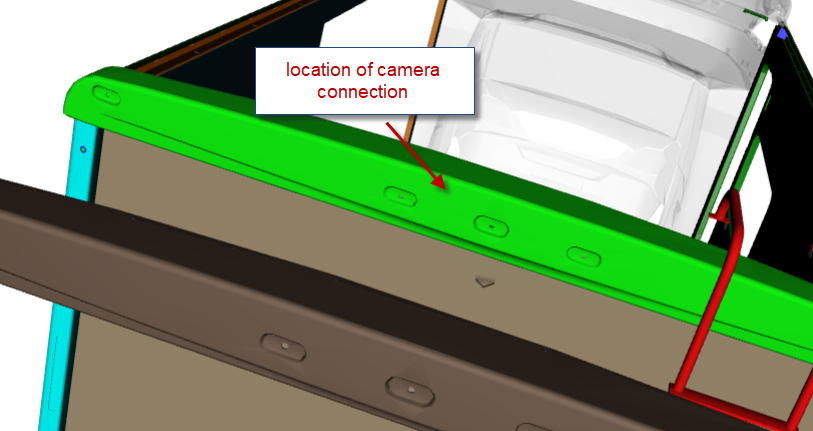
I removed the rear top roof cap next. It is the full width end trim piece above the camera that protects the rear wall and roof seam, and houses the high coach running lights. This image from Winnebago highlights where the actual camera wiring connectors are located inside the rear end cap:
I did not have any experience with roof sealant prior to this job, so it took me some time to remove the sealant to expose the vertical screws on the roof holding the end cap down. I used a plastic razor blade tool that worked well, and mineral spirits did a nice job of cleaning up the residue. Before I cleaned up the cap edge, I took this photo of one of the screws I found buried underneath the sealant:
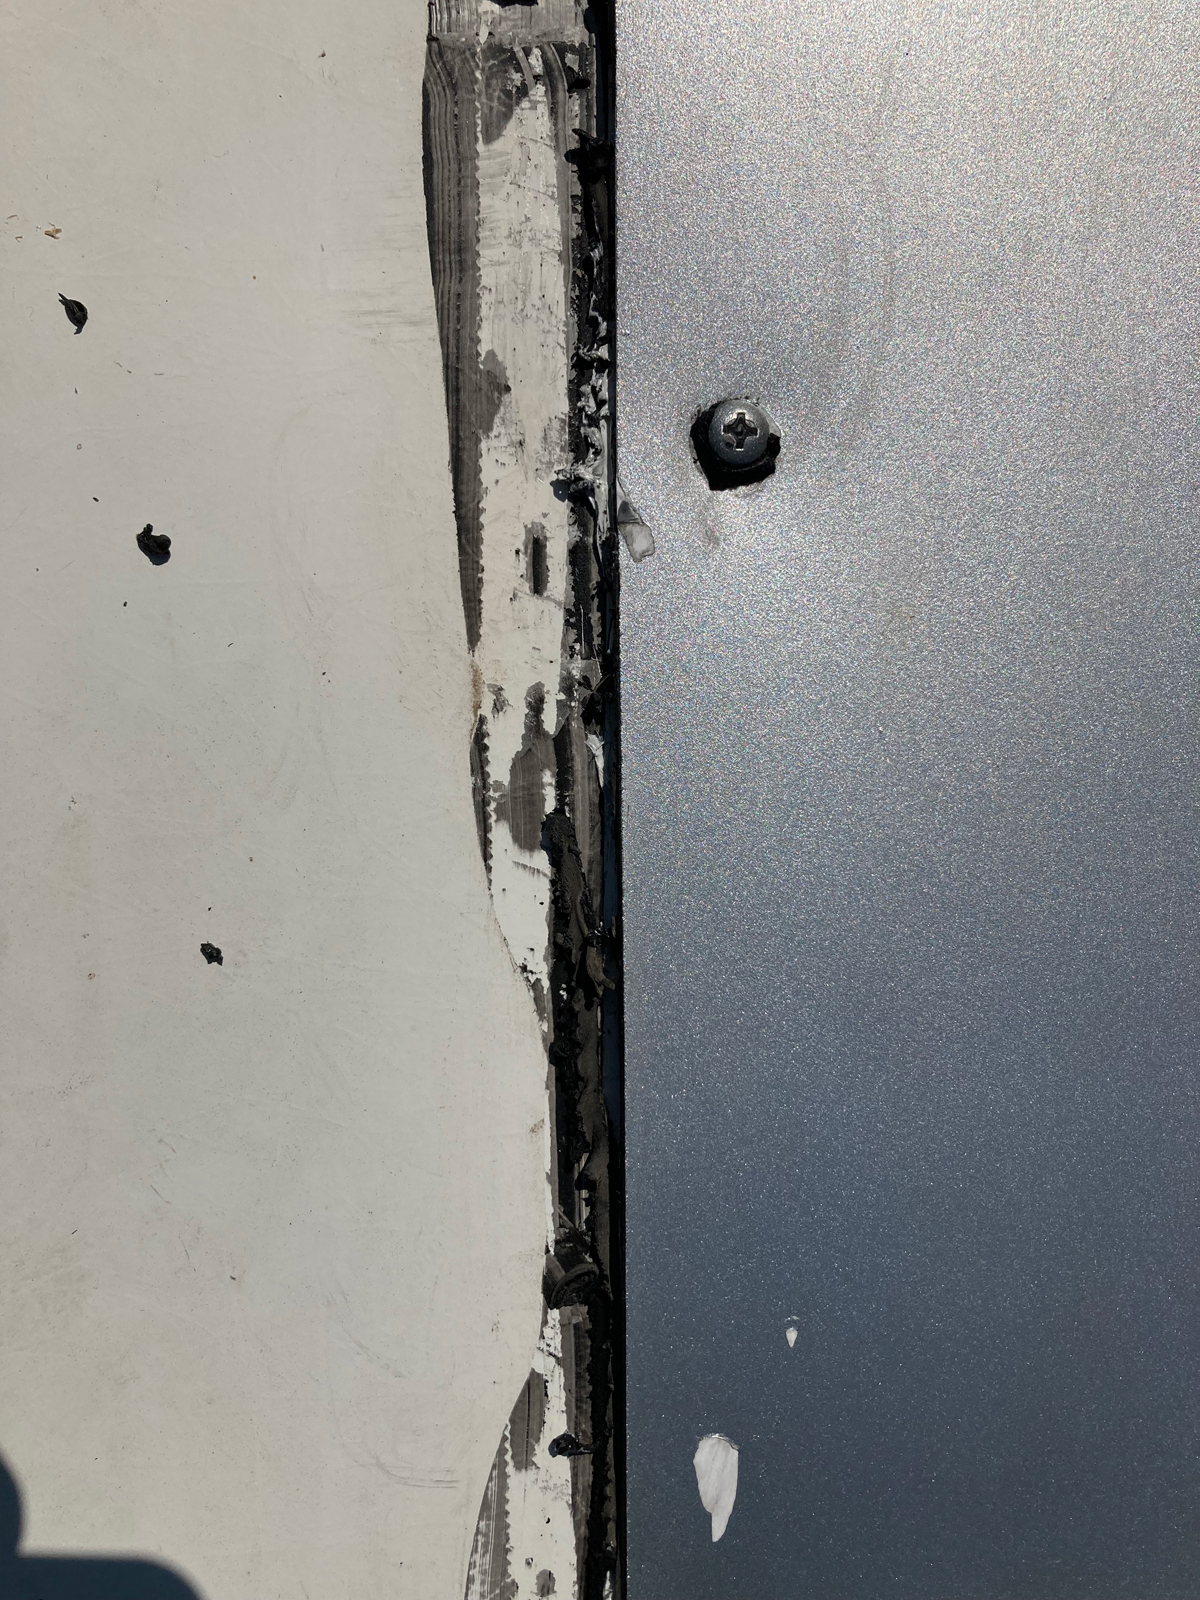
The caulking on the corners of the end cap looks to be the same product that is used on the roof radius. It appears that once the roof radius was sealed along the sides of the motorhome, the installer simply caulked up the ends of the top rear trim cap. This sealant is tougher to remove than the self leveling lap sealant that is used on the top cap.
In addition to the vertical screws on the roof, on our ‘20 View there are three screws that are hidden by those esthetic screw cap covers on the back wall of the trim moulding. (To remove the screw cap covers I inserted a tiny flat head screwdriver into the slot on the “lid” - they just pop off and can be resused. Next time I will put a piece of tape on half of the “lid”, as they have thoughts of their own as where they want to end up.) The screws are actually about three inches away, so you’ll need a Phillips head with a longer than normal small diameter shaft. When you unscrew these, they no doubt will fall into the cap itself and have to be retrieved later.
When the top vertical screws and the three rear horizontal end screws are removed, the trim cap is free to fall. It has a bit of weight to it, so I’d recommend some sort of plan to keep it up high. Unless you want to remove the ladder (I did not), the trim cap is now a bit awkward to work with. The motor home running lights are all still connected; I didn’t want to put any weight on those connections, so used packing tape to support the RH end cap from the top of the ladder, and to attach the LH end cap to the skylight.
You will see that the roof / back wall seam is pretty well sealed with what looks like an eternabond tape type of product. That was a bit of a confidence booster for me, knowing that the end cap sealing is really another layer of belt and braces.
So, what can you now see? Well you can see where the Mercedes connections to the Winnebago wiring is, for starters. No, the connections are not in the wall, they are back out of the wall and lay in the end cap cavity. It is now obvious why tugging on the camera lead was not going to help me find the connections! Also, you will see the mini coaxial cable connector, and the fact that the Winnebago power and control wires do not have a connector that interfaces with a Mercedes connector – instead they cut off the Mercedes connector and use butt splices to join the wires:
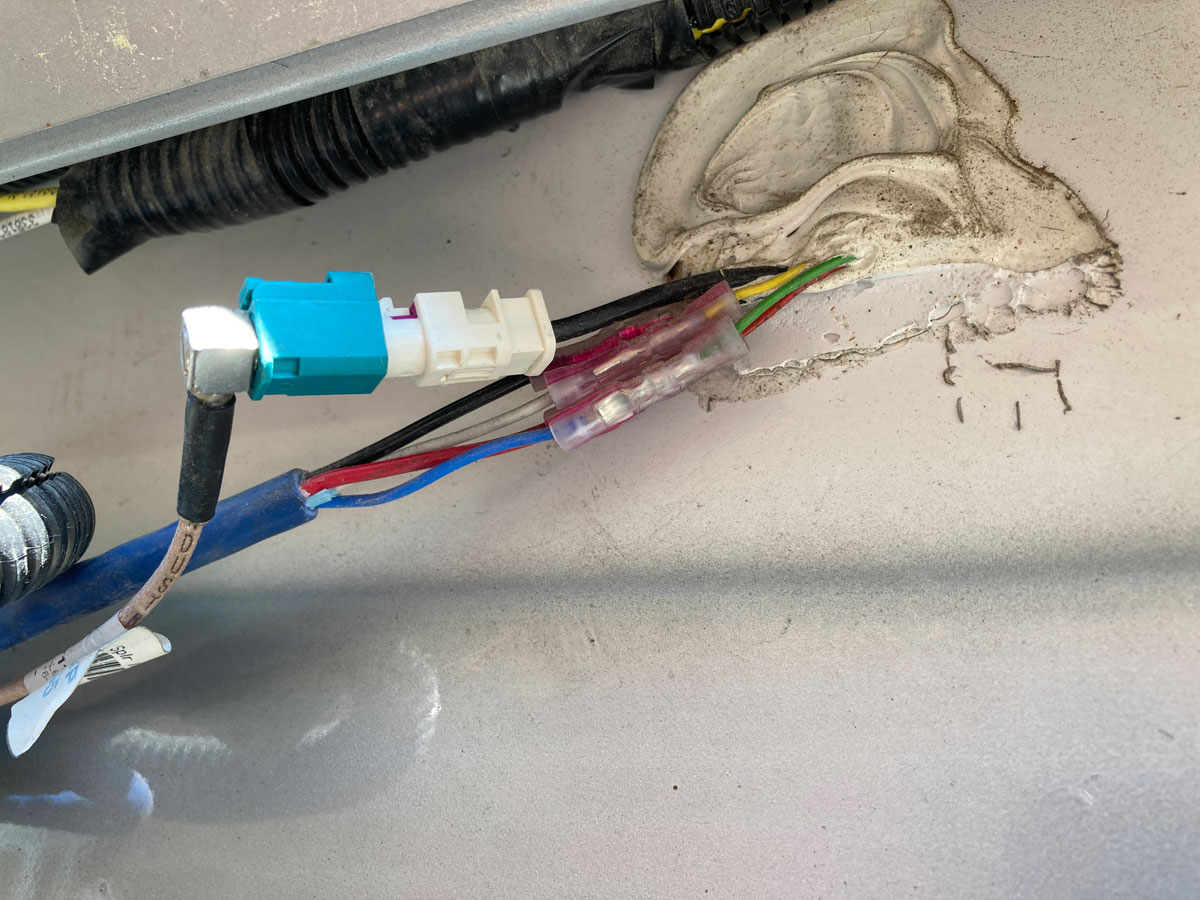
I called our local car audio shop to enquire about that female connector that Winnebago chose not to use, and was told that Mercedes do not sell that connector as a standalone part. You can get that connector, but you have to buy a bunch of cable that is attached to it too. I’m guessing that this is the reason for Winnebago just splicing together the wires – cost. Now, the mini coaxial connector is an industry standard part, and it does connect up to the Mercedes end with no issues.
You will have to get a second wad of caulk out of that wall now, and when you disconnect the coaxial and cut the power and control wire butt connectors free from the Winnebago wiring, you can pull out the camera lead and be left with this:
From this point, there are a few options that present themselves. The first option is to reproduce what the factory had done; feed up the new camera lead, cut off the Mercedes four wire connector, butt splice the wires, connect the mini coaxial cable, and prep the hole for caulking as Winnebago had done. But, it sure would be nice if you didn’t have to take apart the rear part of the roof to replace a camera! This first option guarantees you will have to do this again, if you ever have another camera failure. If only there was enough slack in the cables so you could pull them through the wall without taking off the roof. Is there enough slack in the cables?
Well, yes there is:
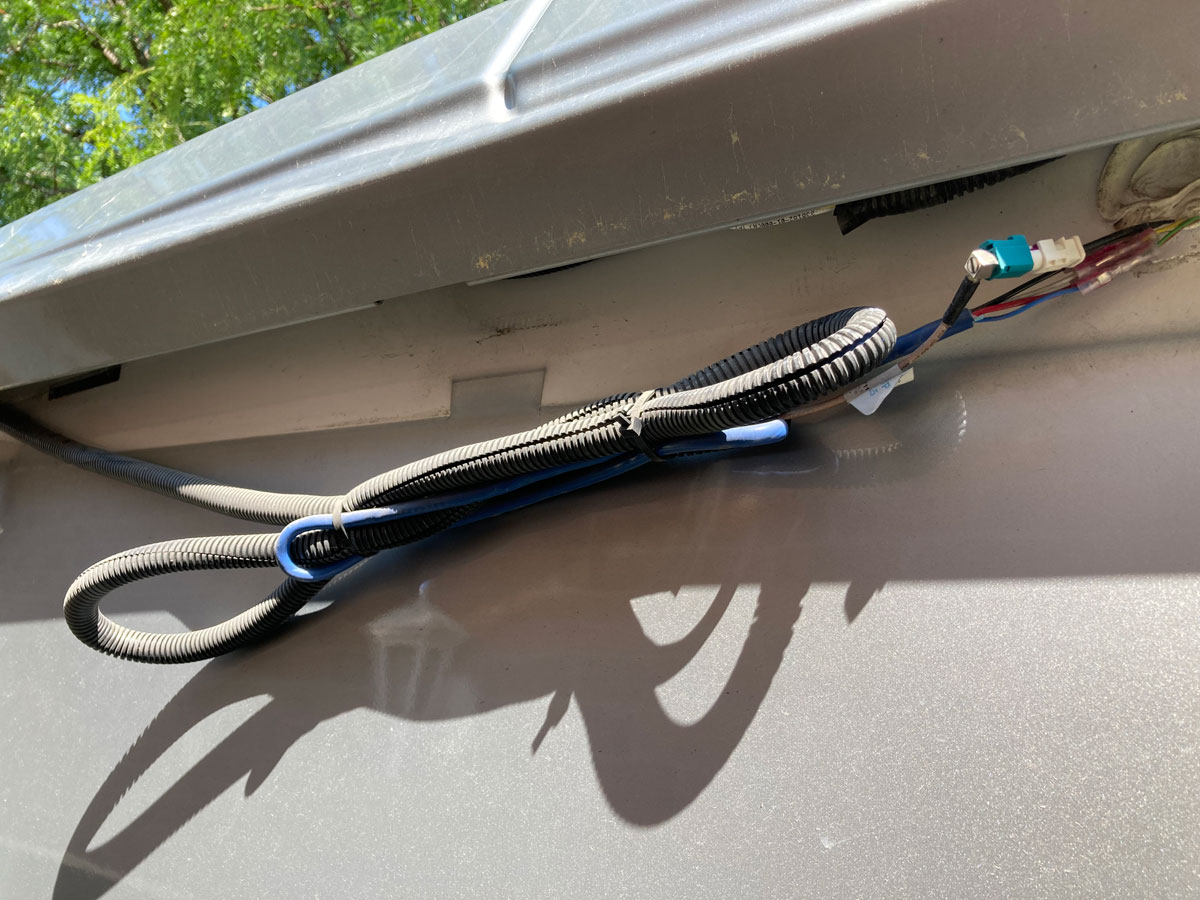
Crazy, but true. There is at least four feet of slack that Winnebago has tucked in the end cap.
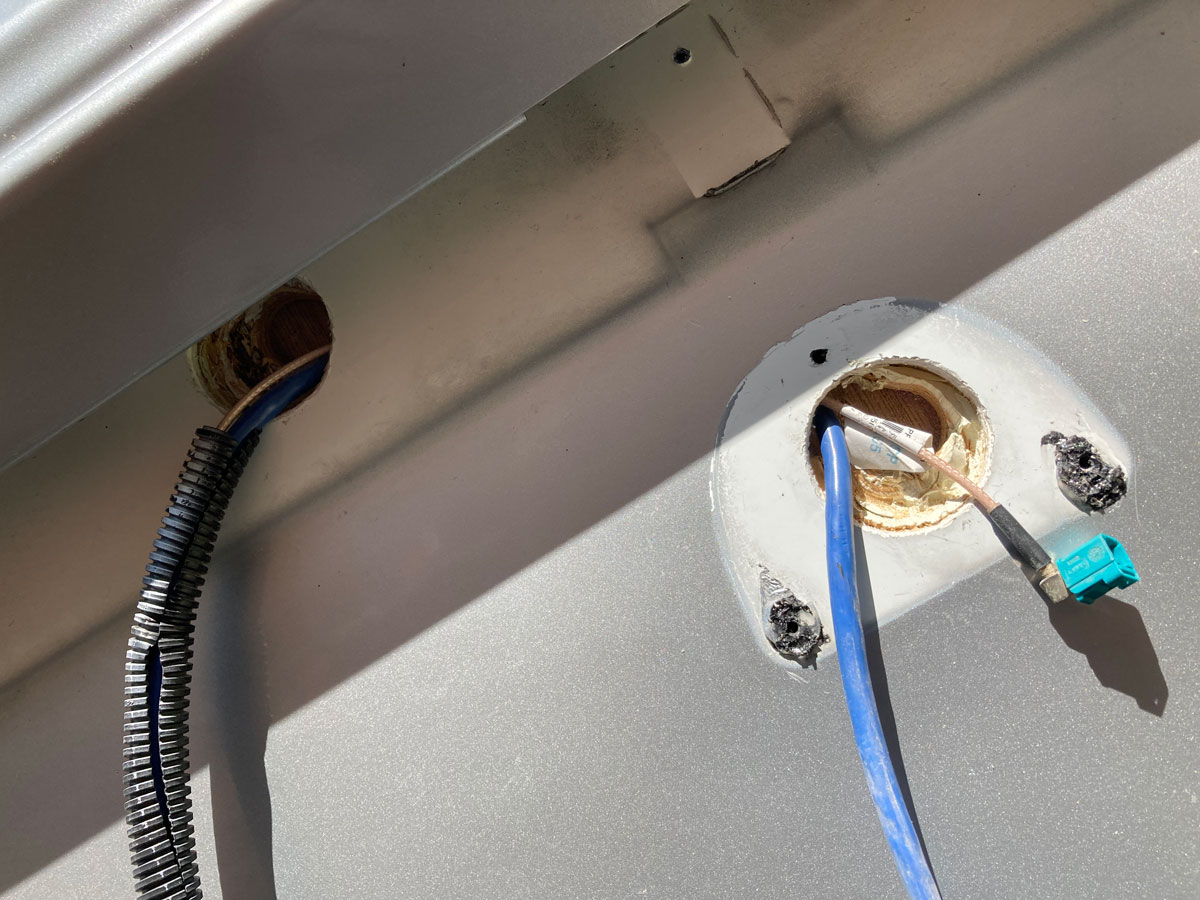
I originally wanted to pull enough of the wire bundles though the bottom hole so that I could leave the connectors outside of the wall, and store the slack in the camera fairing. After looking at this closely, I decided that it couldn’t be done, as there was not enough room in the fairing to house the connections and the cameral lead slack. And, bending the camera lead to the required angle to potentially store things created the risk of damaging the wires just like I had done in the first place, way back when.
That left me with the thought to pull out some loose slack from this bundle, leave the top hole un-caulked, and hope that if you ever had to do this again you’d be able to pull those connectors through the hole, down the wall slot, and out the bottom hole to make the camera replacement. I looked at this option for quite a while, but wasn’t too confident that, after replacing the camera, you’d be able to get the cable slack, connector bundles, and camera lead back up the slot and out of the top hole back into the end cap cavity. And, leaving the hole un-caulked and potentially susceptible to water ingress was something that was a consideration as well.
The decision not to do this was made easier when I realized that the end cap bottom flange actually covers up the bottom part of the hole and would make feeding the connectors through even more difficult. (At the time I had not considered cutting away some material from the flange to make more room.) With the uncertainty of being able to take advantage of the slack in the cables, and not knowing whether I really needed to caulk the hole from some unlikely source of water, I decided to just button it up like Winnebago had done – and face the fact that I was never going to replace the camera again if it ever failed.
I attached the camera to the fairing, fed the camera lead bundle up the slot, cut off the Mercedes four wire connector, and made the splice connections using step down connectors. (I think that all of the Mercedes power wires are about # 22 or 24, but the yellow and green Winnebago wires are about # 20s, and the red and the black Winnebago wires are about # 16s. (I used 22/24 to 20, and 22/24 to 16 step down connectors.) I then wrapped up the four wire bundle and the coaxial connection with electrical tape, caulked the hole, attached the camera fairing to the wall, and sealed the edges. (I did not caulk the bottom hole.)
The better second option is one I thought of afterwards. Of course. This is the one I would recommend to anyone thinking of going through all of this trouble to replace the camera - Tip number 2 - ditch the fairing that came with the motor home, and find another one out there that is larger and able to accommodate the camera lead, cable connections, and cable slack. Before the days of these miniature cameras, the backup camera fairings were much larger and likely would make an easy modification that would solve the problem of having to take apart the roof to replace a camera.
With a bigger fairing, you’d be able to pull some of that four feet of cable slack down that wall slot, out the bottom hole, hook up the connections, and tuck it all away. Here is what I originally wanted to do, but had not thought of finding a bigger fairing:
For the next camera replacement, all you would have to do is remove the fairing. What a concept. If you could check out earlier model motorhome fairings, you might find one that fits the bill and would be available from a Winnebago parts department. That is what I would do next time.
Ok, now for some drama to the story… before I got too far in the closing up phase, I tested the camera to see if it worked. And… it didn’t work. Nope, the MBUX just continued to ignore any attempts of mine to will it to create a picture of my garage. Imagine that. Taking apart your roof, hooking up your new camera, and finding that it didn’t work. I sat down in the garage and went over things for many minutes trying to see if I had made a mistake – Ok, I hadn’t used one of these for a couple of years, but what could I be doing wrong? Seat belt? Park brake? Foot on the brake? With no luck on any of those considerations, it looked like I had just learnt a big lesson about ordering things from Ebay. Not a good feeling.
Well… how about a fuse? Is it possible that the camera has a fuse? Is it possible that when I was originally goofing around and broke the wires - I shorted the power wire and blew the fuse? I pulled out the Sprinter fuse book, and much to my cynical surprise, found driver’s seat fuse box 5 amp fuse # 4 is for the backup camera. What were the chances that it was blown? Well, it turns out 100%. Nice. There still is an RV god after all. So, if you are considering replacing your View / Navion backup camera because it stopped working, and you were not aware that there is a fuse – go check that first before taking apart your roof. I blew mine while destroying my camera, but maybe your fuse just got old. Who knows? A 5 amp fuse is a pretty thin piece of wire.
The only remaining bit of workload for getting the end cap back on concerns those three screws that you have to access via the snap cap cover screw holes. I chose to insert the screws through their tabs first, and then drive them in a bit, one at a time – before driving in the screws in the roof. I felt that using this method I would have a better chance of getting them aligned and back in their original holes. It worked, but took some time.
The remaining part of the camera replacement project was drama fee; I used Dicor 501LSW (white) to seal the edges of the top of the end cap. (I discovered that there is quite a bit of controversy and misunderstanding on-line regarding the use Dicor on a fibreglass roof - Dicor has been formulated for fibreglass, but it has not been formulated to be applied overtop of silicone based sealant.) I finished up by caulking the cap ends with one of the recommended roof radius products - and called it a wrap.
With the camera successfuly replaced, there was one bit of Mercedes work left to do. The MBUX did not recognize the new camera as one of its own, and therefore did not optimize the image for the MBUX screen size. In addition, the image was not mirrored and there was no capability to change the viewing angle using the on-screen selections. So I had to take the coach to the dealer and have them “re-calibrate” the new camera using their diagnostic equipment. Thanks to the Winnebago forum for pointing me in the right direction.
We’ve got a backup camera again, and it has a very nice, large, crisp picture. Bring on those back-in sites!