RV Quieter Cooling | RV Mods
We have a Coleman Mach 10 air conditioner in our View, and were a bit startled when we realized we couldn’t sit at the table and have a normal conversation when the unit was cooling the coach. It certainly was dumping out cool air, but the noise level associated with its use was not acceptable. I started looking for a solution when we found ourselves debating if we really needed to run the AC or just use some fans…
I had some hope that there might be a fix out there when the Winnie Owner’s forum took up the cause, and researched a new product on the market that was advertised as an easy retrofit. It was supposed to improve performance and also quieten things down. This product’s main performance enhancement is due to the elimination of the cold air flood dump functionality, and the enhancement of the flow that is directed to the coach’s overhead cooling ducts. If you don’t have distributed overhead cooling ducts, this product would not be for you.
Here is a link to the product that the Winnie Owner’s Forum discussed at great length:
A traditional RV air conditioner, in combination with a coach that has overhead ducts, has three ways to deliver cool air. The first utilizes two channels at the forward and back end of the in-ceiling exhaust plenum to carry cool air throughout the ceiling via pathways and vents at the various ceiling ducts. If the slider door on the AC faceplate is closed completely, this overhead duct system is intended to distribute flow evenly throughout the coach. The problem with this concept is that some of the air at the slider door escapes anyways, creates turbulence, and noise, and detracts from the performance of the ceiling ducts. The second method of delivering air to the coach is to do the reverse of method one; open up the slider door to create a dump of cool air directly down from the ceiling, and close off the overhead ducts. This method floods the immediate vicinity of the ceiling unit, but does not really distribute cool air in other parts of the coach. And, it is noisy as the air gets sliced up by the slider door grid on the ceiling unit. The third method would be a combination of method one and two.
The product made by RV Airflow Systems is an insert that fits into the exhaust plenum, effectively blocks of the flood dump pathway, and forces air to efficeintly flow to the ceiling ducts. This product is reported to improve the performance of the ceiling ducts, while reducing air flow noise associated with the an open, or closed, flood dump.
This product has great reviews, but was not as straightforward an install as the forum members who owned Views had hoped it would be. The RV Airflow Systems kit was not completely compatible with the dimensions in the exhaust plenum of the View that was tested. Other mods from YouTube were tried by forum members, essentially emulating the RV Airflow Systems product using good old homemade ingenuity. Those homemade mods did have good success on the performance side, with some improvement in the noise levels as well. There is quite a bit of material on the web regarding this topic.
Another RV season approached as I contemplated a plan of action to get things fixed. By chance, James at the FitRV posted information on a silencing kit that he had tested. This kit was much simpler to install, and did not rely on an insert into the exhaust plenum and matching exacting dimensions. The link to that product review can be found here:
The FitRV and the RV AC Silencer
The main take-away from this mod description is again the concept of eliminating the cold air flood dump, and using the coach’s overhead cooling ducts as the lone source of flow distribution. This mod uses HVAC foil tape to cover the flood dump, and as James described, was pretty straightforward. I gave the RV AC Silencer some serious consideration, but in the end decided that I’d have a look up there and just do what I could using foil HVAC tape to block off the cold air flood dump. Blocking off the flood dump worked very well for us to increase flow distribution throughout the coach, but it was an unanticipated cleanup of the electrical wires in the INTAKE plenum that really gave us a noise reduction that is worth reporting on. Between the foil tape trick to improve performance, and creating undisturbed air INTAKE flow, we can now sit at the table and have a normal conversation while the air conditioner is running. Nice.
The Coleman Mach 10 air conditioner system in the coach ceiling is made up of three components: there is a coach visible faceplate that the removable filters are attached to, inside of that outer faceplate is another cover plate that creates a division between the intake and exhaust plenums, and then there are the aluminum plenums themselves that are associated with the mechanical components of the cooling system.
This is the outer faceplate that is attached by four screws visible and accessed when the air filters are removed:

When this outer panel is removed, the inner panel is visible and can be removed by another four screws. In these next two photos, you can see the exhaust duct aperture that is taped off on the inner panel using foil tape – both sides of the aperture have been taped off to completely eliminate cold air from dumping directly out from the air conditioner:
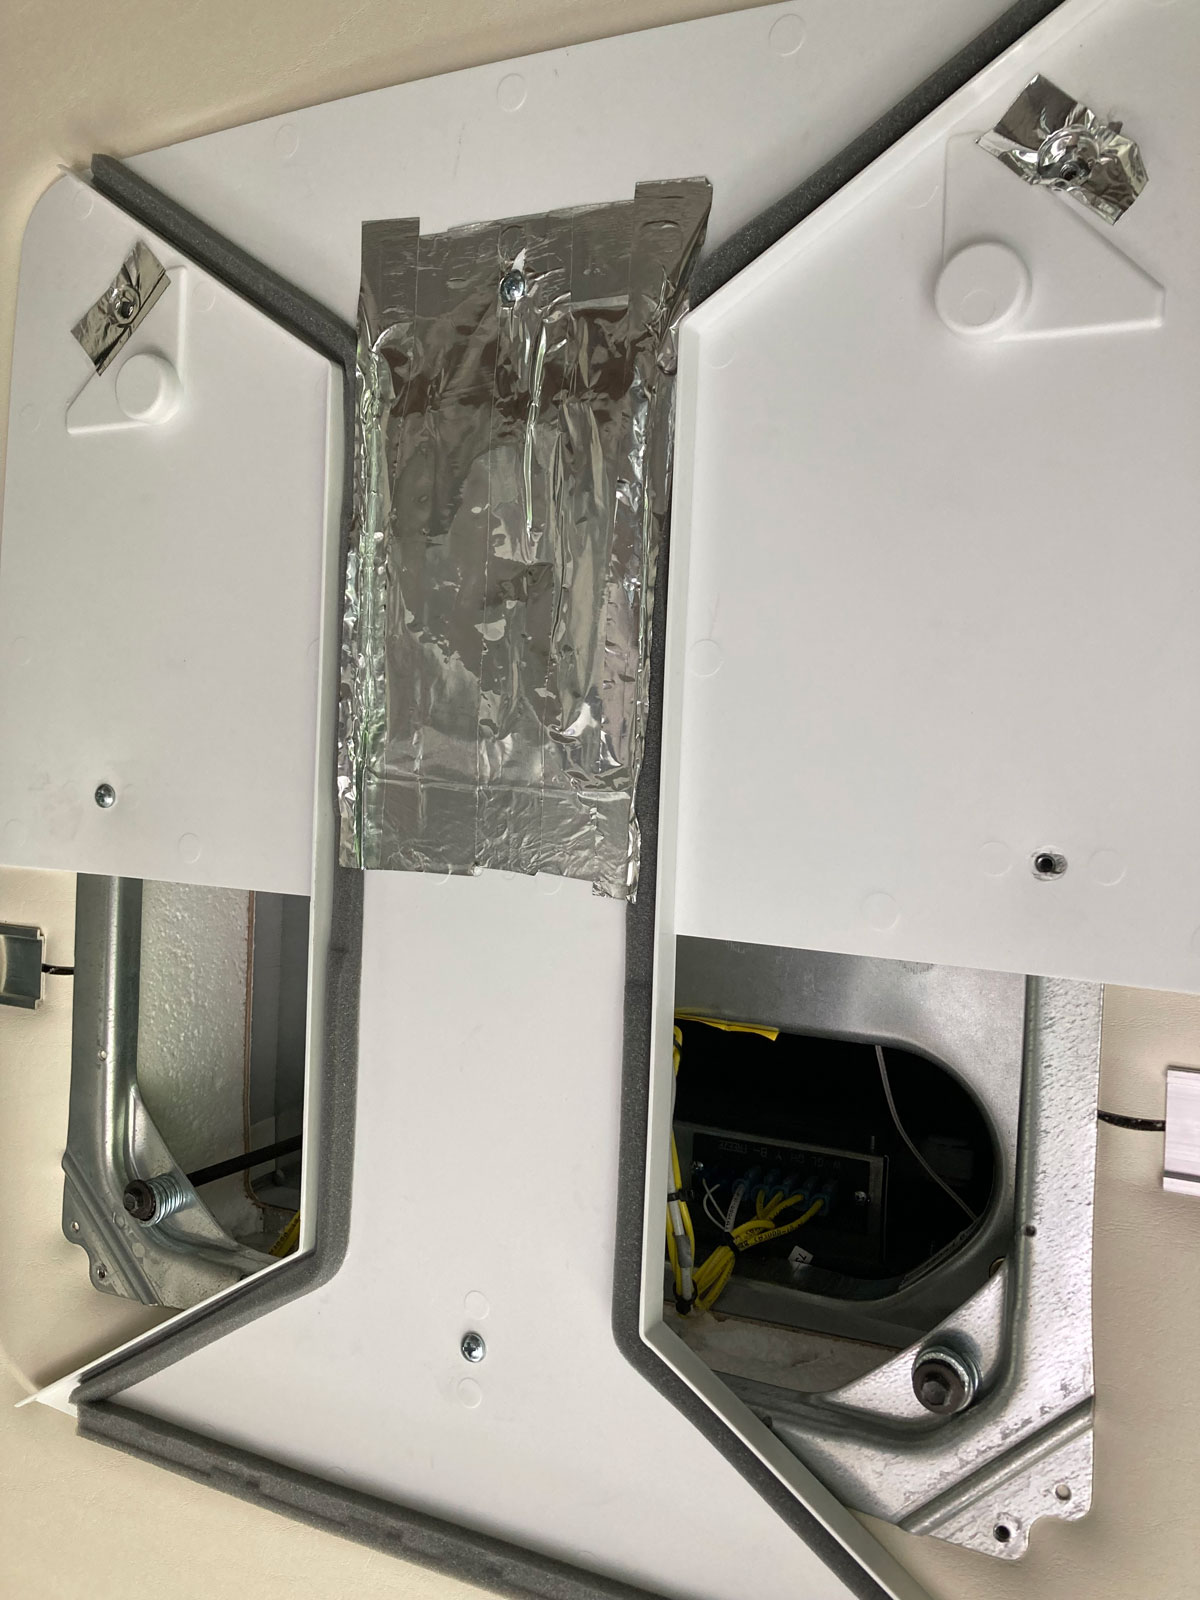
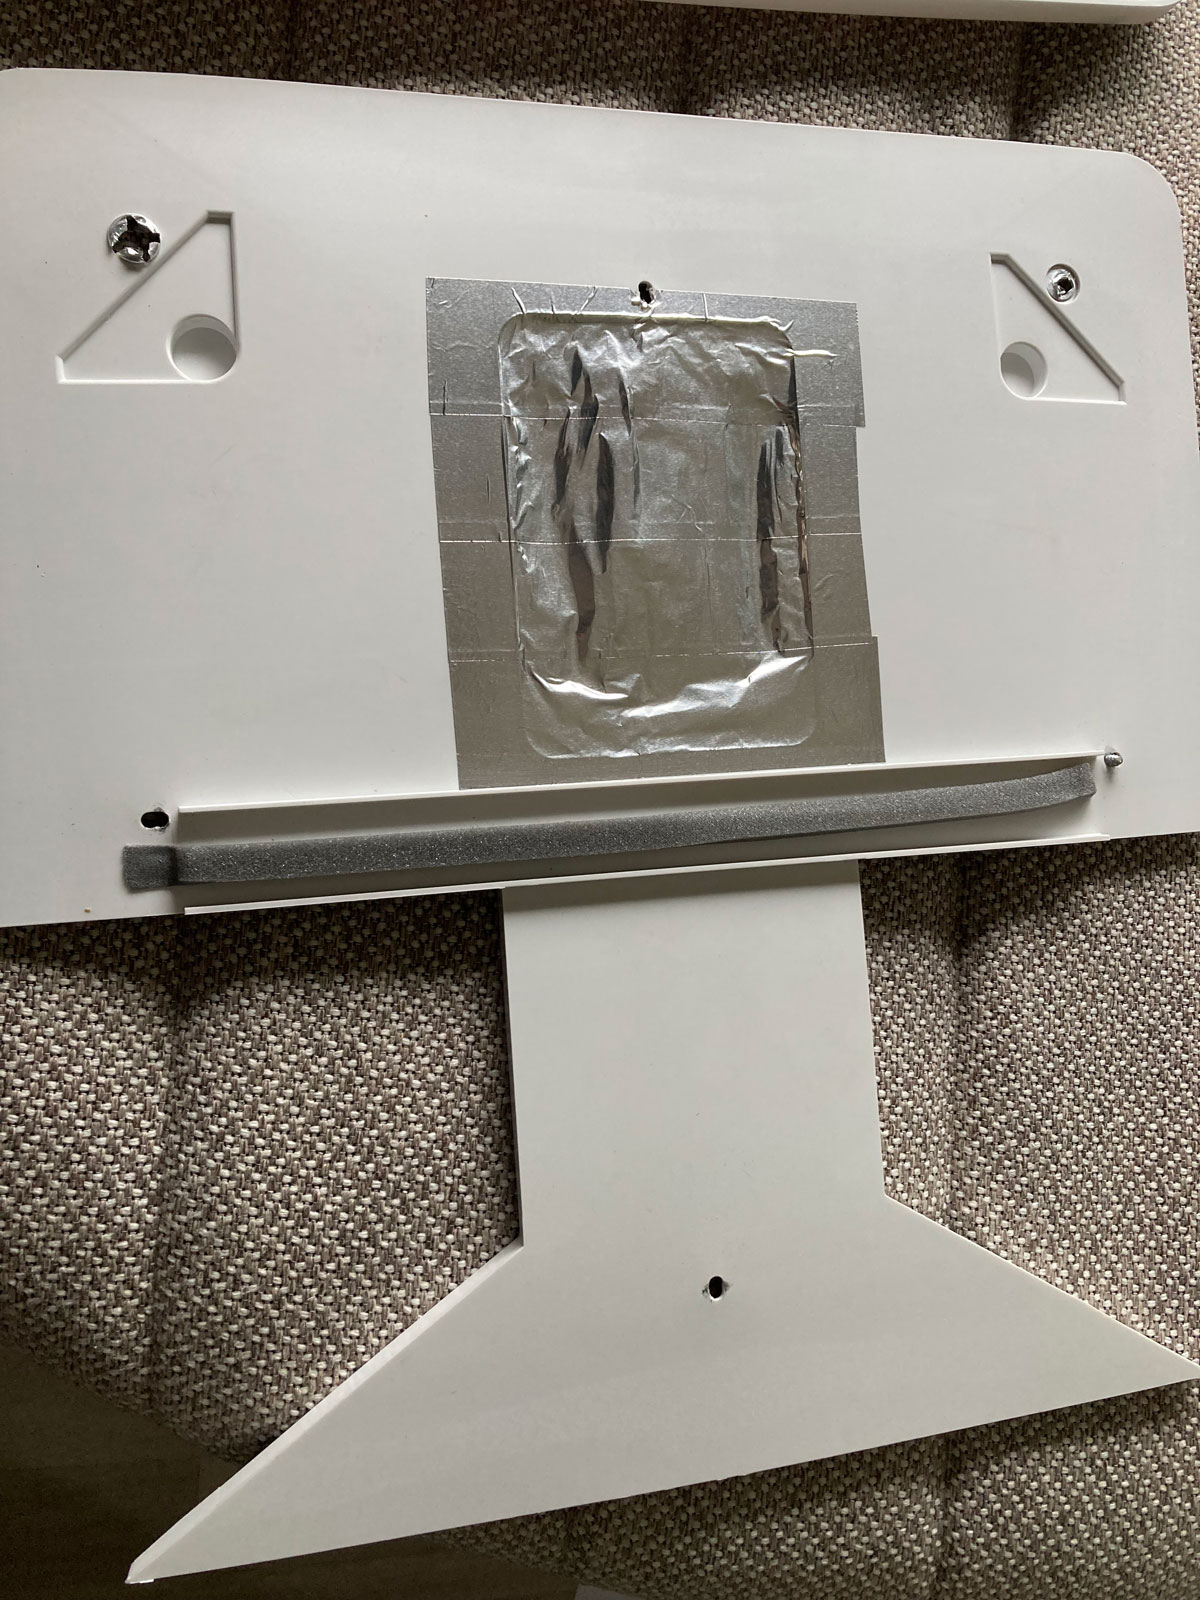
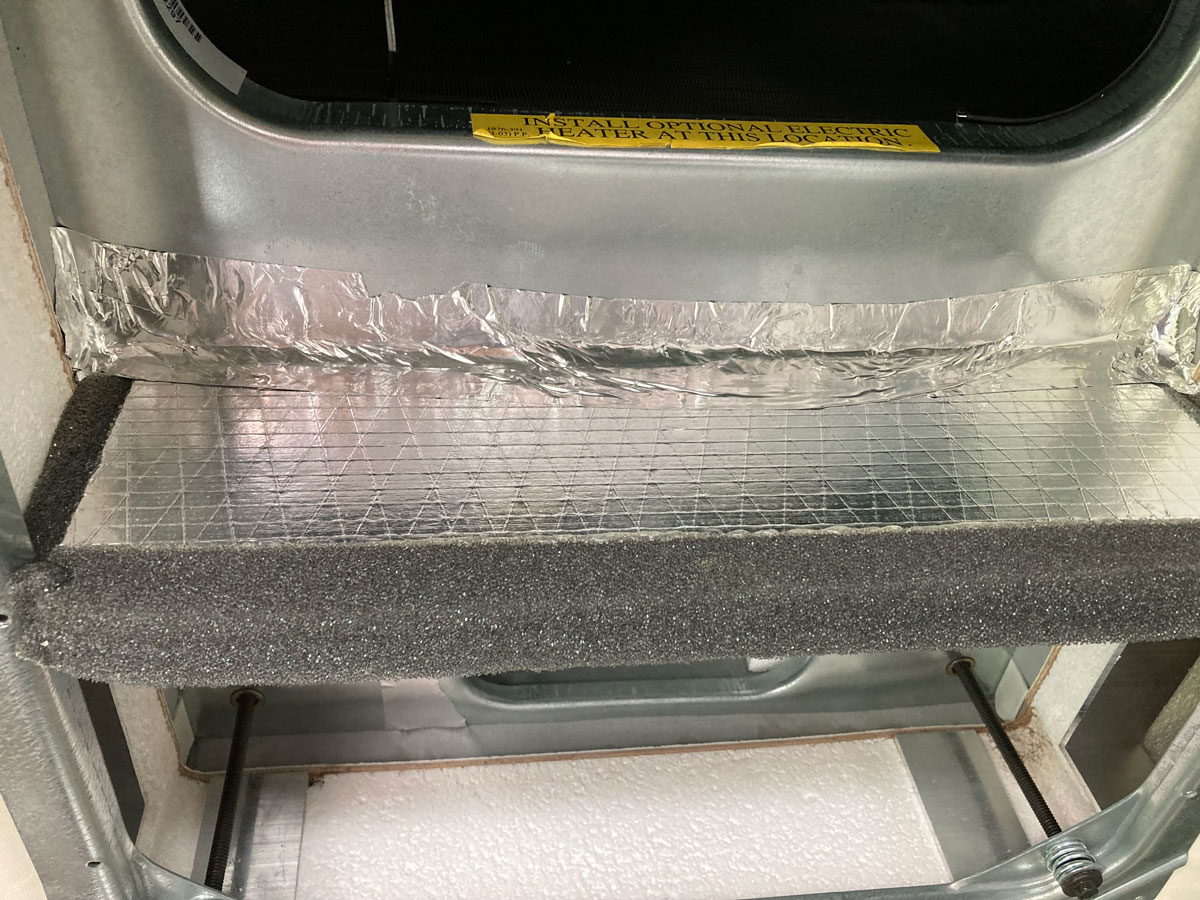
With this second panel removed you can see the intake and exhaust plenums, and a divider of rigid insulation that separates the two flow paths. Our divider was not centred very well, and actually was allowing some mixing of intake and exhaust air – likely adding to some of the objectionable noise. I centred the divider, and used the foil tape to ensure it stayed in place.
Next I had a look in the intake plenum, and was surprised to see that the installers had left all of the associated electrical wiring in the entryway to the plenum box. With this much material to slice up the flow and cause turbulence and vortices, it is no wonder it was a bit noisy:
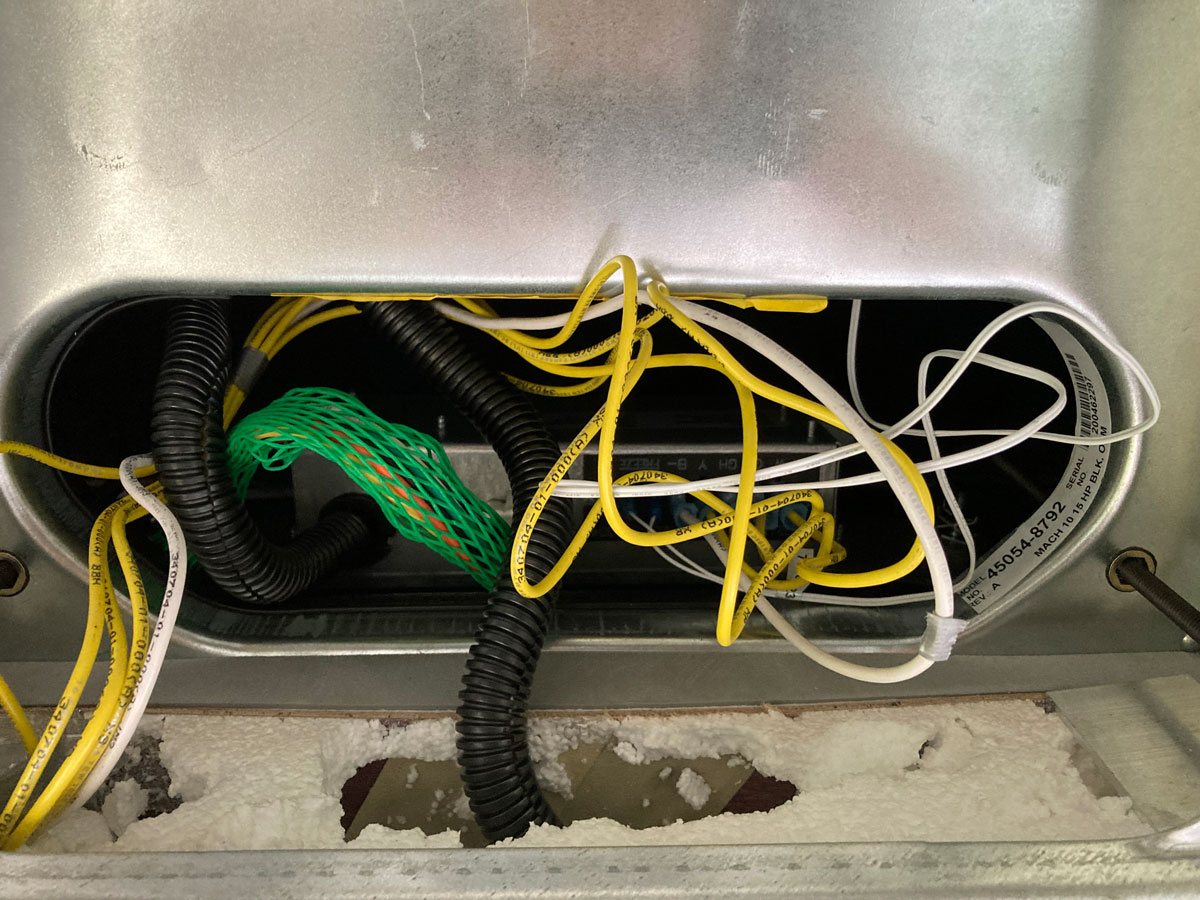
I used zip ties to bundle up the loose wires, and moved all of the wires, large and small, off to one side to create an unobstructed path for the intake airflow. Here is what I finished up with:
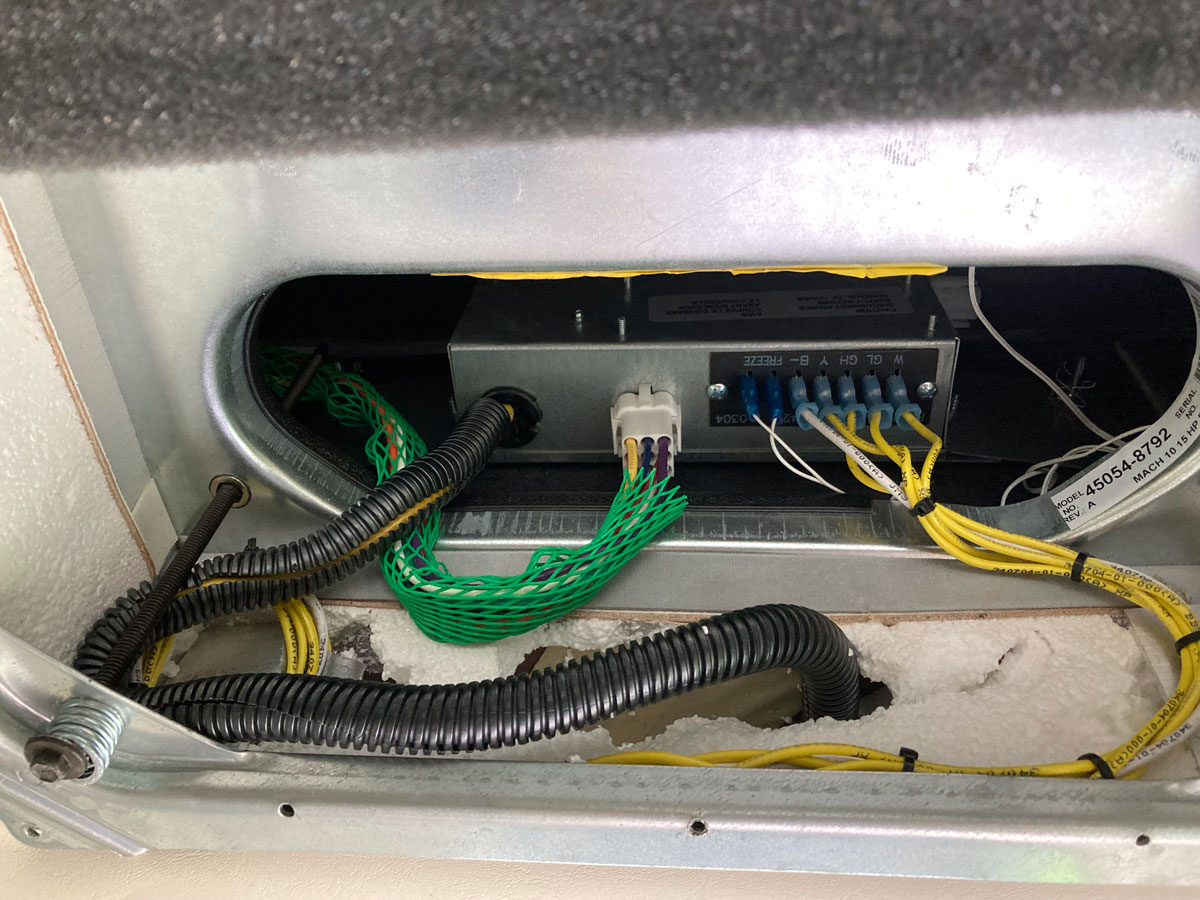
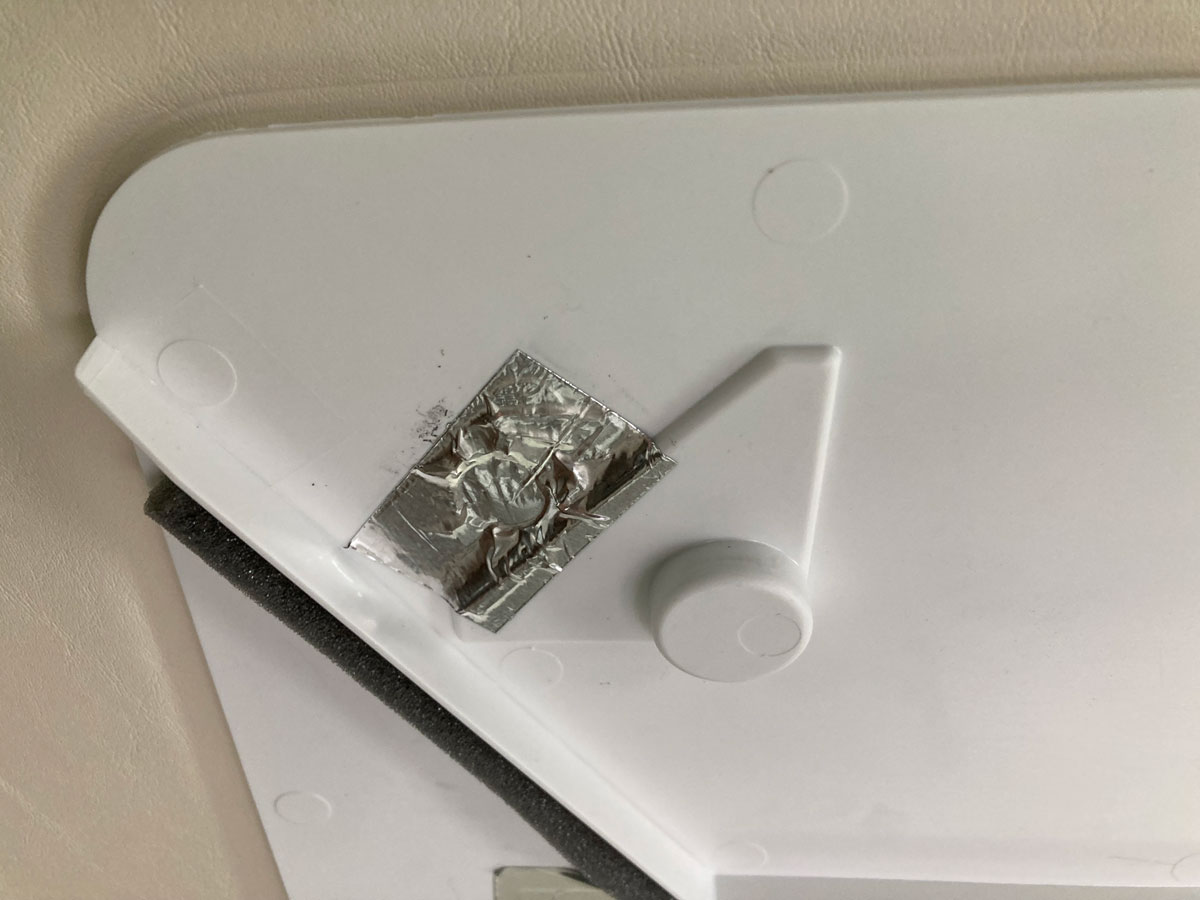
After I re-attached the inner face plate, I used some foil tape to cover up the screw holes on the exhaust side to ensure no leakage:
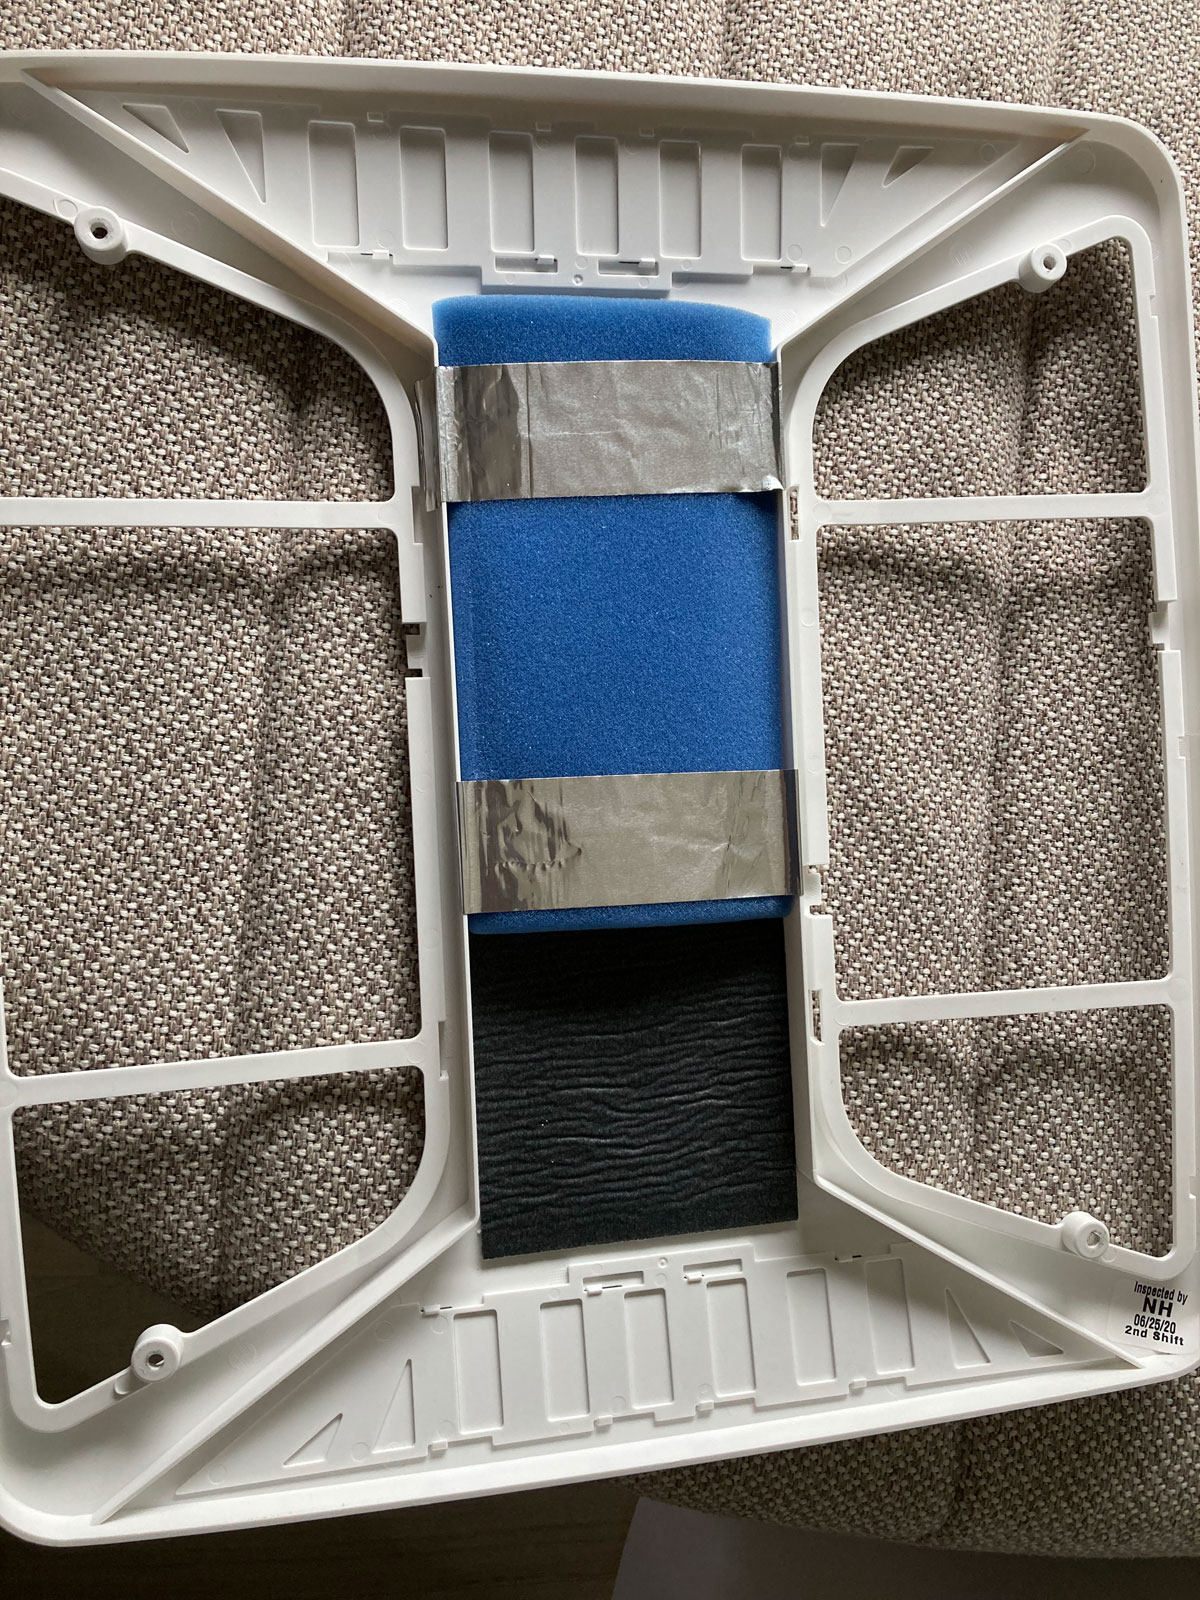
The last thing I did was attach a small bit of foam to the inside of the outside faceplate, where it would be sitting up against the foil tape covering the exhaust aperture. My consideration here was that it might provide a bit of insulation and prevent condensation, and also cushion the foil tape to reduce the potential for noise.
When it was all put back together, the improvement in the noise level was significant, and the flow distribution was improved resulting in better overall cooling performance throughout the coach.
Now, here is another post from the FitRV with a subsequent review of the RV Airflow Systems, and a comparison to just doing the foil tape trick:
The FitRV and RV Airflow Systems
Whatever method you are contemplating to help improve the noise and performance of your air conditioner -buy a ready-made kit, or tap your own mod creativity to come up with something yourself - don’t forget to have a look at the intake plenum as well. The warm air being drawn into the intake is the same speed as the cold air exiting – any disruptions in there might just be a source of objectionable flow noise. Hopefully your installation did not leave as many loose wires in the intake as ours did.
This mod is working better than anticipated.