RV Air Conditioner Recharge | RV Mods
NOTE: This mod was made to the Coleman Mach 10 heat pump we have on our Winnebago View / Navion, but the method for adding a refrigerant port to any legacy RV air conditioner is exactly the same.
“What do you mean the heat pump can’t be recharged? There is no way to add refrigerant? If you have a refrigerant leak, you have to replace the complete heat pump? The bill will be in excess of 2500.00?”
That is sort of a snapshot of the conversation I was envisioning with my local Winnebago dealer, after we ran into heat pump troubles while getting the coach ready for a Christmas trip. The heat pump appeared to be functioning as normal, but there was no heat and the compressor was pulling less amperage than usual. A quick search online pointed to a possible refrigerant leak, and the realization that these rooftop RV heat pumps and air conditioners had no way for an RV technician to fix that type of problem. “Not good.”
When spring rolled around, and the outside temperatures made it possible to check the cooling side of our Coleman Mach 10 heat pump, we had no cooling capability and again the compressor was not working as hard as it should have been. (For our heat pump, a normal amperage draw under compressor load is 11 – 12 amps … but we were only seeing 7 amps. The ammeter on our Progressive Industries HW30C makes this determination very easy.) Our local Winnebago dealer explained that there were some electrical components they could check, but they were limited as to the amount of servicing they could do. If the problem could not be traced to electrical components or a faulty compressor, they would have no option but to replace the entire heat pump. “Ok then, really not good…”
The dealer was quoting a six week wait for a service appointment, and then a three to six week delay at the shop while they scheduled it into the service rotation. Maybe the six week wait to get it in was tolerable, but the multi week delay at the shop was not. And that was just to troubleshoot the problem, not necessarily fix it.
Here is a link to a video that addresses the exact problem we had with our unit. The video concludes that you have to throw away your rooftop air conditioner:
“Ok, there must be another option”.
The Winnebago owner’s forum was reporting that, once every now and then, someone would be lucky enough to find a residential / commercial HVAC technician that would treat these RV rooftop heat pumps and air conditioners as normal business and take on the job of troubleshooting the complete unit. Other than it being on the roof of an RV, it’s just a heat pump … right? So, it took me the better part of a day to scour the web for HVAC companies in our local area, but I eventually found a company of energetic young folks who admitted they had never worked on an RV heat pump, but were more than keen to see if this market was something they could tap into. They booked me onto their shop driveway a couple of days later, and within 20 minutes concluded that the heat pump was working correctly electrically - but likely had no refrigerant circulating in the system. After they explained that they could add a refrigerant top-up port to the coils, pressurize the system and check for leaks, fix any leaks they found, and then add refrigerant as required – they gave me a quote that was a fraction of what the dealer was talking about for a new heat pump. Well, that was an easy decision to make.
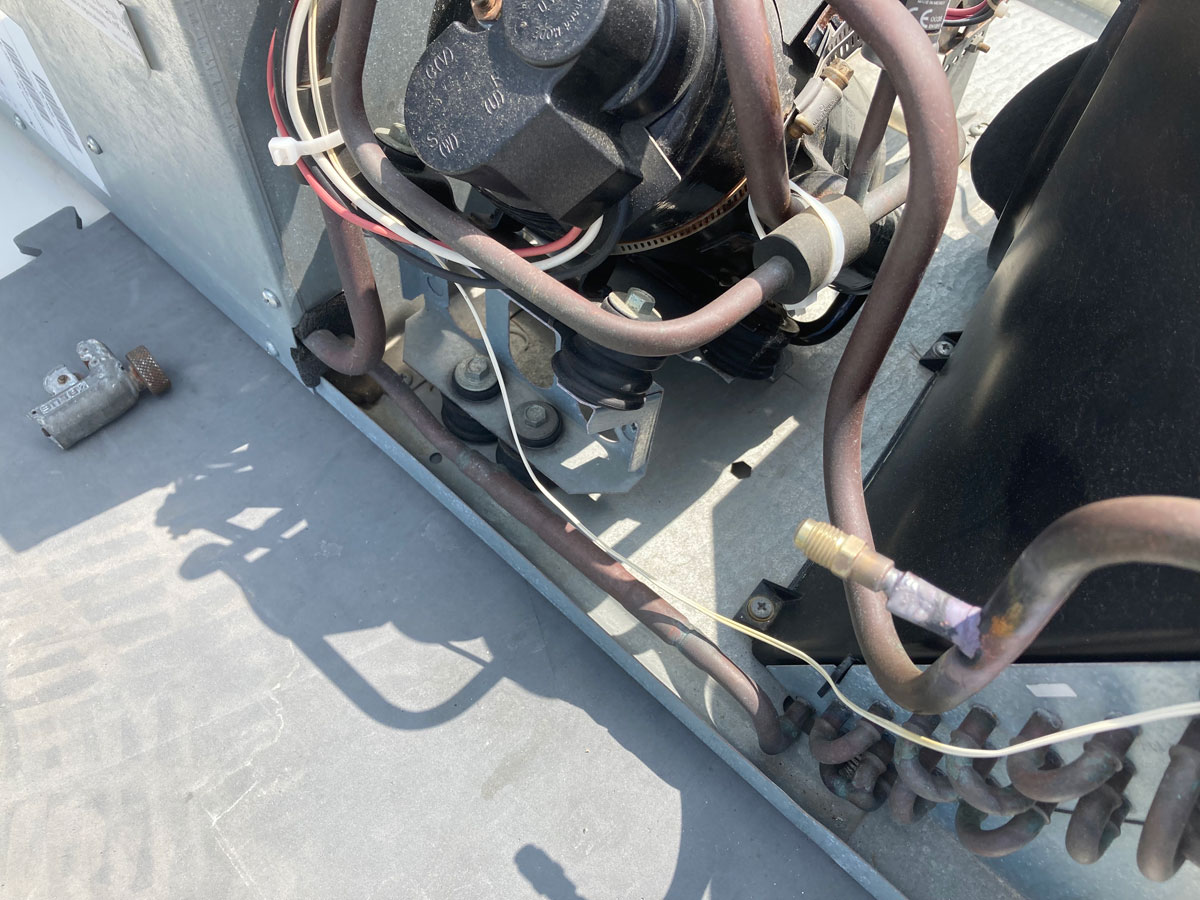
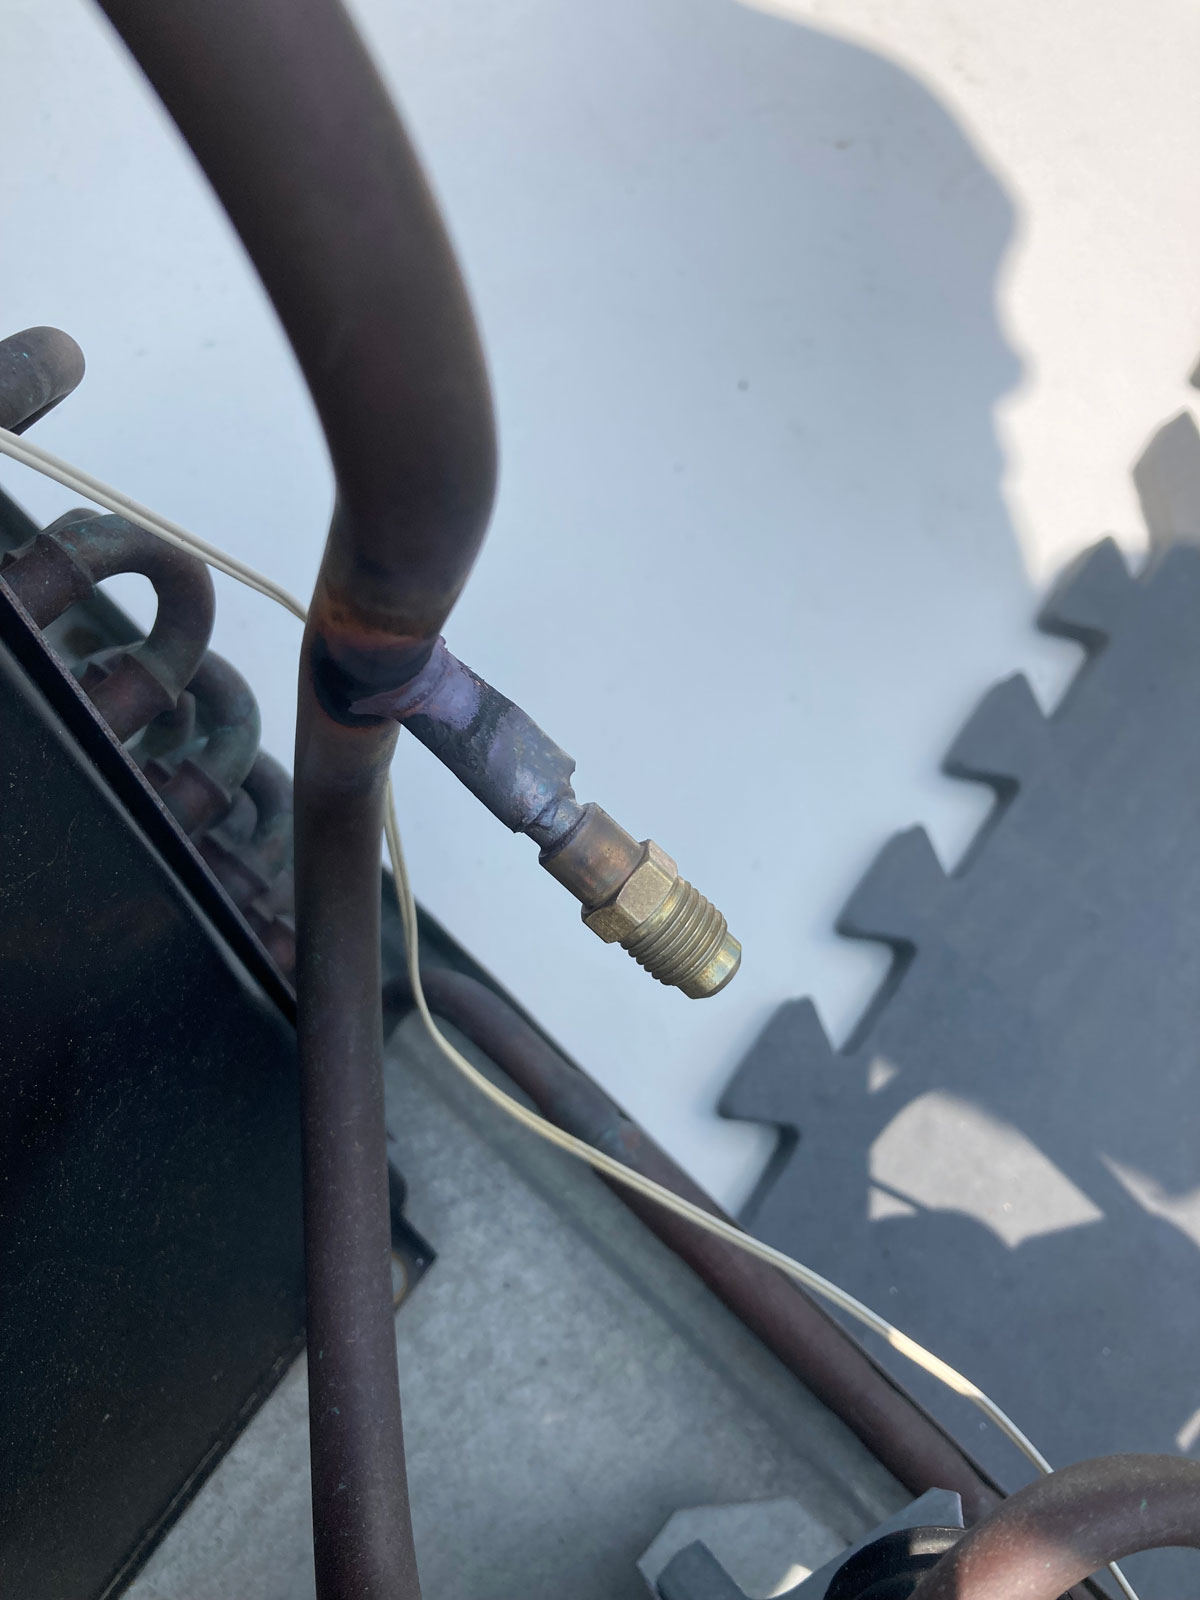
A few days later I was back on their driveway for the actual repair - the job was reported to be pretty straightforward for someone experienced, and licenced, in this type work. A refrigerant port was added to the coils, in the same place that Coleman had originally installed one to load the refrigerant at the factory. (After the factory had done their work, they cut off the port and crimped the line to effectively render the heat pump a throw-away for an RV dealer without the necessary experience or tools.) Once the port was installed they pressurized the system and quickly found a leak at one of numerous welds associated with the refrigerant coils. Once the leak was fixed, they pressure tested the coils to ensure it was going to hold at high pressure. With 450 psi holding firmly, they then vented the system and applied suction to remove any moisture. After a refrigerant refill, both the heat and cool sides of the heat pump were tested successfully. Within two hours of arriving, I was back on the road with a heat pump as good as new.
Here are a couple of photos of the new port’s location – it was attached to a crimped stub leftover from Coleman’s factory refrigerant installation:


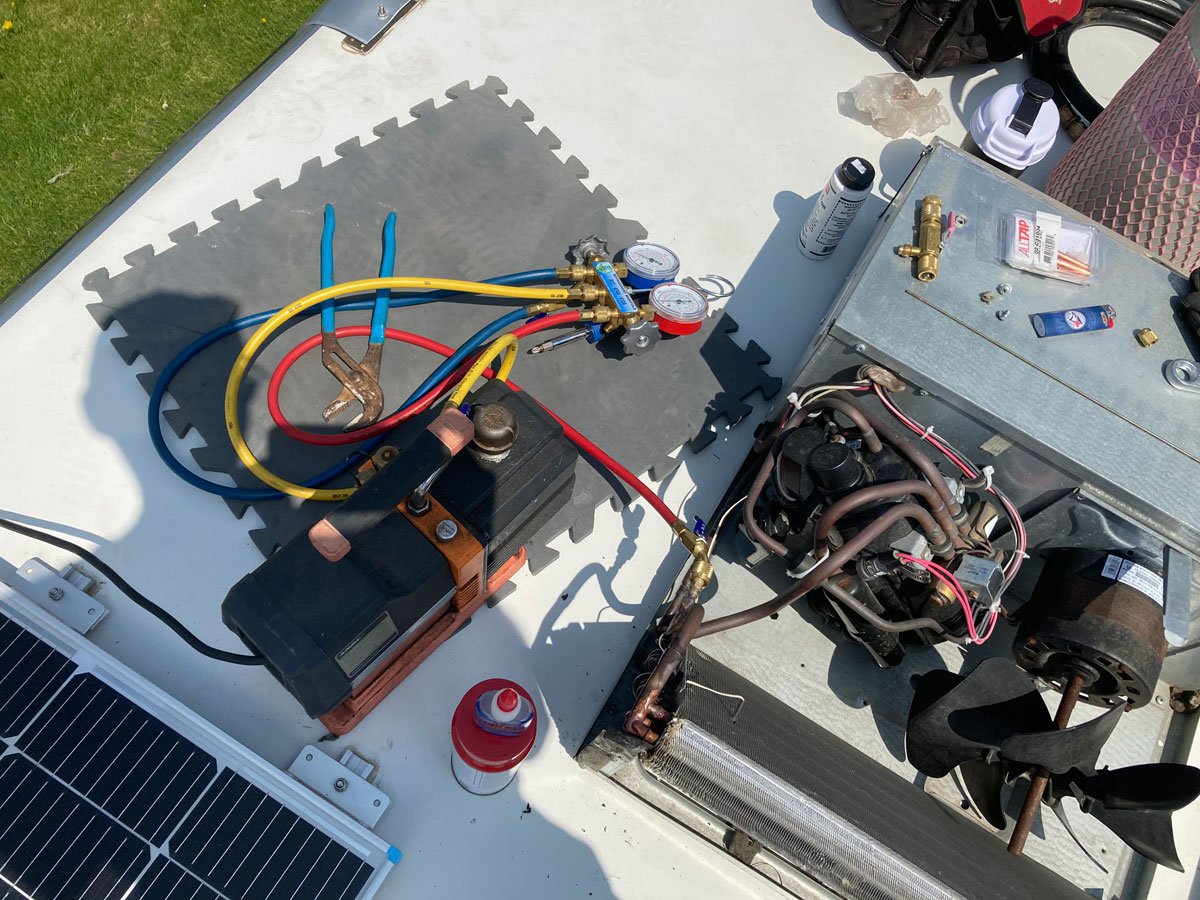
It turns out that the decision made during our solar panel upgrade to leave some room on the roof for working on the heat pump was a good one:

Fixing stuff instead of throwing it away – what a concept!
If anyone wants the name of the company in the Eastern Ontario area that got us back up and running, drop me a line and I’ll pass on their coordinates. I highly recommend them.